


cheat summon Xenomorph_Character_BP_Male_Tamed_Ccheat SpawnDino "Blueprint'/Game/Aberration/Dinos/Nameless/Xenomorph_Character_BP_Male_Tamed.Xenomorph_Character_BP_Male_Tamed'" 500 0 0 35cheat summon Xenomorph_Character_BP_Male_Chupa_Ccheat SpawnDino "Blueprint'/Game/Aberration/Dinos/Nameless/Xenomorph_Character_BP_Male_Chupa.Xenomorph_Character_BP_Male_Chupa'" 500 0 0 35cheat summon Xenomorph_Character_BP_Male_Minion_Ccheat SpawnDino "Blueprint'/Game/Aberration/Dinos/Nameless/Xenomorph_Character_BP_Male_Minion.Xenomorph_Character_BP_Male_Minion'" 500 0 0 35cheat summon Xenomorph_Character_BP_Male_Surface_Ccheat SpawnDino "Blueprint'/Game/Aberration/Dinos/Nameless/Xenomorph_Character_BP_Male_Surface.Xenomorph_Character_BP_Male_Surface'" 500 0 0 35cheat summon Xenomorph_Character_BP_Female_Ccheat SpawnDino "Blueprint'/Game/Aberration/Dinos/Nameless/Xenomorph_Character_BP_Female.Xenomorph_Character_BP_Female'" 500 0 0 35cheat summon Xenomorph_Character_BP_Male_Tamed_Corrupt_Ccheat SpawnDino "Blueprint'/Game/Extinction/Dinos/Corrupt/Nameless/Xenomorph_Character_BP_Male_Tamed_Corrupt.Xenomorph_Character_BP_Male_Tamed_Corrupt'" 500 0 0 35cheat summon Xenomorph_Character_BP_Male_Lunar_Ccheat SpawnDino "Blueprint'/Game/Aberration/Dinos/Nameless/Xenomorph_Character_BP_Male_Lunar.Xenomorph_Character_BP_Male_Lunar'" 500 0 0 35cheat summon Xenomorph_Character_BP_Male_InitialBuryOnly_Escort_Ccheat SpawnDino "Blueprint'/Game/Genesis/Dinos/MissionVariants/Escort/Lunar/Xenomorph_Character_BP_Male_InitialBuryOnly_Escort.Xenomorph_Character_BP_Male_InitialBuryOnly_Escort'" 500 0 0 35cheat summon Xenomorph_Character_BP_Male_InitialBuryOnly_Gauntlet_Ccheat SpawnDino "Blueprint'/Game/Genesis/Dinos/MissionVariants/Gauntlet/Lunar/Xenomorph_Character_BP_Male_InitialBuryOnly_Gauntlet.Xenomorph_Character_BP_Male_InitialBuryOnly_Gauntlet'" 500 0 0 35cheat summon Xenomorph_Character_BP_Male_InitialBuryOnly_Retrieve_Ccheat SpawnDino "Blueprint'/Game/Genesis/Dinos/MissionVariants/Retrieve/Lunar/Xenomorph_Character_BP_Male_InitialBuryOnly_Retrieve.Xenomorph_Character_BP_Male_InitialBuryOnly_Retrieve'" 500 0 0 35cheat summon Xenomorph_Character_BP_Female_InitialBuryOnly_Gauntlet_Ccheat SpawnDino "Blueprint'/Game/Genesis/Dinos/MissionVariants/Gauntlet/Lunar/Xenomorph_Character_BP_Female_InitialBuryOnly_Gauntlet.Xenomorph_Character_BP_Female_InitialBuryOnly_Gauntlet'" 500 0 0 35cheat summon Xenomorph_Character_BP_Male_InitialBuryOnly_Adolescent_Ccheat SpawnDino "Blueprint'/Game/Aberration/Dinos/Nameless/Xenomorph_Character_BP_Male_InitialBuryOnly_Adolescent.Xenomorph_Character_BP_Male_InitialBuryOnly_Adolescent'" 500 0 0 35cheat summon Xenomorph_Character_BP_Male_InitialBuryOnly_Adolescent_Escort_Ccheat SpawnDino "Blueprint'/Game/Genesis/Dinos/MissionVariants/Escort/Lunar/Xenomorph_Character_BP_Male_InitialBuryOnly_Adolescent_Escort.Xenomorph_Character_BP_Male_InitialBuryOnly_Adolescent_Escort'" 500 0 0 35cheat summon Xenomorph_Character_BP_Male_InitialBuryOnly_Adolescent_Gauntlet_Ccheat SpawnDino "Blueprint'/Game/Genesis/Dinos/MissionVariants/Gauntlet/Lunar/Xenomorph_Character_BP_Male_InitialBuryOnly_Adolescent_Gauntlet.Xenomorph_Character_BP_Male_InitialBuryOnly_Adolescent_Gauntlet'" 500 0 0 35cheat summon Xenomorph_Character_BP_Male_InitialBuryOnly_Adolescent_Retrieve_Ccheat SpawnDino "Blueprint'/Game/Genesis/Dinos/MissionVariants/Retrieve/Lunar/Xenomorph_Character_BP_Male_InitialBuryOnly_Adolescent_Retrieve.Xenomorph_Character_BP_Male_InitialBuryOnly_Adolescent_Retrieve'" 500 0 0 35cheat summon VRXenomorph_Character_BP_Male_Minion_Ccheat SpawnDino "Blueprint'/Game/Genesis/Dinos/BiomeVariants/VR/VRXenomorph_Character_BP_Male_Minion.VRXenomorph_Character_BP_Male_Minion'" 500 0 0 35cheat summon Xenomorph_Character_BP_Female_Gen2_Ccheat SpawnDino "Blueprint'/Game/Genesis2/Dinos/BiomeVariants/Xenomorph_Character_BP_Female_Gen2.Xenomorph_Character_BP_Female_Gen2'" 500 0 0 35cheat summon Xenomorph_Character_BP_Male_Tamed_Gen2_Ccheat SpawnDino "Blueprint'/Game/Genesis2/Dinos/BiomeVariants/Xenomorph_Character_BP_Male_Tamed_Gen2.Xenomorph_Character_BP_Male_Tamed_Gen2'" 500 0 0 35cheat summon Xenomorph_Character_BP_Male_Gen2_Summoned_Ccheat SpawnDino "Blueprint'/Game/Genesis2/Dinos/Summoner/SummonedDinos/Xenomorph_Character_BP_Male_Gen2_Summoned.Xenomorph_Character_BP_Male_Gen2_Summoned'" 500 0 0 35


リーパーは、ARK: Survival EvolvedのDLC Aberrationの生物の一種です。
このセクションは、サバイバーであるヘレナ・ウォーカーが書いた調査書を、正確にコピーすることを目的としています。この文章とゲーム内の生物との間には若干の食い違いがあるかもしれません。

Unknown
生息年代Unknown
食性Carnivore
気性Aggressive
洞窟の最深部を住処にする巨大で恐るべきリーパーは、捕食者の頂点に立っています。その牙と爪による攻撃が圧倒的なのはもちろん、地下に潜って奇襲攻撃を仕掛けることや、尾からは酸を飛ばすことができます。 さらに恐ろしいのは、繁殖活動の方法です。リーパーのメスは、尾を生殖器にして人間の体内に受胎するのです。その後、赤ちゃんが胸を突き破って飛び出してくるまで、人間は彼らを体内で育てることになります。
メスのリーパーに受胎されたなら、放射線を浴びて胎芽を殺すしかありません。一方、リーパーのフェロモン腺を有する人間であれば、リーパーの赤ちゃんがその人を親として認識するという噂もあります。 この噂が、リーパーに騎乗することを夢見て、受胎期間を最後まで見届けようとする正気とは思えない人たちを生み出しています。極めて危険な行為であるばかりか、グロテスクです。
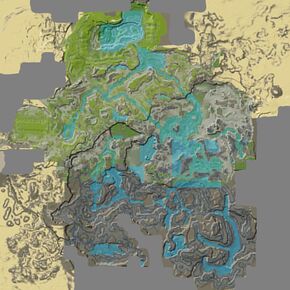
The Reaper is very aggressive and can be found at various areas, including the Surface, Bio luminescence, and Element Regions. All of R-variants are found deep within Void sporadically around in the Genesis Ship.
Reapers from the surface region will follow you throughout the rest of the map, unless it turns to day, at which point they will burrow away.
Even as an offspring, Reaper is still aggressive to everyone at its baby state, and will steal belongings from deceased adventurers.
Reapers are large creatures with glowing white eyes and vicious jaws, able to shoot acidic saliva out of their mouths when roaring. The species and their larvae resemble the Xenomorphs from the Alien franchise and were likely inspired by them. The R-reaper and R-reaper queen variants feature striped patterns on their skin and queens will always have yellow stripes, much like the vanilla reaper queens only come in black color schemes.
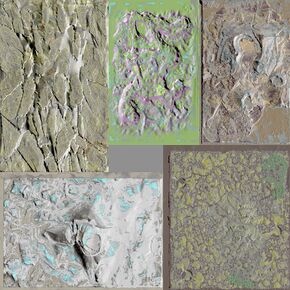
These regions represent the color scheme of a Reaper King. Reaper Queen never spawns with any other color, unlike Reaper Kings. However, each queen has their own color region stored inside, which will affect Baby Reaper King's color appearance when it is born. It may be worth mentioning that while Reaper Kings can spawn in with many region colors, only a few colors can appear legitimately due to the Queen's limited color region spawning.
このセクションでは、リーパーの自然な色と領域が表示されます。デモンストレーションのために、以下の領域はアルビノのリーパーの上に赤色で着色されています。各領域の説明の下に表示される色付きの四角形は、自然な配色の全体的な範囲を提供するためにリーパーがランダムにスポーンする色です。色の上にカーソルを置くと、その色の名前とIDが表示されます。
この情報を使用して、チートコンソールにcheat SetTargetDinoColor <ColorRegion> <ColorID>と入力することにより、リーパーの領域を変更できます。たとえば、cheat SetTargetDinoColor 0 6はリーパーの"middle region"がmagenta色になります。


Region 1 is not used
for this Creature.
Region 2 is not used
for this Creature.
Region 3 is not used
for this Creature.


These regions represent the color scheme of a Reaper King. Reaper Queen never spawns with any other color, unlike Reaper Kings. However, each queen has their own color region stored inside, which will affect Baby Reaper King's color appearance when it is born. It may be worth mentioning that while Reaper Kings can spawn in with many region colors, only a few colors can appear legitimately due to the Queen's limited color region spawning.
このセクションでは、リーパーの自然な色と領域が表示されます。デモンストレーションのために、以下の領域はアルビノのリーパーの上に赤色で着色されています。各領域の説明の下に表示される色付きの四角形は、自然な配色の全体的な範囲を提供するためにリーパーがランダムにスポーンする色です。色の上にカーソルを置くと、その色の名前とIDが表示されます。
この情報を使用して、チートコンソールにcheat SetTargetDinoColor <ColorRegion> <ColorID>と入力することにより、リーパーの領域を変更できます。たとえば、cheat SetTargetDinoColor 0 6はリーパーの"body main"がmagenta色になります。

Region 1 is not used
for this Creature.
Region 2 is not used
for this Creature.
Region 3 is not used
for this Creature.
These regions represent the color scheme of a Reaper King. Reaper Queen never spawns with any other color, unlike Reaper Kings. However, each queen has their own color region stored inside, which will affect Baby Reaper King's color appearance when it is born. It may be worth mentioning that while Reaper Kings can spawn in with many region colors, only a few colors can appear legitimately due to the Queen's limited color region spawning.
このセクションでは、リーパーの自然な色と領域が表示されます。デモンストレーションのために、以下の領域はアルビノのリーパーの上に赤色で着色されています。各領域の説明の下に表示される色付きの四角形は、自然な配色の全体的な範囲を提供するためにリーパーがランダムにスポーンする色です。色の上にカーソルを置くと、その色の名前とIDが表示されます。
この情報を使用して、チートコンソールにcheat SetTargetDinoColor <ColorRegion> <ColorID>と入力することにより、リーパーの領域を変更できます。たとえば、cheat SetTargetDinoColor 0 6はリーパーの"middle region"がmagenta色になります。
Region 1 is not used
for this Creature.
Region 2 is not used
for this Creature.
Region 3 is not used
for this Creature.
These regions represent the color scheme of a Reaper King. Reaper Queen never spawns with any other color, unlike Reaper Kings. However, each queen has their own color region stored inside, which will affect Baby Reaper King's color appearance when it is born. It may be worth mentioning that while Reaper Kings can spawn in with many region colors, only a few colors can appear legitimately due to the Queen's limited color region spawning.
このセクションでは、リーパーの自然な色と領域が表示されます。デモンストレーションのために、以下の領域はアルビノのリーパーの上に赤色で着色されています。各領域の説明の下に表示される色付きの四角形は、自然な配色の全体的な範囲を提供するためにリーパーがランダムにスポーンする色です。色の上にカーソルを置くと、その色の名前とIDが表示されます。
この情報を使用して、チートコンソールにcheat SetTargetDinoColor <ColorRegion> <ColorID>と入力することにより、リーパーの領域を変更できます。たとえば、cheat SetTargetDinoColor 0 6はリーパーの"main color"がmagenta色になります。


Region 3 is not used
for this Creature.

The color scheme of the Elemental Reaper King is also shared by the Subterranean Reaper King and Surface Reaper King. }}
| 能力値 | 基準値 | レベルアップ |
|---|---|---|
| 野性生物 | ||
| 2000 | +400 | |
| 480 | +48 | |
| 150 | +15 | |
| 3000 | +300 | |
| 415 | +8.3 | |
| 85 | +4.25 | |
| 100% | N/A | |
| 925 | +55.5 |
| 移動 [u/s] |
基本速度 | スプリント速度 |
|---|---|---|
| 野生 | 野生 | |
| 歩行 | 466
|
1467.8999 |
| 水泳 | 300
|
? |
| 能力値 | 基準値 | レベルアップ |
|---|---|---|
| 野性生物 | ||
| 2500 | +500 | |
| 480 | +48 | |
| 150 | +15 | |
| 3000 | +300 | |
| 415 | +8.3 | |
| 85 | +4.25 | |
| 100% | N/A | |
| 925 | +55.5 |
| 移動 [u/s] |
基本速度 | スプリント速度 |
|---|---|---|
| 野生 | 野生 | |
| 歩行 | 466
|
2049.8174 |
| 水泳 | 300
|
? |
| 能力値 | 基準値 | レベルアップ | テイムボーナス | ||
|---|---|---|---|---|---|
| 野性生物 | テイム生物 | 追加 | 増加 | ||
| 45000 | +234 | +2.7% | -38500 | ||
| 480 | +48 | +10% | |||
| 150 | +15 | +10% | |||
| 3000 | +300 | +10% | |||
| 415 | +8.3 | +4% | |||
| 75 | +3.75 | +1.7% | 7% | 17.6% | |
| 100% | N/A | +1% | |||
| 925 | +55.5 | N/A | 0.5 | ||
| 移動 [u/s] |
基本速度 | スプリント速度 | スタミナ | ||||
|---|---|---|---|---|---|---|---|
| 野生 | テイム1 | テイム2 | 野生 | テイム1 | テイム2 | ||
| 歩行 | 466 | ? | ? | 1782.4501 | 1584.4 | 1584.4 | 14 |
| 水泳 | 300 | ? | ? | ? | ? | ? | ? |
| 能力値 | 基準値 | レベルアップ |
|---|---|---|
| 野性生物 | ||
| 42500 | +8500 | |
| 480 | +48 | |
| 150 | +15 | |
| 3000 | +300 | |
| 415 | +8.3 | |
| 180 | +9 | |
| 100% | N/A | |
| 925 | +55.5 |
| 移動 [u/s] |
基本速度 | スプリント速度 |
|---|---|---|
| 野生 | 野生 | |
| 歩行 | 932
|
4099.6348 |
| 水泳 | 600
|
? |
| 能力値 | 基準値 | レベルアップ |
|---|---|---|
| 野性生物 | ||
| 1250 | +250 | |
| 480 | +48 | |
| 150 | +15 | |
| 3000 | +300 | |
| 415 | +8.3 | |
| 90 | +4.5 | |
| 100% | N/A | |
| 925 | +55.5 |
| 移動 [u/s] |
基本速度 | スプリント速度 |
|---|---|---|
| 野生 | 野生 | |
| 歩行 | 466
|
1467.8999 |
| 水泳 | 300
|
? |
| 能力値 | 基準値 | レベルアップ |
|---|---|---|
| 野性生物 | ||
| 45000 | +234 | |
| 480 | +48 | |
| 150 | +15 | |
| 3000 | +300 | |
| 415 | +8.3 | |
| 75 / 1 | +3.75 / +0.05 | |
| 100% | N/A | |
| 925 | +55.5 |
| 移動 [u/s] |
基本速度 | スプリント速度 |
|---|---|---|
| 野生 | 野生 | |
| 歩行 | 900
|
3240 |
| 水泳 | 300
|
? |
野生生物の値を入力すると、どのステータスが目立っているかがわかります。高レベルの生物の値が緑色であれば、繁殖には非常に適しています。すでに生物をテイムしている場合は、外部ツールを使って繁殖用のステータスを取り戻すことができます。[1]
stat-calculatorはモバイルビューでは機能しません。代替方法についてはこちらをご覧ください: Apps
生物がテイムされた後は、テイム効果に応じていくつかのステータスにボーナスを得ることに注意してください。このため、テイムされた生物のレベルを取得することは困難です。したがって、このツールは野生生物のみを対象としていますが、ステータスがどのように配分されているかという第一印象を与えることができます。
A Hazard or TEK suit, GPS and Rock Drake are highly recommended as the area is flooded with radiation and/or aggressive creatures.
In order to fight any forms of Reaper, bring anything with charge light. Plant Z fruit, charge lanterns, and charge-light pets are all good for weakening the Reaper. Once these are in place, bring a powerful weapon to finish the job.
Surface Reaper Kings can be found randomly on the surface, while Subterranean Reaper Kings are called by Alpha-state Nameless when enough of such creature are present for certain duration. Reaper Queens can be found around Molten Element Region.
Reaper Queen can be distinguished from a Reaper King by not only the fact it appears as a single color and larger than the King, but it has a distinguishing bulb at the tip of her tail and a more pronounced head crest.
Due to its natural regeneration and armor in the absence of Charge Light, Reapers of any kind should be prioritized when it emerges out to attack the survivor, regardless of what is happening. Utilizing high-damage focused mounts that deals Area of Effect damage will minimize the health loss caused by Nameless. Refrain from getting hit too often unless you are utilizing multiple riot shields or a Mastercraft Metal shield, for its attacks easily shred armor durability, which can be fatal in irradiated area.
Take advantage of the Reaper's large body by wedging between two structures/rocks and a small opening. This will prevent them from reaching too close towards you. Be mindful of its tail attack as it inflicts large amounts of torpor damage and potential tail swing that can hit through gaps if stood too close.
Killing the Queen requires either a pack of Megalosaurus (or well-bred Ravagers), or a Rock Drake with decent stats in Health and/or Damage, as the Queen possess health almost matching that of an Alpha Predator, alongside the fact that its tail releases narcotic spikes rather than cocoons.
A High level Megalosaurus can easily dispatch Queens before they need to heal at a Plant Z. 8k-10k hp and 500 melee is enough for low and mid level Queens. Tilt the odds even further in your favor by getting it mate boosted, imprinted, and equipping a better saddle. Be wary of buried Purlovias. If they stun and knock you off your mount while fighting a Queen you are as good as dead.
If in possession of a Reaper King, the same method can be used as that of Megalosaurus. However, it cannot be mate-boosted, and is weak to charge light, which is essential to deal most damage to Reaper Queen. Well advised to get a decent Stat Reaper King when using this strategy.
Because of the new Carnotaurus bleeding attack a high level Carno can be really effective to kill the Reaper.
The easiest way to get impregnated is to dismount and remount in her presence and wait for her to grab you off your mount. You may need to dismount/remount again if she refuses to latch on(Maybe after 10 seconds). Impregnation can only occur when a Queen is surrounded by a pink aura, which only happens when she is under 2k health. Be mindful to time your dismount until after she attacks.
![]() Corrupted Reaper King, unlike the originals, do not possess either natural protection and quick health regeneration, essentially considered a weaker variant of
Corrupted Reaper King, unlike the originals, do not possess either natural protection and quick health regeneration, essentially considered a weaker variant of ![]() Corrupted Giganotosaurus. Unlike Reaper King, Corrupted Reaper King always appear surfaced up rather than burrowed down moving, and tends to have a lower aggression range despite being corrupted. However, despite this, it is best not to trifle with it as previous tactic and danger still applies due to its ability to throw cocoons and tail swings at its target.
Corrupted Giganotosaurus. Unlike Reaper King, Corrupted Reaper King always appear surfaced up rather than burrowed down moving, and tends to have a lower aggression range despite being corrupted. However, despite this, it is best not to trifle with it as previous tactic and danger still applies due to its ability to throw cocoons and tail swings at its target.
Always have a charge light source (Pet or Lantern) when fighting against Reaper. If traps are not used, utilizing high-health dino to tank the damage, often watching out for any cliff edges. You can technically use any ranged weapon, if shot from far enough away, but it'll most likely not be powerful enough to beat out the Reaper's health regeneration.
Have a bundle of Stimulants on standby if needed to fight back against the narcotic spikes inflicted by Reaper Queen.
Both Reaper Kings and Corrupted Reaper Kings shoot cocoons in the form of acid shrapnel from their tail, significantly slowing down the affected target's speed and drops flyers flying upwards, preventing them from flying as long as the debuff exists. While the effect cannot be stacked, but creatures can be “stun” locked by player ridden Reapers, it will still hinder any form of escape in such event.
Reaper Queen shoots narcotic/tranquilizing spikes from its tail, inflicting torpidity at its struck target. If the dino does not have decent torpidity, it will get knocked out by the torpidity.
Tail Swings from any Reapers have massive knockback, sending dinos and survivors far away from their original spot, while also dealing massive damage. This can be fatal if combat is near Element Water within the Molten Element Region. While Reapers are buoyant, they cannot use any other attack while floating, other than bite. Some creatures are impervious (if not unaffected) by its knockback, like ![]() Rock Drake.
Rock Drake.
Both Reaper King (not corrupted) and Reaper Queen regenerate their health at an incredibly fast rate (slower during daytime). This can be negated by inflicting Charged effect on them through the above methods.
Reaper Queens can impregnate another player as a last ditch effort to escape from death (at very low health), sending them at 1HP if successful. This can be denoted by a pink pheromone gas (like alpha) emitting out of herself while not within charge light.
Even after death, they leave behind Burning Acid, so its best advised not to get too close when harvesting their remains.
Reapers, much like the Nameless, are weakened by charge light. Be sure to bring a lantern pet or charge weaponry, if you plan to venture into their territory. Tamed Reaper Kings are not exempt from the debuff, but Corrupted Reaper Kings are not affected by charge light and do not possess natural protection and fast health regeneration, rendering the use of charge light useless.
Reapers cannot use any other attack nor jump while they are floating on any liquid surface.
Reapers do not wear saddles, much like ![]() Wyvern, which means they rely on their natural armor as additional protection. Reapers imprinted to the rider will still gain the damage resistance rider bonus.
Wyvern, which means they rely on their natural armor as additional protection. Reapers imprinted to the rider will still gain the damage resistance rider bonus.
Wild Reapers cannot be tamed, and domesticated Reapers cannot be bred. In order to obtain a tamed Reaper, a player must be impregnated by a ![]() Reaper Queen, which are always wild (tamed Reapers are always born as Kings), and imprint on the baby. In order to do this, you must first locate a Queen which, unlike the widespread Kings, can only be found in the deeper, radioactive areas of the map; requiring hazard suit gear to reach them. Once found, the Queen must be weakened by a chargelight source so that she can be damaged, and battled to the edge of death, below 2,000 health points (using a Magnifying Glass, players can check her health, but this comes with safety risks). Once she is sufficiently bloodied, she will start emitting a glowing pheromone cloud of reddish pink gas to signify she is ready to impregnate a survivor, but she will only do so if left unaffected by chargelight. If the cloud does not start appearing around her after the chargelight is turned off; turn it back on, damage her lightly once or twice, turn the light off, and wait a few moments. Repeat this process as necessary until the cloud appears. Once she begins to glow, she is ready to perform the impregnation attack, where she grabs a survivor with the end of her tail, and impales them; leaving the victim at 1 HP, but alive and carrying a Reaper embryo. If mounted, it is sometimes required for a player to dismount before she will target them and perform the impregnation strike, during which she will pull you off your tame if you remounted. Be wary when doing this, as she often performs her standard attacks a few times before the impregnation strike, including the tail swipe which can be lethal due to the knockback. Bring a riot shield and have your back to a wall before walking up to her, but don't worry about the shield blocking the impregnation attack, as it cannot be blocked by a shield. Once she has successfully impregnated a survivor, she will bury into the ground and despawn. Very rarely, she may attack once or twice after impregnation and before burrowing away, so keep that shield up immediately after she drops you. If the queen was standing on foundations or other player built structures, they will prevent her from burrowing. This could allow multiple impregnations. Keep in mind, however that upon getting out of render range of the queen, she will likely despawn. If you happen to be killed by the vengeful Queen after receiving your embryo, your death will not kill the gestating Reaper, so long as your hazard gear remained intact and you were not exposed to radiation. In the case that this happens, it is a good idea to keep a Rock Drake and a spare hazard suit located at your respawn point, for quick means of returning to your area of death and retrieving your lost items.
Reaper Queen, which are always wild (tamed Reapers are always born as Kings), and imprint on the baby. In order to do this, you must first locate a Queen which, unlike the widespread Kings, can only be found in the deeper, radioactive areas of the map; requiring hazard suit gear to reach them. Once found, the Queen must be weakened by a chargelight source so that she can be damaged, and battled to the edge of death, below 2,000 health points (using a Magnifying Glass, players can check her health, but this comes with safety risks). Once she is sufficiently bloodied, she will start emitting a glowing pheromone cloud of reddish pink gas to signify she is ready to impregnate a survivor, but she will only do so if left unaffected by chargelight. If the cloud does not start appearing around her after the chargelight is turned off; turn it back on, damage her lightly once or twice, turn the light off, and wait a few moments. Repeat this process as necessary until the cloud appears. Once she begins to glow, she is ready to perform the impregnation attack, where she grabs a survivor with the end of her tail, and impales them; leaving the victim at 1 HP, but alive and carrying a Reaper embryo. If mounted, it is sometimes required for a player to dismount before she will target them and perform the impregnation strike, during which she will pull you off your tame if you remounted. Be wary when doing this, as she often performs her standard attacks a few times before the impregnation strike, including the tail swipe which can be lethal due to the knockback. Bring a riot shield and have your back to a wall before walking up to her, but don't worry about the shield blocking the impregnation attack, as it cannot be blocked by a shield. Once she has successfully impregnated a survivor, she will bury into the ground and despawn. Very rarely, she may attack once or twice after impregnation and before burrowing away, so keep that shield up immediately after she drops you. If the queen was standing on foundations or other player built structures, they will prevent her from burrowing. This could allow multiple impregnations. Keep in mind, however that upon getting out of render range of the queen, she will likely despawn. If you happen to be killed by the vengeful Queen after receiving your embryo, your death will not kill the gestating Reaper, so long as your hazard gear remained intact and you were not exposed to radiation. In the case that this happens, it is a good idea to keep a Rock Drake and a spare hazard suit located at your respawn point, for quick means of returning to your area of death and retrieving your lost items.
Once impregnated, the gestation period begins, during which the growing embryo will absorb all experience earned by the player; earning the baby a higher base level dependent on the experience gained (up to 75 levels higher than the level of the Queen who impregnated you). Once the gestation period ends, a time period of about 12 real-life hours on normal settings, the baby Reaper will violently burst from the player's chest, resulting in a claimable infant, but once again lowers the player to 1 HP. Once born, a Reaper Pheromone Gland is needed to safely interact with and imprint on the young King while it is in the baby stage of its life cycle. Note that only the bearer of the infant can claim it; other survivors won't be given the option. While in its larval state, the infant Reaper is highly aggressive; wandering around, ignoring whistle commands and attacking any living creature without the effects of the pheromone gland. It will sometimes even attack and kill the player who birthed before it is claimed, so building a pen to contain it while in its infancy is required. For your own safety, it is a good idea to build a platform above this pen and face it once the Reaper is ready to be born; allowing it to shoot out and fall into the pit where it cannot reach you, giving you a few brief moments to heal up before running down to claim it. Be sure to bring plenty of raw meat with you to put in its inventory after claiming it, as it won't eat from a food trough until it grows into a juvenile.
Once the baby reaches a certain point of growth, the insect-like larva will bury itself into the ground; remaining submerged for a short period of time. It will then claw its way up from the ground and emerge, having shed it infantile shape and assumed the form identical to that of the larger adults. In order for the baby to complete this action, it must have access to the ground for it to bury itself; however, if this is not the case, the Reaper will just change into its adult form with no animation. Once the baby reaches juvenile age, it will no longer lash out at anything without the pheromone buff, and can be safely removed from the pen as it will now obey whistle commands. Once your first Reaper has reached adult age, even though they cannot be bred, a Cloning Chamber is a viable option for producing more Kings, although cloned Kings will not receive the benefits of imprint bonuses.
When attempting an impregnation, regardless of strategy, always bring either Stimberries or Stimulant to fight the narcotic effects of the Queen's ranged barb attack, and a source of chargelight to weaken her.
For this strategy, you need a mount that's tough enough to take down a Queen. High level tames with stats in health, damage, and stamina are recommended for a prolonged engagement; higher quality saddles that provide hefty armor bonuses also makes the process even easier. For most tames, stimberries or stimulant are needed to avoid being knocked unconscious by the Queen's narcotic barbs. While fighting the Queen, most mounts should fight her with their back to a wall or from an uphill position, to avoid being pushed into a lethal fall or element water from her tail attacks. Following the above descriptions, when the pheromone cloud appears and she is ready to impregnate you, dismount with a riot shield raised and your back facing a wall, and wait for her to grab you with her tail. Be sure your mount is set to passive so that it doesn't attack and kill her while she's implanting the embryo. Meks are also very effective.
Provided the right conditions are met, a Rock Drake can prove the most valuable asset you have for obtaining Reaper pregnancies. While Drakes have many abilities that work to their benefit when hunting Queens, there are a couple downsides to consider. The average, lower level Drake is not always strong enough to take on a Queen alone, meaning that in most cases it is best to go pack hunting with your tribemates while using Drakes. A high level Drake however, hatched from a maxed out egg and fully imprinted, with high damage and health stats is more than enough to take down a Queen alone. The second problem is that Drakes, even with high damage stats, attack more slowly and deal less damage over time than the other heavyweights used against Queens; making the quality of the saddle you use, and the armor it provides, much more vital to surviving the longer fight, so bring the best you have. So long as those two problems are handled appropriately, you are free to take advantage of the full benefits a Drake provides for Reaper-hunting. Being the best form of travel in the Aberrant Ark, a Rock Drake can get you in, out and through Reaper territory safely and quickly. If the Drake finds itself in danger of losing the battle, they are by far the best at escaping; able to glide away to safety if things go south. Unlike the other carnivores used to hunt Reapers though, if a fight does start to go poorly for the Drake, Nameless venom can be used as a powerful healing food on the Drake to turn a pitch battle in its favor; with each dose of venom healing 100 points of health. Building up a stockpile of venom before the fight can literally be lifesaving, and can allow for longer hunting expeditions against stronger Queens.
Their mobility also makes it far easier to seek out and find higher level Queens for stronger embryos; the emerged Queen's level can quickly be checked in first person or with a spyglass, then quickly glide away if her level is not desired, without having to kill and wade through multiple Queens on foot until you find the one you want. Drakes are also able to detect any nearby Reapers; as the feathered frills on their heads raise up when one is close, making it easier to tell when one is nearby. Unlike most other large mounts, a Magnifying Glass can be used on a Drake's back to check the Queen's health during battle. Lastly, Rock Drakes are the only mount immune to the knockback of a Reaper's tailsweep; almost completely eliminating the chance of being killed by fall damage or getting knocked into element water. This comes with a second advantage, as Reaper Queens only use their narcotic barb attack when their target is out of bite range. Almost every other mount has to deal with the effects of her barbs, but so long as a Drake is continuously walked into the Queen during the fight, the entire battle can take course without having to use stimulants to keep your Drake conscious. If the Drake does indeed need a dose of stimulant; Drakes lose torpidity at an extremely fast rate, making them very cost effective to keep awake, even a small handful of simple stimberries can quickly deplete a nearly-full torpor bar.
A well-bred, high leveled, fully imprinted Spino is one of the best mounts for obtaining Reaper pregnancies, and killing Queens for glands. For starters, Spinos are one of the few creatures that can push a Reaper Queen around; simply walking into her and slashing with the claw attacks makes it possible, with some effort, to shove her into a location of your choosing, provided you avoid being knocked too far back from the tail sweep. When shoved away by her tail sweep, most tames need to reposition themselves to face the Queen again; as she tends to flank you with her speed while running back towards your mount, and the knockback of her attacks coming from behind only adds to the difficulty. Spinos solve this problem easily, as they can turn and face any direction while in their two-legged stance, without actually having to walk in order to do it. When it comes to availability, Spinos are easier to tame and can be bred for higher stats, unlike most other Queen-killing mounts, although their favorite taming foods; raw prime fish and Exceptional Kibble, can be somewhat difficult to acquire in the Aberrant Ark. Like most Queen-killers, Spinos will have to deal with the narcotic effects of the Queen's barbs, but for their size they are capable of losing torpor at a decent rate. When it comes to healing between or after battles, Spinos may be beaten by Rock Drakes with Nameless Venom, but they come in at a close second with their hydrated buff; which provides a large boost to their healing rate. Combining the hydration buff with the passive healing from a wild Plant Species Z, then force-feeding raw meat, provides a means of quickly getting the Spino back into the fray. If the fight goes poorly and you need to flee, Spinosaurs are among the fastest large carnivores, and certainly have the potential to outrun a Reaper Queen. Strategically, while it may lightly damage your Spino during the chase, a very short and quick dip into the shallow shorelines of the many pools of element water will apply the hydrated buff; granting a short term, but significant increase to movement speed, allowing the Spino to make a much easier getaway.
If you have previously managed to raise a Reaper King and fully (or mostly) imprinted it on you, it is one of the best options at obtaining further Reaper pregnancies. With one of the best health and damage pools in the Aberrant Ark, Reaper Kings can easily hold their own with a Queen. Kings however do not benefit from the armor of a saddle, and still need chargelight to damage the Queen. The chargelight in turn will weaken your King as well; negating his natural armor along with hers, but his heavy health pool more than makes up for it. With this in consideration, he will actually lose a higher percentage of his health than other mounts like Spinos or Drakes, and so will need to spend more time healing between battles with Queens. During the fight, Queens can still knock back Kings with their tail sweep, but Kings can also do the same to Queens with theirs; allowing you to throw unwanted, lower level Queens off cliffs or into pits of element water while you seek out stronger Queens for Impregnation. If a King does get knocked back off a cliff, they take very little fall damage compared to other mounts. If they happen to get knocked into a pit of element water, Kings have a unique advantage to surviving this; they are incredibly buoyant, and cannot sink into water no matter how far the fall distance; keeping you and your charge light pet safe from harm in most cases. Reaper kings can survive the element water for a period of time, but will eventually die from exposure to it, giving you a window of time to find a spot to crawl out and potentially climb back up out of the pit. If there is no means of escape from the water for your Reaper, its buoyancy in the very least gives you a chance to escape with the use of climbing picks, potentially still saving you and your charge light pet at the cost of its own life. If the fight goes poorly and the King needs to escape, it might be slightly slower than a Spino, but he has several abilities that work to his advantage when he needs to get away. His acid shrapnel tail attack acts like a source of chain bolas; severely reducing the speed of anything it hits for roughly ten seconds. This allows you to pelt a Queen once with the acid, then make a run for it. If the King doesn't have the stamina for a long sprint, he can leap vast distances and cover large amounts of ground in a single jump; essentially allowing you to hop your way to safety up cliffs or across chasms, with minimal stamina drain.
Long considered one of the more troublesome tames in ARK, the Megalosaurus now gets a chance to shine in Aberration. Unlike their counterparts located in other maps, Aberrant Megalosaurus stay awake around the clock while in their native Ark; allowing them to be used with much greater potential. When it comes to the task Queen-hunting, with stats comparative to that of Spinosaurs, Megalosaurus are more than capable of handling the task, but they have some downsides to consider along with their benefits. The biggest concern is the environment they have to traverse in order to get to the Queens; nearly everything located within the element regions of the map are hostile to Megalosaurus; meaning your tame will have to wade through many different creatures before coming across a Queen. While it can handle these swarms with varying ease, the greatest danger doesn't come so much from the attacks against your Megalosaurus, than from wild creatures attacking you; Aberrant Purlovia pose a serious threat, as they can and will knock you off your Megalosaurus if you are not careful. The resulting stun from this attack can be lethal, as the surrounding wildlife takes the opportunity to kill you, or destroy your hazard gear while you are dismounted; putting a swift end to your expedition. Larger mounts, in comparison, have much less to worry about as the majority of wildlife will opt to leave them alone. Though in terms of availability; Aberrant Megalosaurus are far easier to tame compared to other Queen-killers, more so than Spinos, as their second favorite taming food, raw mutton, is relatively abundant on the map. Once a Queen is located however, this is where the Megalosaurus gets a chance to excel. Although much smaller than her, the Megalosaurus makes for an extremely scrappy and lethal opponent.
Possessing a low drag weight makes them even more vulnerable to the knockback of a Queen's tail sweep, but this is where their small size comes to their advantage. Megalosaurus are able to run between the legs of Reaper Queens, and with their significantly short turn radius, they can to do something very few Queen-Killers can achieve; outflank a Queen. This makes it possible to circle around behind her, attacking her from the rear while avoiding the damage of a full frontal assault. She will still use her tail sweep while you do this however, but the knockback from it is less severe from behind than if she hits you with it from the front, and can even be completely negated if standing directly beneath her while she uses it. This does not mean caution should be thrown to the wind however, as the standard strategy to fight her near walls, rather than near pools of element water and sheer cliffs, is still advised. The Megalosaurus' agility does come with a second bonus though; as most mounts will inevitably get hit by the Queen's narcotic barbs after a tail sweep, the Megalosaurus is small and fast enough to completely avoid the barbs with a sharp turn as she fires them, allowing you to battle her without the standard precaution of bringing any stimulants, provided you put in the effort to dodge. When it comes to their healing prowess, Megalosaurus are standard; requiring the usual amount of time to patch themselves up, compared to the speedier healing of a venom-fed Rock Drake or hydrated Spino. While the Megalosaurus makes for a very effective Queen-killer, if they end up having to flee from the fight, this is where they can run into some trouble. Their small size, and slower speed compared to that of the other fighters, makes it far easier for the Queen to pursue. Be mindful of your environment if you have to flee and use the landscape to your advantage to throw her off you; the Megalosaurus' smaller size and agility allows it to duck and weave between obstacles, whereas the Queen either gets trapped, slowed down, or is forced to circle around these hazards.
As a Queen-killer, a Basilisk is a viable option, but far from the best. One of its greatest handicaps is the fact that, unlike much of the native wildlife, Basilisks are vulnerable to radiation damage; so they will either have to be fed Mushroom Brew to stave off its effects, or you will have to lure a Queen to your Basilisk waiting outside of the irradiated zones. While it sports considerably impressive stats, Its wide turn radius makes it very vulnerable to being flanked by the Queen, so turning simply to face and bite her can prove to be a challenge. When it comes to availability; Basilisks are notoriously difficult to tame, as they require Rock Drake eggs to feed, and more than a little patience during the passive-tame process. The Basilisk does however have one large advantage over all other options: its immunity to torpor. While a Basilisk can be pushed around horribly during a fight with a Queen, it never has to worry about getting knocked out by her barbs. Combine that with a high health pool and decent damage stats, and a Basilisk can hold its own against a Queen. If a Basilisk needs to escape the fight if things don't work out in its favor, it has speed to its advantage, but its wide turn radius can present a problem while running from the very agile Queen.
An alternative way, albeit costly in time and resources (building materials, extra hazard suits and shields, weaponry and ammunition), to become impregnated is to construct a trap and a safe place to shoot from, if you lack strong enough tames for mount-based tanking. This method however is not always reliable, as the impregnation strike can be interrupted by structures if she grabs you from inside the trap; resulting in a failed attempt, wasted time, and lost resources as you fall out of her tail and she buries away anyway without implanting an embryo.
For this method, building a 2x2 room out of stone or better with windows and a door to get in and out, or just crafting a few walls to hide behind when required is vital. This room should be built just out of range of her bite attacks from the trap, and ideally be enclosed to protect from other creatures as well. If you ventured down into the caverns using a mount, constructing a closed pen (completely shut off from the outside, not a crack left open) to keep it safe from the Reaper's attacks is of utmost importance. Being stranded in the deep caves without a mount to aid in your escape after impregnation can be very unpleasant, but it is not absolutely necessary. Being killed will not destroy the gestating Reaper inside you after impregnation, but it will reset its growth timer. Dying in the deep caves to escape does come with risks though, as your Hazard Suit can be destroyed as you take damage, which will kill the baby. If you do find yourself trapped in the area without a convenient method of escape, collecting from the small pale-white bulbous ground plants in the area will yield Organic Polymer, which a survivor can consume to instantly kill themselves without damaging their hazard suit, and thus avoid risking the gestating Reaper.
For the trap, you will need a few small Stone Dinosaur Gateways, placed in a rough horseshoe shape similar to the kind of traps used to tame a Giganotosaurus. Once the trap is built, leave one side open for the Queen to enter, and proceed to wander the area in an attempt to lure her out. Beware of Aberrant Purlovia, which can often be found in the same areas the Queens are in, and can leap out of the ground and stun you, potentially while a Queen is surfacing to chase you. Once you've found a Queen, let her chase you into the mouth of the trap. Once inside, quickly place the last dinosaur gate behind her in the opening to close it off and lock her in. This can be done with relative safety from the back of a mount, or on foot with a shield raised to block. While closing the trap, beware of her sweeping tail attack, which can knock you very far back and possibly into element water, resulting in your death. This tail sweep can be countered by building stone fencing two walls high around the area of your gate trap, but be sure your fencing doesn't block off the entrance to the trap. Once the Queen is locked in place, hide behind the walls of your safe room when she attacks. Once she stops, throw a Plant Species Z Fruit at her, or have a chargelight pet with high enough range stats to reach her, and proceed to shoot her with a powerful weapon, such as a ![]() Pump-Action Shotgun.
Pump-Action Shotgun.
Once the Queen has very low health, turn off your chargelight source and wait for a few moments, you will know she is ready to impregnate you when you see the reddish pink pheromone cloud around her torso. If the cloud does not appear, turn the chargelight back on and take a few more shots, then turn the light back off to see if it appears; repeat this process until the cloud can be seen. If she is trying to flee as you walk up to her with your shield, wait for a few moments for her health to regenerate slightly, and she will resume attacking. If her pheromone cloud disappears as she resumes attacking, return to your shooting room and damage her a little more, then approach again. It may take a few tries, but she will eventually grab and impregnate you.
As mentioned above, it's important to note that if you create a trap that has a complete foundation base, it's possible to use the same Reaper Queen for multiple pregnancies since they are unable to burrow through foundations. A simple trap for this method is a 3x4 foundation base with dinosaur gateways on the middle of 3 sides and a behemoth gate on the back. Open the gate while on a creature that can jump over the dinosaur gateways or run through them, lure the queen in, then run around to the side and close the gate. This traps the queen and leaves plenty of space for attacks to go through. From there, weaken her to your leisure and get impregnated. She won't be able to burrow so you can have another tribemate get impregnated off the same Reaper Queen, though you may need to wait a couple minutes before trying. As with other methods, make sure you're using a strong shield to block the occasional tail swipe.
The baby takes 12 real-time hours for gestation to be completed. During this time, the survivors cannot earn full XP, as the baby will absorb half XP obtained from killing dinosaurs, with the exception of crafting, which it will gain no XP from.
Once the period ends, the baby forcefully 'ejects' from the survivor, which then will try to run away. If the survivor does not have the effect from a ![]() Reaper Pheromone Gland, which can be harvested from a dead Reaper Queen, it will eventually become hostile like a wild Reaper King and targets anyone. (It is possible to give birth to it within a very small room.)
Reaper Pheromone Gland, which can be harvested from a dead Reaper Queen, it will eventually become hostile like a wild Reaper King and targets anyone. (It is possible to give birth to it within a very small room.)
While the survivor is impregnated, the following things should be taken into consideration:
There are ways to ensure the Reaper Embryo does not decay upon a single touch of radiation such as setting an trap outside of the radiation zone, and luring the Reaper Queen into the trap. That way, even if the Hazard Suit breaks, as long as the survivor is not inside, it will remain safe.
When the baby is nearly ready to emerge, survivors should put themselves in a safe, enclosed area at least two walls high and away from other survivors and tames. An "airlock"-like system may be useful in case the baby tries to leave the room with you. About half a minute before it emerges, consume the pheromone gland. Once it emerges, imprint on it immediately, feed it quickly, and keep it enclosed. As with all babies, keep a close eye on its food, as it will starve quickly and sometimes won't eat by itself even if it has food. Ensure that there is nothing around the survivor, as any hits the Reaper King baby deals will reduce its food by 400.
To feed it the easy way, take 2 or 3 troughs full of meat in your inventory, and after birth and claim, let the baby kill you. It will drop ALL your inventory, regardless of weight, and you'll be able to let it be alone for all the baby stage. It's a game mechanic, like with Wyvern, Basilisk or an enraged Giganotosaurus, when your own tame does kill you, it will always drop your inventory. The king is not an exception, even when at it’s baby stage.
Reaper babies will be hostile to any players not under the buff given from consuming a ![]() Reaper Pheromone Gland, including the player who imprinted on the baby. However, if the player does not imprint the offspring in time, even if they have the buff, they will still get attacked by the baby after a while (it will run off upon birth for a moment).
Reaper Pheromone Gland, including the player who imprinted on the baby. However, if the player does not imprint the offspring in time, even if they have the buff, they will still get attacked by the baby after a while (it will run off upon birth for a moment).
The baby will ignore any whistle commands and will not respond to any behavior changes until it reaches the juvenile stage due to its lack of eyes and ears. It is advised to keep it in a box during the baby stage, as they move fast and can easily get away. Alternatively, a ![]() Cryopod can be used to prevent the creature from erratic behavior, but changing of its attack stance is still impossible until it reaches juvenile, meaning if any combat towards creature is engaged, it will still run away, meaning it is still advised to care for it in an enclosed area due to its speed.
Cryopod can be used to prevent the creature from erratic behavior, but changing of its attack stance is still impossible until it reaches juvenile, meaning if any combat towards creature is engaged, it will still run away, meaning it is still advised to care for it in an enclosed area due to its speed.
A claimed baby's inventory can be accessed even after the pheromone buff has worn off, but it will attack the player while doing so. Using good armor can make this negligible and reduce the number of pheromone glands required. However, using this method will drain the baby's food 400 points per hit, so is an ineffective method. Moreover, while its targeting someone or something, it may not even eat meats that is in its inventory either.
Once the baby reaches juvenile, pheromone glands are no longer needed as it will be able to see and hear, and can eat from a trough.
The amount of XP the baby absorbs during the pregnancy will alter its stats once it's fully grown, much like taming efficiency in other creatures. The maximum amount of XP the offspring can receive is 52,500 before it stops absorbing. The number in parentheses indicates how many levels it has gained, up to a max of 75. The level of the offspring and its stats are dependent of the level of the Reaper Queen that impregnated the player as well as the consumed XP.
For example: A level 125 Queen + 52,500 absorbed XP (75 levels) = Level 200 baby Reaper.
Prior to update 275.0 giving Imprint was not possible due to a bug where the baby would ask to be fed with the ![]() Kibble (Glowtail Egg),
Kibble (Glowtail Egg), ![]() Kibble (Featherlight Egg),
Kibble (Featherlight Egg), ![]() Kibble (Baryonyx Egg) and
Kibble (Baryonyx Egg) and ![]() Kibble (Rock Drake Egg).
Kibble (Rock Drake Egg).
The Reaper is perhaps one of the strongest mounts available, because of its natural armor that highly reduces damage unless it's effected by charge light, the unique mechanics on leveling a gestating reaper, along with imprinting and its massive health pool, it can quickly become a contender even with the ![]() Giganotosaurus. The highest level of a wild Reaper Queen (150), along with maximum XP siphoned and stored during gestation (75), brings the highest total birth level of a Reaper King to 225, making the fully leveled Reaper King level 298 (313 in single player). The drawback however is that Reapers cannot be bred and acquire mutations, or destroy stone structures as the Giganotosaurus can. The Giganotosaurus also gains armor ratings from saddles, whereas Reapers do not, however the natural armor of a tamed Reaper King provides an 80% damage reduction, equivalent to a 400 armor saddle.
Giganotosaurus. The highest level of a wild Reaper Queen (150), along with maximum XP siphoned and stored during gestation (75), brings the highest total birth level of a Reaper King to 225, making the fully leveled Reaper King level 298 (313 in single player). The drawback however is that Reapers cannot be bred and acquire mutations, or destroy stone structures as the Giganotosaurus can. The Giganotosaurus also gains armor ratings from saddles, whereas Reapers do not, however the natural armor of a tamed Reaper King provides an 80% damage reduction, equivalent to a 400 armor saddle.
Acquiring a new Reaper is also considerably more difficult than a Giganotosaurus, as the latter can be bred, while the former always has to be obtained through finding a wild queen for impregnation: making establishing a stable level base of tamed kings impossible, as wild queens always vary in level. The Reaper can make up for these shortcomings though, as they possess an even wider range of abilities compared to the Giganotosaurus: Reapers can jump considerable distances and heights with minimal fall damage, are able to bury themselves and hide from sight, have a range of attacks with different effects, and more. Reapers have a very short turn radius, are faster than most other large predators, and can sprint long distances with low stamina drain: making them far more agile than the Giganotosaurus. The Reaper however is far more buoyant than the Giga: it cannot submerge in water, but still drains stamina at a slow rate while floating. While this has its uses, it leaves the Reaper very vulnerable while afloat, as it cannot dive to escape aggressors attacking from above.
With the introduction to Genesis: Part 2, R-Reaper King, the mutated variant of Reaper King, are a viable battle mount against Rockwell Prime due to the above mentioned, along with the fact with the right stat build up, can tank a lot of hits, both from the tentacles and from the constant acidic field generated from the projectile.
| 資源 | 効率 |
|---|---|
| ★★★☆☆ |
| このページには、ARK:Survival Evolvedの背景ストーリーに関連したネタバレが含まれている可能性があります。 あなたは物語のゲーム内を体験したい場合は、おそらくこのページの続きを読むべきではありません。 |
| Patch | 変更点 |
|---|---|
| 275.0 Aberration Expansion Release | The |
| 275.31 | Increased Subterranean Reaper King |
| 275.32 | Tamed Reaper Kings can now be properly downloaded to ARKs other than Aberration |
| 275.33 | Wild Subterranean, Elemental, and Regular Surface Reaper Kings no longer grant XP on kill |
| 275.4 |
|
| 276.21 | Massively improved stats across the board for Tamed Reaper Kings |
| 278.0 | It is no longer necessary to consume a |
| 285.104 Extinction Expansion Release | Added |
| 306.41 Genesis: Part 1 Expansion Release | Added Corrupted Reaper Dinotar |
| 307.2 |
|
| 307.56 | Official Genesis: Part 1 Server wipes for Tamed Reaper Kings, and any Reapers inside a |
| 307.8 | Re-enabled configuration to prevent Reapers from being transferred to Genesis: Part 1. |
| 313.5 |
|
| 313.10 | Fixed an exploit with the Reaper |
| 329.5 Genesis: Part 2 Expansion Release |

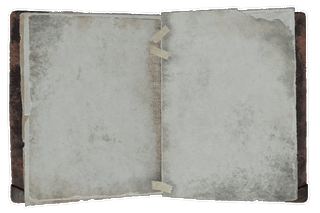
Torn dossier

Pink aura seen when the Reaper Queen is ready to impregnate the player.


Appearance of a Reaper Offspring at its baby age.

Stat Hover of a Level 76 Reaper King Baby from a Level 1 maxed XP. Notice how it does not show "Following" in the Stat despite being called.

A render of a Reaper King doing its roar animation.

Size comparison between a Giga and a Reaper King
3 「ブリーディング」の唯一の方法は、クイーンからの受胎しかないが、リーパーの性別の仕組み上、技術的にはブリーディングは不可能です。