オベリスクと供給品クレートからアクセスできるMegapithecus Arena。
メガピテクス
(メガピテクス(ベータ)から転送)
ナビゲーションに移動
検索に移動
| Partly outdated
Some information on this page is outdated due to the changes of v254.0. You can help correcting it.
|
| このページには、ARK:Survival Evolvedの背景ストーリーに関連したネタバレが含まれている可能性があります。 あなたは物語のゲーム内を体験したい場合は、おそらくこのページの続きを読むべきではありません。 |
メガピテクス

Lua エラー モジュール:Version/legacy 内、75 行目: unknown Switch version 599.0
スポーンコマンド
or
Variant Megapithecus (Gamma)
or
Variant Megapithecus (Beta)
or
Variant Megapithecus (Alpha)
or
Variant Megapithecus (Gamma) (The Center)
or
Variant Megapithecus (Beta) (The Center)
or
Variant Megapithecus (Alpha) (The Center)
or
Variant Megapithecus (Gamma) (Valguero)
or
Variant Megapithecus (Beta) (Valguero)
or
Variant Megapithecus (Alpha) (Valguero)
or
Variant Megapithecus (Gauntlet)
or
cheat summon Gorilla_Character_BP_Cor
cheat SpawnDino "Blueprint'/Game/PrimalEarth/Dinos/Gorilla/Gorilla_Character_BP.Gorilla_Character_BP'" 500 0 0 35Variant Megapithecus (Gamma)
cheat summon Gorilla_Character_BP_Easy_Cor
cheat SpawnDino "Blueprint'/Game/PrimalEarth/Dinos/Gorilla/Gorilla_Character_BP_Easy.Gorilla_Character_BP_Easy'" 500 0 0 35Variant Megapithecus (Beta)
cheat summon Gorilla_Character_BP_Medium_Cor
cheat SpawnDino "Blueprint'/Game/PrimalEarth/Dinos/Gorilla/Gorilla_Character_BP_Medium.Gorilla_Character_BP_Medium'" 500 0 0 35Variant Megapithecus (Alpha)
cheat summon Gorilla_Character_BP_Hard_Cor
cheat SpawnDino "Blueprint'/Game/PrimalEarth/Dinos/Gorilla/Gorilla_Character_BP_Hard.Gorilla_Character_BP_Hard'" 500 0 0 35Variant Megapithecus (Gamma) (The Center)
cheat summon Gorilla_Character_BP_TheCenter_Cor
cheat SpawnDino "Blueprint'/Game/PrimalEarth/Dinos/Gorilla/Gorilla_Character_BP_TheCenter.Gorilla_Character_BP_TheCenter'" 500 0 0 35Variant Megapithecus (Beta) (The Center)
cheat summon Gorilla_Character_BP_TheCenter_Medium_Cor
cheat SpawnDino "Blueprint'/Game/PrimalEarth/Dinos/Gorilla/Gorilla_Character_BP_TheCenter_Medium.Gorilla_Character_BP_TheCenter_Medium'" 500 0 0 35Variant Megapithecus (Alpha) (The Center)
cheat summon Gorilla_Character_BP_TheCenter_Hard_Cor
cheat SpawnDino "Blueprint'/Game/PrimalEarth/Dinos/Gorilla/Gorilla_Character_BP_TheCenter_Hard.Gorilla_Character_BP_TheCenter_Hard'" 500 0 0 35Variant Megapithecus (Gamma) (Valguero)
cheat summon Gorilla_Character_BP_Easy_Cor
cheat SpawnDino "Blueprint'/Game/Mods/Valguero/Assets/CoreBlueprints/Boss/Gorilla_Character_BP_Easy.Gorilla_Character_BP_Easy'" 500 0 0 35Variant Megapithecus (Beta) (Valguero)
cheat summon Gorilla_Character_BP_Medium_Cor
cheat SpawnDino "Blueprint'/Game/Mods/Valguero/Assets/CoreBlueprints/Boss/Gorilla_Character_BP_Medium.Gorilla_Character_BP_Medium'" 500 0 0 35Variant Megapithecus (Alpha) (Valguero)
cheat summon Gorilla_Character_BP_Hard_Cor
cheat SpawnDino "Blueprint'/Game/Mods/Valguero/Assets/CoreBlueprints/Boss/Gorilla_Character_BP_Hard.Gorilla_Character_BP_Hard'" 500 0 0 35Variant Megapithecus (Gauntlet)
cheat summon Gorilla_Character_BP_Gauntlet_Cor
cheat SpawnDino "Blueprint'/Game/Genesis/Dinos/MissionVariants/Gauntlet/Arctic/Gorilla_Character_BP_Gauntlet.Gorilla_Character_BP_Gauntlet'" 500 0 0 35生息地
オベリスクと供給品クレートからアクセスできるForsaken Oasis。
メガピテクスはARK: Survival Evolvedのボスで、極寒の北に隠れ家を持っています。The IslandのMegapithecus Arena、The CenterのArena、ValgueroのForsaken Oasisのいずれかでのみ見つけることができます。これらの場所に行くためには、プレイヤーは供給品クレートかオベリスクのいずれかに行き、必要な貢物アイテムを中に入れ、![]() Generate Megapithecus Portal(またはCenter PortalかForsaken Oasis)のアイテムをクリックします。近くのプレイヤーや恐竜をアリーナにテレポートするためのポータルが開かれます。
Generate Megapithecus Portal(またはCenter PortalかForsaken Oasis)のアイテムをクリックします。近くのプレイヤーや恐竜をアリーナにテレポートするためのポータルが開かれます。
シングルプレイでThe Islandをプレイしている場合、ポータルは青のオベリスクからのみ生成できます。
ガントレットミッションの最後のウェーブで、メガピテクスの弱い異種が出現します。
Survival of the Fittestでは、![]() Broodmotherや
Broodmotherや![]() Dragonと同様に、テイムして騎乗することができます。メガピテクスの攻撃の一つに、大きな岩を拾って投げるというものがあり、簡単に建造物を壊したり、大勢の恐竜にダメージを与えることができます。
Dragonと同様に、テイムして騎乗することができます。メガピテクスの攻撃の一つに、大きな岩を拾って投げるというものがあり、簡単に建造物を壊したり、大勢の恐竜にダメージを与えることができます。
基本情報
外観
The Megapithecus highly resembles an incredibly oversized modern-day gorilla with dark silver skin and very long and thick white fur. Scars that reveal flesh and straps of tissue appear on the upper-right portion of the chest-piece, the front-facing section of the right shoulder, and most of the right side of its face. The origin of those scars remain a mystery. Its left eye is red while its right eye is blind and white.
配色と領域
メガピテクスは常に同じ配色でスポーンし、カラー領域を持ちません。
これは、現在、メガピテクスの色を変更することが不可能であることを意味します。
Colors 色
The Megapithecus has different types of color due to its difficulty level:
| Difficulty Level | Color |
|---|---|
| Gamma | Default Coloring |
| Beta | Yellow |
| Alpha | Red |
必要な貢物
The following items are needed to summon the Megapithecus:
| Item | Quantity | ||
|---|---|---|---|
| Gamma | Beta | Alpha | |
| Player Level | 45 | 65 | 85 |
| 1 | 1 | 1 | |
| 1 | 1 | 1 | |
| 1 | 1 | 1 | |
| - | 5 | 10 | |
| - | 5 | 10 | |
| - | 5 | 10 | |
| - | 5 | 10 | |
| - | 5 | 10 | |
貢物のスポーンコマンド
Use these commands to give yourself all the items needed for tribute:
| Gamma |
|---|
cheat giveitem "Blueprint'/Game/PrimalEarth/CoreBlueprints/Items/Artifacts/PrimalItemArtifact_12.PrimalItemArtifact_12'" 1 0 0 | cheat giveitem "Blueprint'/Game/PrimalEarth/CoreBlueprints/Items/Artifacts/PrimalItemArtifact_07.PrimalItemArtifact_07'" 1 0 0 | cheat giveitem "Blueprint'/Game/PrimalEarth/CoreBlueprints/Items/Artifacts/PrimalItemArtifact_02.PrimalItemArtifact_02'" 1 0 0
|
| Beta |
|---|
cheat giveitem "Blueprint'/Game/PrimalEarth/CoreBlueprints/Items/Artifacts/PrimalItemArtifact_12.PrimalItemArtifact_12'" 1 0 0 | cheat giveitem "Blueprint'/Game/PrimalEarth/CoreBlueprints/Items/Artifacts/PrimalItemArtifact_07.PrimalItemArtifact_07'" 1 0 0 | cheat giveitem "Blueprint'/Game/PrimalEarth/CoreBlueprints/Items/Artifacts/PrimalItemArtifact_02.PrimalItemArtifact_02'" 1 0 0 | cheat giveitem "Blueprint'/Game/PrimalEarth/CoreBlueprints/Resources/PrimalItemResource_ApexDrop_Megalania.PrimalItemResource_ApexDrop_Megalania'" 5 0 0 | cheat giveitem "Blueprint'/Game/PrimalEarth/CoreBlueprints/Resources/PrimalItemResource_ApexDrop_Megalodon.PrimalItemResource_ApexDrop_Megalodon'" 5 0 0 | cheat giveitem "Blueprint'/Game/PrimalEarth/CoreBlueprints/Resources/PrimalItemResource_ApexDrop_Spino.PrimalItemResource_ApexDrop_Spino'" 5 0 0 | cheat giveitem "Blueprint'/Game/PrimalEarth/CoreBlueprints/Resources/PrimalItemResource_apexdrop_theriz.primalitemresource_apexdrop_theriz'" 5 0 0 | cheat giveitem "Blueprint'/Game/PrimalEarth/CoreBlueprints/Resources/PrimalItemResource_apexdrop_thylaco.primalitemresource_apexdrop_thylaco'" 5 0 0
|
| Alpha |
|---|
cheat giveitem "Blueprint'/Game/PrimalEarth/CoreBlueprints/Items/Artifacts/PrimalItemArtifact_12.PrimalItemArtifact_12'" 1 0 0 | cheat giveitem "Blueprint'/Game/PrimalEarth/CoreBlueprints/Items/Artifacts/PrimalItemArtifact_07.PrimalItemArtifact_07'" 1 0 0 | cheat giveitem "Blueprint'/Game/PrimalEarth/CoreBlueprints/Items/Artifacts/PrimalItemArtifact_02.PrimalItemArtifact_02'" 1 0 0 | cheat giveitem "Blueprint'/Game/PrimalEarth/CoreBlueprints/Resources/PrimalItemResource_ApexDrop_Megalania.PrimalItemResource_ApexDrop_Megalania'" 10 0 0 | cheat giveitem "Blueprint'/Game/PrimalEarth/CoreBlueprints/Resources/PrimalItemResource_ApexDrop_Megalodon.PrimalItemResource_ApexDrop_Megalodon'" 10 0 0 | cheat giveitem "Blueprint'/Game/PrimalEarth/CoreBlueprints/Resources/PrimalItemResource_ApexDrop_Spino.PrimalItemResource_ApexDrop_Spino'" 10 0 0 | cheat giveitem "Blueprint'/Game/PrimalEarth/CoreBlueprints/Resources/PrimalItemResource_apexdrop_theriz.primalitemresource_apexdrop_theriz'" 10 0 0 | cheat giveitem "Blueprint'/Game/PrimalEarth/CoreBlueprints/Resources/PrimalItemResource_apexdrop_thylaco.primalitemresource_apexdrop_thylaco'" 10 0 0
|
ドロップ
- Inventory
| Item | Difficulty | ||
|---|---|---|---|
| Gamma | Beta | Alpha | |
| 40 | 110 | 220 | |
アンロック
- TEKエングラム
Completing the harder difficulties will unlock all of the lower difficulty Tekgrams as well.
- Achievements
 |
雪猿狩りの証/Expert Survivor ARKの2体目の究極生命体を倒した! |
 |
センターの生き残り/Survivor of The Center The Centerのガーディアンを倒しました! |
基本ステータスと成長
| 能力値 | 基準値 | レベルアップ |
|---|---|---|
| 野性生物 | ||
| 180000 | +0 | |
| 650 | +0 | |
| N/A | N/A | |
| 2600 | +0 | |
| 4000 | +80 | |
| 400 | +0 | |
| 100% | N/A | |
| 350 | +21 |
| 移動 [u/s] |
基本速度 | スプリント速度 |
|---|---|---|
| 野生 | 野生 | |
| 歩行 | 960
|
? |
| 水泳 | 360
|
? |
- すべての生物のステータスの比較については、生物の基本ステータスを参照。
- レベルアップの計算が具体的にどのように行われるのかについては、生物の基本ステータスを参照。
- 1これらは100%の移動速度での生物の基本速度です。
- 2これらは生物をテイムし、刷り込みしない場合の速度です。
- すべての生物の速度の比較については生物の基本速度を参照。
| 能力値 | 基準値 | レベルアップ |
|---|---|---|
| 野性生物 | ||
| 396000 | +0 | |
| 650 | +0 | |
| N/A | N/A | |
| 2600 | +0 | |
| 4000 | +80 | |
| 800 | +0 | |
| 100% | N/A | |
| 350 | +21 |
| 移動 [u/s] |
基本速度 | スプリント速度 |
|---|---|---|
| 野生 | 野生 | |
| 歩行 | 960
|
? |
| 水泳 | 360
|
? |
- すべての生物のステータスの比較については、生物の基本ステータスを参照。
- レベルアップの計算が具体的にどのように行われるのかについては、生物の基本ステータスを参照。
- 1これらは100%の移動速度での生物の基本速度です。
- 2これらは生物をテイムし、刷り込みしない場合の速度です。
- すべての生物の速度の比較については生物の基本速度を参照。
| 能力値 | 基準値 | レベルアップ |
|---|---|---|
| 野性生物 | ||
| 540000 | +0 | |
| 650 | +0 | |
| N/A | N/A | |
| 2600 | +0 | |
| 4000 | +80 | |
| 1200 | +0 | |
| 100% | N/A | |
| 350 | +21 |
| 移動 [u/s] |
基本速度 | スプリント速度 |
|---|---|---|
| 野生 | 野生 | |
| 歩行 | 960
|
? |
| 水泳 | 360
|
? |
- すべての生物のステータスの比較については、生物の基本ステータスを参照。
- レベルアップの計算が具体的にどのように行われるのかについては、生物の基本ステータスを参照。
- 1これらは100%の移動速度での生物の基本速度です。
- 2これらは生物をテイムし、刷り込みしない場合の速度です。
- すべての生物の速度の比較については生物の基本速度を参照。
| 能力値 | 基準値 | レベルアップ |
|---|---|---|
| 野性生物 | ||
| 352000 | +0 | |
| 650 | +0 | |
| N/A | N/A | |
| 2600 | +0 | |
| 4000 | +80 | |
| 400 | +0 | |
| 100% | N/A | |
| 350 | +21 |
| 移動 [u/s] |
基本速度 | スプリント速度 |
|---|---|---|
| 野生 | 野生 | |
| 歩行 | 960
|
? |
| 水泳 | 360
|
? |
- すべての生物のステータスの比較については、生物の基本ステータスを参照。
- レベルアップの計算が具体的にどのように行われるのかについては、生物の基本ステータスを参照。
- 1これらは100%の移動速度での生物の基本速度です。
- 2これらは生物をテイムし、刷り込みしない場合の速度です。
- すべての生物の速度の比較については生物の基本速度を参照。
| 能力値 | 基準値 | レベルアップ |
|---|---|---|
| 野性生物 | ||
| 400000 | +0 | |
| 650 | +0 | |
| N/A | N/A | |
| 2600 | +0 | |
| 4000 | +80 | |
| 600 | +0 | |
| 100% | N/A | |
| 350 | +21 |
| 移動 [u/s] |
基本速度 | スプリント速度 |
|---|---|---|
| 野生 | 野生 | |
| 歩行 | 960
|
? |
| 水泳 | 360
|
? |
- すべての生物のステータスの比較については、生物の基本ステータスを参照。
- レベルアップの計算が具体的にどのように行われるのかについては、生物の基本ステータスを参照。
- 1これらは100%の移動速度での生物の基本速度です。
- 2これらは生物をテイムし、刷り込みしない場合の速度です。
- すべての生物の速度の比較については生物の基本速度を参照。
| 能力値 | 基準値 | レベルアップ |
|---|---|---|
| 野性生物 | ||
| 464000 | +0 | |
| 650 | +0 | |
| N/A | N/A | |
| 2600 | +0 | |
| 4000 | +80 | |
| 800 | +0 | |
| 100% | N/A | |
| 350 | +21 |
| 移動 [u/s] |
基本速度 | スプリント速度 |
|---|---|---|
| 野生 | 野生 | |
| 歩行 | 960
|
? |
| 水泳 | 360
|
? |
- すべての生物のステータスの比較については、生物の基本ステータスを参照。
- レベルアップの計算が具体的にどのように行われるのかについては、生物の基本ステータスを参照。
- 1これらは100%の移動速度での生物の基本速度です。
- 2これらは生物をテイムし、刷り込みしない場合の速度です。
- すべての生物の速度の比較については生物の基本速度を参照。
野生生物のステータスのレベルアップ計算機
野生生物の値を入力すると、どのステータスが目立っているかがわかります。高レベルの生物の値が緑色であれば、繁殖には非常に適しています。すでに生物をテイムしている場合は、外部ツールを使って繁殖用のステータスを取り戻すことができます。[1]
Megapithecus (Easy)
stat-calculatorはモバイルビューでは機能しません。代替方法についてはこちらをご覧ください: Apps
生物がテイムされた後は、テイム効果に応じていくつかのステータスにボーナスを得ることに注意してください。このため、テイムされた生物のレベルを取得することは困難です。したがって、このツールは野生生物のみを対象としていますが、ステータスがどのように配分されているかという第一印象を与えることができます。
戦闘
This section describes how to fight against the Megapithecus.
全般
The Megapithecus is an ideal start to taking out the Guardians on The Island due to it being weaker than the ![]() Broodmother and
Broodmother and ![]() Dragon, It dealing no special effects to the player and their tames unlike the other 2 Guardians, and it rewards far more than the Broodmother despite being weaker.
Dragon, It dealing no special effects to the player and their tames unlike the other 2 Guardians, and it rewards far more than the Broodmother despite being weaker.
Like the ![]() Broodmother Lysrix, defeating Megapithecus can be done quickly as long as the correct tames are brought to the battle. Megapithecus has the lowest health of the three main island Guardians, so killing it isn't very hard and can be done even quicker than killing a Broodmother. It can spawn minions in the form of
Broodmother Lysrix, defeating Megapithecus can be done quickly as long as the correct tames are brought to the battle. Megapithecus has the lowest health of the three main island Guardians, so killing it isn't very hard and can be done even quicker than killing a Broodmother. It can spawn minions in the form of ![]() Mesopithecus and
Mesopithecus and ![]() Gigantopithecus. The arena the Megapithecus on The Island lives in is a snow covered mountain temple, so bringing equipment to prevent hypothermia is necessary.
Gigantopithecus. The arena the Megapithecus on The Island lives in is a snow covered mountain temple, so bringing equipment to prevent hypothermia is necessary.
戦略
On The Island, not much strategy is required to defeat Megapithecus other than whistling and attacking. However, precautions must be made to ensure tames don't fall into the large insta-kill hole to the right of the starting area. To avoid this, most tribes do not leave the starting teleport pad and instead lure the Megapithecus over to it, which is much safer and prevents anything from being knocked into the hole. It is recommended to bring Fur Armor, Fria Curry, or high amounts of Fortitude on your character to prevent freezing to death as the arena itself is quite cold. Finally, while it most likely won't be needed, firearms should be brought just in case as a last resort.
In The Center Arena and the Forsaken Oasis, players will have to watch out for the other bosses and their minions.
おすすめのテイム生物
- A
 Yutyrannus or 2 (preferably mate boosted) should always be brought into any arena as it's one of if not the most valuable creature for Boss fights due to its courage roar ability and good stats making them a jack of all trades mount.
 - The common strategy of
 Rex Rushing is almost always a good strategy for almost any boss due to their high health and damage.
 - If players are willing to put the effort into micromanaging their food the
 Daeodon can also be valuable due to their healing ability.
 - A rare strategy that you can do is using mutated Kentrosaurus. Since the Megapithecus has low health and deals a lot of damage, the Kentrosaurus will be very good because it can send back a percentage of the damage it takes to the creature that hit it. Although not the best strategy on its own, it can go well with other creatures present.
- A pack of
 Allosaurus with mate boosts and alpha boosts can be used to take it down.
  Deinonychus are very effective for the Megapithecus and Broodmother boss fights. They receive a pack bonus and they deal a bleed damage that stacks, meaning it does a damage over time that increases every time the boss is hit. This can drain its health very fast, so just be certain to level the pack in health because otherwise they will be killed very fast. Imprinting is recommended.
 Woolly Rhino are also a good choice. You may need 3-4 Woolly Rhinos with 20+ veggie cakes each, and 100% imprint to the player riding it. You will kill the Megapithecus extremely fast, but may need 60+ armour saddles, which are fairly hard to get ahold of. Search purple drops on most maps(besides Aberration) and you can also get them from missions on Genesis: Part 1.
危険
The large hole to the right side of the starting area in the arena can instantly kill ANYTHING. Leaving the starting area is always very risky and dangerous, on top of that if not properly prepared for, players will likely freeze to death due to the temperature.
If a tame is dismounted a Mesopithecus could blind the player, giving enough time for other stronger enemies to potentially kill the player.
弱点
It has the lowest health of The Island bosses on all difficulties; even only having 180,000 on Gamma! This leads to much quicker kill times than other bosses.
The Megapithecus has a very small variety of attacks that don't have any special effects, unlike how the![]() Broodmother Lysrix's web attacks slow players down, or how the
Broodmother Lysrix's web attacks slow players down, or how the ![]() Dragon's fire breath attack lights players on fire. Instead, its attacks consist of: a punch, a double arm slam attack (which in and of itself is just a different attack animation for the punch attack), and a rock throwing ability.
Dragon's fire breath attack lights players on fire. Instead, its attacks consist of: a punch, a double arm slam attack (which in and of itself is just a different attack animation for the punch attack), and a rock throwing ability.
備考
- Its name was originally ??? but was then renamed by the user BlackFish to Megapithecus. (The creator of the Survivors Wildlife Appendix on the steam forums.) Later Wildcard Studios adopted the name and made it official. [citation needed]
- Dossier revealed on 07/24/15
- Its name is similar to that of the Gigantopithecus, and may indicate a relation to this territorial ape.
- The rings surrounding the Megapithecus in its dossier are written in Daedric from The Elder Scrolls series.
- if Megapithecus is tamed using the
forcetamecommand, it cannot sprint, jump, or use its chest-pound animation. - Although the Megapithecus on both Alpha and Beta difficulty (but not Gamma) on The Center can damage all building materials all other Megapithecus variants can only damage Thatch, Wood, and Greenhouse.
- Megapithecus has the lowest health out of any boss on the island only having a very meager 180,000 on Gamma difficulty. On Alpha, it has 540,000 health, which is even surpassed by some bosses on Beta difficulty.
- In the past, the Megapithecus's rock throw was capable of damaging players on mounts and commonly killing weaker players in one hit. This capability was removed (probably due to community frustration) but it received no buff to counterbalance this. Therefore, the Megapithecus is now regarded as one of the easiest bosses in the game due to its fragility compared to other bosses.
- The Megapithecus is the easiest boss to kill, but rewards the player with more Element than the
 Broodmother.
 - The Megapithecus was the only Boss Creature to appear in the base game of Ark Park.
- However, the Dragon was later added into the Pterosaur Hill DLC.
- In the Story Line for Ark Mei Yin used a
 Giganotosaurus to fight and kill the Megapithecus however in game the Giga can't be brought into the Megapithecus arena or any other boss arena.
- The Megapithecus fighting the Giganotosaurus might also be a slight nod to King Kong films as in quite afew of the films Kong is shown fighting dinosaurs similar to Rex or Giganotosaurus (ex. The V-rex is a evolved T-rex, the Gorosaurus resembles a Giga, and Kong fought actual T-rexes).
- The Megapithecus fighting the Giganotosaurus might also be a slight nod to King Kong films as in quite afew of the films Kong is shown fighting dinosaurs similar to
変更履歴
| Patch | 変更点 |
|---|---|
| 240.0 | |
| 240.2 | Reduced the ground shaking caused by the Megapithecus |
| 240.3 | Fixed issue with Megapithecus boss teleporters potentially getting overlapped |
| 254.5 | Improved attack hit detection |
| 258.2 | Fixed Megapithecus boss arena boundary |
| 259.0 | Colorized boss health to indicate boss difficulty |
| 261.0 |
|
| 262.0 |
|
| 263.0 | Fixed a case where the Megapithecus would float and walk backwards, unable to attack anything |
| 278.2 | Adjusted the Megapithecus boss on The Center so that it now matches the one on The Island |
| 316.18 | Element reward from The Island bosses & The Center has been increased by 100% |
スポットライト
ギャラリー
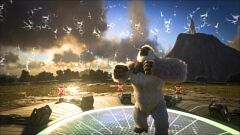
Official promo image from the Survival of the Fittest: The Last Stand
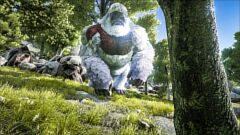
Official promo image from the Survival of the Fittest: The Last Stand


参照資料
| 生物 |
|---|
|
カテゴリ:
- DynamicPageList3のdplvarパーサー関数を使用しているページ
- Tabberパーサータグを使用しているページ
- スクリプトエラーがあるページ
- Pages setting LuaCache keys
- Spoiler
- ボス
- 空想生物
- 哺乳類
- 攻撃的な生物
- テイムできない生物
- ブリーディングできない生物
- 気絶耐性のある生物
- 糞を落とさない生物
- 生物
- Citation needed
- 未翻訳