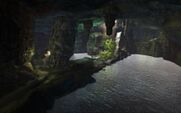
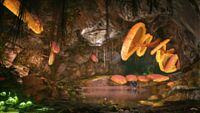
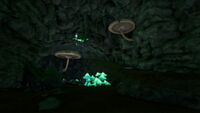
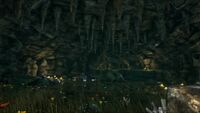
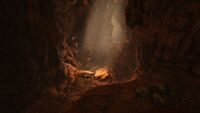
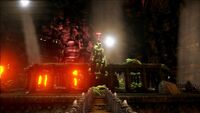
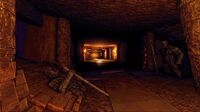
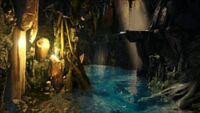
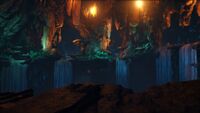
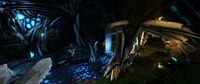
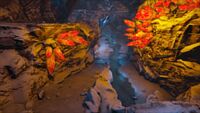
Es gibt zwei Typen von Höhlen die man in ARK finden kann: Artefakt Höhlen und Ressourcen Höhlen, die zuletzt genannten findet man unter Wasser auf den Karten The Island und in den meisten Regionen auf Ragnarok. Einige sind einfach zu erkunden, andere extrem schwer. Solltest du den Gefahren der Höhlen gewachsen sein, wodurch auch immer, enthalten alle eine Vielfalt an Ressourcen.
Progression Caves
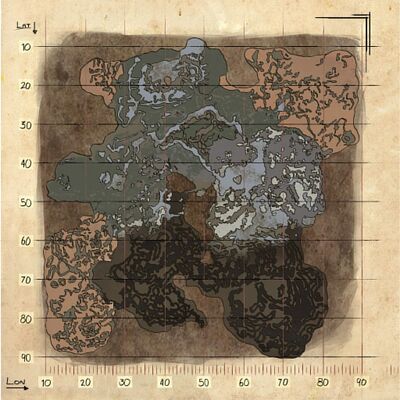
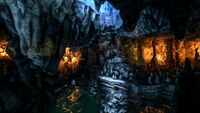
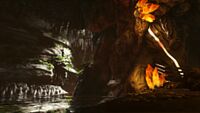
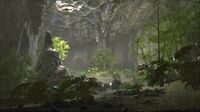
The Island Caves:
-

Central Cave
-

North West Cave
-

Lower South Cave
-

North East Cave
-

Upper South Cave
-

South East Cave
-

Swamp Cave
-

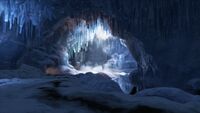
Snow Cave
-

Caverns of Lost Hope
-

Caverns of Lost Faith
-

Tek Cave
Locations
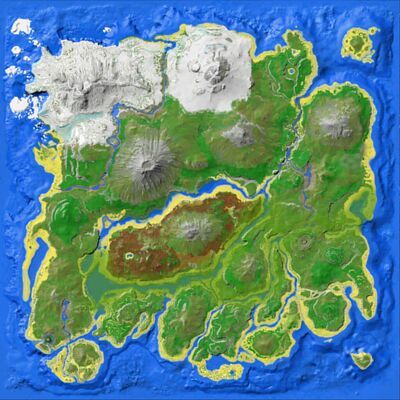
Difficulty: Green = Standard; Red = Hard; Cyan = Standard Underwater; Blue = Hard Underwater.
Vorlage:Dynamic coordinate
Vorlage:Dynamic coordinate
Vorlage:Dynamic coordinate
Vorlage:Dynamic coordinate
Vorlage:Dynamic coordinate
Vorlage:Dynamic coordinate
Vorlage:Dynamic coordinate
Vorlage:Dynamic coordinate
Vorlage:Dynamic coordinate
Vorlage:Dynamic coordinate
Vorlage:Dynamic coordinate
Coordinates
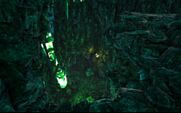
Kreaturen
Beachte das die Kreaturen in "schwierigen Höhlen" in sehr hohen Levels auftreten (oft über Level 250), und das diese Kreaturen nicht zähmbar sind. Kreaturen in den Höhlen des verlorenen Glaubens sind ebenfalls nicht zähmbar, erscheinen dort aber mit normalen Levels.
- Terrestrial Entrances
- Underwater Entrances
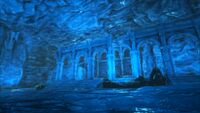
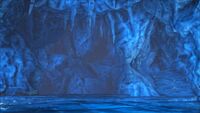
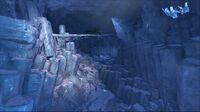
Resource Caves

|
Resource Caves are referred to as "Underwater Caverns" in ARK: Survival Evolved Mobile
|
Cavern: A cave, or a chamber in a cave, typically a large one.
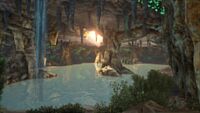
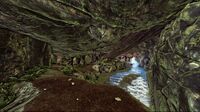
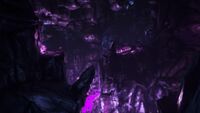
Derzeit gibt es auf The Island 12 Ressourcenhöhlen, die alle unter Wasser zu finden sind. Diese Höhlen können oft schwer zu finden sein, enthalten aber oft eine dichte Ansammlung von Silica Pearls und Oil, obwohl letztere weniger Öl liefern als Quellen, die anderswo im Spiel zu finden sind. Der einzige Hinweis auf die Position von der Oberfläche ist ein kleiner Blasenfluss, der als dünne weiße Linie erscheint. Bei niedrigeren Grafikeinstellungen ist von der Oberfläche um den Höhleneingang herum ein graues Kästchen auf dem Meeresboden zu sehen.
Die Eingänge zu den Ressourcenhöhlen sind auch oft Spawnregionen für Plesiosaur, die gerne in der Gegend herumlungern, ebenfalls einzelne Mosasaurus, welche sich gerne in der Nähe von Plesiosauriern aufhalten.
Coordinates
- Creatures
- Resources
 Silica Pearls
 Oil
Oil Crystal
The Center Caves:
-
Jungle Cave
-
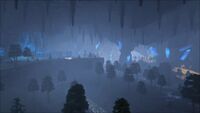
North Ice Cave
-
South Ice Cave
-
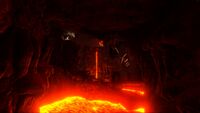
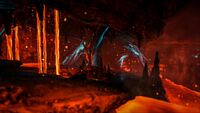
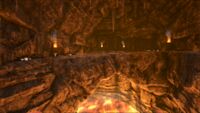
West Lava Cave
-
East Lava Cave
-
Southeastern Trench
-

The Center Cave
-
Cliffside Cavern
-
Underground World
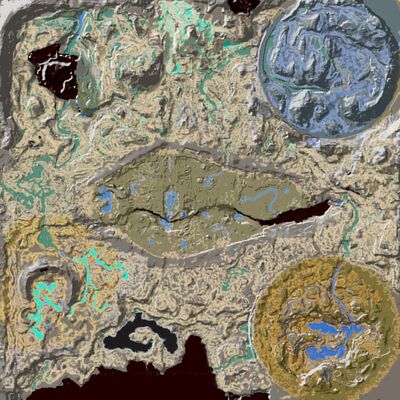
Locations
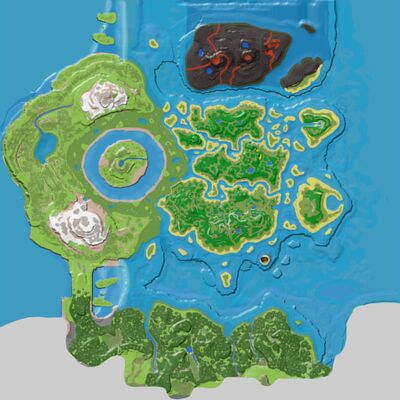
Difficulty: Green = Standard; Red = Hard; gray = unknown difficulty; Cyan = Standard Underwater
Vorlage:Dynamic coordinate
Vorlage:Dynamic coordinate
Vorlage:Dynamic coordinate
Vorlage:Dynamic coordinate
Vorlage:Dynamic coordinate
Vorlage:Dynamic coordinate
Vorlage:Dynamic coordinate
Vorlage:Dynamic coordinate
Vorlage:Dynamic coordinate
Vorlage:Dynamic coordinate
Vorlage:Dynamic coordinate
Vorlage:Dynamic coordinate
Vorlage:Dynamic coordinate
Vorlage:Dynamic coordinate
Vorlage:Dynamic coordinate
Vorlage:Dynamic coordinate
Vorlage:Dynamic coordinate
Vorlage:Dynamic coordinate
Vorlage:Dynamic coordinate
Vorlage:Dynamic coordinate
Vorlage:Dynamic coordinate
Coordinates
Jungle Cave
Coordinates
The Center Cave
Coordinates
Cliffside Cavern
Coordinates
Underground World
Coordinates
Creatures
- Missing.
Kleine Höhlen
Coordinates
Scorched Earth Caves:
-

Grave of the Tyrants
-

Old Tunnels
-

Ruins of Nosti
Locations
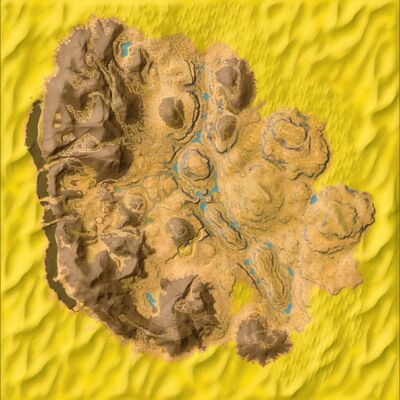
Green = Standard Difficulty
Vorlage:Dynamic coordinate
Vorlage:Dynamic coordinate
Vorlage:Dynamic coordinate
Coordinates
Kreaturen
Beachte das Achatina als hohe Level Kreaturen erscheinen und nicht zähmbar sind, ähnlich wie die Kreaturen in den Sumpf- und Schneehöhlen von The Island.
Ragnarok Caves:
Diese Seite listet nur die Verließe und wichtigen Höhlen von Ragnarok. Für eine Liste mit allen Höhlen in Ragnarok besuche bitte diese Seite: Caves (Ragnarok)
Locations
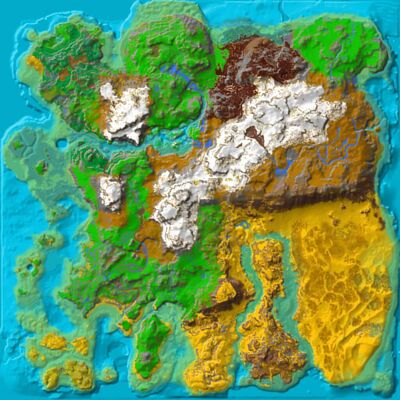
Green = Standard; Red = Hard; gray = unknown difficulty
Vorlage:Dynamic coordinate
Vorlage:Dynamic coordinate
Vorlage:Dynamic coordinate
Vorlage:Dynamic coordinate
Vorlage:Dynamic coordinate
Vorlage:Dynamic coordinate
Coordinates
Kreaturen
Beachte das alle Kreaturen in diesen Höhlen sehr hohe Level haben und nicht zähmbar sind, ähnlich wie die Kreaturen in den Sumpf- und Schneehöhlen von The Island.
Aberration Caves:
-

Old Railway Cave
-

Hidden Grotto
-

Elemental Vault
Locations
Green = Standard; Red = Hard; gray = unknown difficulty
Vorlage:Dynamic coordinate
Vorlage:Dynamic coordinate
Vorlage:Dynamic coordinate
Coordinates
Kreaturen
Extinction Caves:
Locations
Green = Standard; Red = Hard; gray = unknown difficulty
Vorlage:Dynamic coordinate
Vorlage:Dynamic coordinate
Vorlage:Dynamic coordinate
Coordinates
Creatures
Tips

|
Diese Seite ist veraltet. Bitte hilf mit, indem du sie aktualisierst, wenn du kannst.
Die Diskussions-Seite enthält vielleicht mehr Informationen.
|
Höhlen auf der Oberfläche
These are general cave tips. For tips on specific caves, please visit their individual pages.
- Take
 Stimberry or better yet
  Stimulants and
  Water Jars or if you are a high enough level
  Canteen. Some progression caves require multiple Canteens.
- Hide or Fur armor is helpful for many, but not all caves. Chitin is great if you have an available Smithy.
- Set up a small base at the beginning of a cave with a
 Simple Bed and a chest with tools, weapons, armor, a
  Smithy and a
  Refining Forge. If possible, in single player you can use a
  Argentavis as a smithy IN the cave. Or on multiplayer you can use a
  Castoroides
- Most of the creatures found in caves are mostly non-tamable (mostly
 Achatina), except for a few cases or caves such as
  Megalosaurus,
  Dung Beetle or
  Glowtail.
 Grappling Hooks are useful for avoiding creatures, getting a good vantage point, and to not have to bring foundations and ceilings to bridge gaps. However, not all caves will permit its uses.
- In some caves that are very tough, one may use a
 Auto Turret on Wild Creatures to clear the cave to make it easier. However, be mindful as some respawn area will immediately respawn creatures the instant the area is brought to stasis.
- Flyers brought into the cave under any method will not be mountable, even with saddle.
- Aberration
 Climbing Picks and
  Glider Suit are also a big help even though all caves can be traversed without these.
 Cryopod allows bringing of creatures into previously inaccessible area due to the opening of the caves. However, some creatures that are too big to fit inside will not be released out of the cryopod, or will be too big to advance anywhere.
Unterwasserhöhlen
- Lazarus Chowder will decrease the needed Oxygen while underwater and allow you to dive for longer times, making it easier to find the entrance. A
 SCUBA Tank or a powered
  Tek Helmet could also help with this, then no oxygen is ever needed!
- Riding a Megalodon can help against other Sharks and allows you a very quick movement in the Water. They are also a good way to spot the bubbles from the surface. In an earlier version, there seemed to be a problem with taking your Shark into the Cave. However, Megalodons can now enter the underwater caves without issue .
- If you have a Tribemate with a Pteranodon or Argentavis, he or she can transport you directly to the location of the cave and drop you down, avoiding most of the swim, and with that, most of the Megalodons on the way to the cave. Once finished the Pteranodon or Argentavis can pick you up again from the water surface. This is also a very resource friendly method, as it allows you to go down with minimum armor and weapons, as fighting can be reduced to a minimum. That way, the loss of dying is less of a setback. This method does, however, require you to have found the entrance beforehand.
- Riding a Sarco allows you to use a single mount as he can move quick in both water and ground. Moreover, it's faster than a Megalodon, has near instant stamina regeneration under water and can fit in most underwater caves, making it safer while gathering resources.
- As of patch 246, Eurypterids can spawn in groups (3-5 at once) in even small underwater caves. Be prepared to deal with their stings!
- Extinction Cryopod allows bringing of creatures into previously inaccessible area due to the opening of the caves. However, some creatures that are too big to fit inside will not be released out of the cryopod. Care for the Cryo Cooldown though (due to possible constant uses), as wild dinos inside the caves that are aggressive will still attack dino under Cryo Sickness, which will result in a swift death due to damage multiplier towards dino under that state.
Notes/Trivia
- There is a large flat faced rock that looks like it could be a cave entrance on the South haven island cliff face. Could be another cave in the future.
- Building a base in an underwater cave will stop resource spawning in that cave.
- In the North Ice Cave on The Center, one of the two parts (the part with the Artifact of the Devourer) of the cave's crystal nodes are invisible (can still be farmed normally with a pick).
- This is especially detrimental when trying to get to one of the places that spawns a loot crate, which is along a long, thin corridor that is littered with spiders, wolves, sabertooths, and Yetis (possibly one of the most concentrated areas of aggressive creatures in the game).
- These nodes can block movement, bullets, arrows, etc. but can be helpful as it blocks some creatures against walls, while other nodes can act as walls, allowing you to be unseen as long as it is between you and a creature.
- When holding the “H” key, you can see that each cave has its own location. The Tek Cave is “The Belly of the Beast.” The South East cave is “Lava Cave.”
- In Aberration, there was supposedly a fourth cave planned, but was eventually scrapped after the DLC is released. The names still exist in the database, however. This makes it the first and only official cave to not be implemented into the official DLC map.
v · d · eLocations  |
|---|
| | Displayed are the locations for The Island. For locations found in DLCs, please see The Center, Scorched Earth, Ragnarok, Aberration, Extinction, or Valguero. | | | Maps |
Resource Map • Explorer Map • Creature Spawn Map | | | Plains |
Eastern Plains • The Frigid Plains • Western Plains | | | Islands |
Cragg's Island • Dead Island • Footpaw • Southern Islets • South Haven | | | Mountains |
Far's Peak • Frozen Tooth • Grand Hills • Red Peak • Volcano • Weathertop • Whitesky Peak • Winter's Mouth | | | Beaches |
Northeast Shores • Northern Shores • Southeastern Shores • Western Coast • Western Approach | | | Forests |
Eastern Forest • Southern Jungle • Redwood Forests | | | Other |
Deep Island • Derilect Ship • Drayo's Cove • Gulch of Lamentation • Hidden Lake • Ice Wyrm's Belly • Shadow Road • The Maw • Throat of Borea • Throat of Flame • Smuggler's Pass • The Writhing Swamps | | | Ruins |
Beach Ruins • Jungle Ruins • Mountain Ruins • Redwood Forest Ruins • Snow Ruins • Swamp Ruins | | | Caves |
Caverns of Lost Hope • Caverns of Lost Faith • Central Cave • Lava Cave • Lower South Cave • North East Cave • North West Cave • Snow Cave • Swamp Cave • Tek Cave • Upper South Cave | | | Arenas |
Broodmother Arena • Dragon Arena • Megapithecus Arena • Overseer Arena |
|
v · d · eLocations in the DLC: Extinction  |
|---|
| | Angezeigt werden die Positionen für die Bereiche in Extinction. Die Positionen auf anderen Karten finden Sie unter The Island, Scorched Earth, Aberration, The Center, oder Ragnarok. | | | Karten |
Resource Map • Explorer Map • Creature Spawn Map | | | Domes |
Desert Dome • Snow Dome | | | Ebenen |
Badlands • Giants Steppes • Hulterel Plains • Lowlands • Sulfur Fields • Wasteland | | | Ruinen |
Barracks • Beckette's Bridge • Beckette's Other Bridge • Bracken Institution • Camp Omega • Control Center • Control Room • Delta Tower • Diana Memorial Fountain • Dome Treatment • Exposed Dome • Fallen Tower • Fort Nova • Memorial • Memorial Park • Obelisk Park • Old Ruins • Relic Of The Past • Sanctuary • Sanctuary Obelisk • Sanctuary Park • Sanctuary Parkway • Santiago's Grave • Station • UnderForest Ruins • Water Main | | | Other |
Beckette's Falls • Blood Hollows • Cassinese River • Core • Corrupted Den • Corrupted Terminal • Crater • Crater Runoff • Crimson Falls • Crystal Falls • Crystal Path • Crystal River • Flodded Pond • Flooded Waterway • Frozen Approach • Frozen Falls • Frozen Grotto • Frozen Lake • Frozen Lens • Frozen Tundra • Geiser Falls • Geiser Springs • Hideout • Hopeless Ravine • Ice Tail River • Ivory Gulch • Lowlands Runnoff • Memorial Waterfront • Narrows • Outlook • Ribcage • Searing Springs • Secluded Lake • Sludge Basin • Spire River • Striker's Landing • Striker's Point • Thundering Basin • Treatment Runnoff • Underbelly • Vile Straight | | | Mountains, Plateaus, & Cliffs |
Arid Steps • Carver Rock • Crater Pass • Eroded Pass • Forbidden Zone • Gallanwell Pass • Glaicer Pass • Grey Fist Mountain • Grip of Torment • Jagged Lookout • Loose Rock Ridge • Lower Spires • Mt. Bracken • Overpass • Picholm Mountain • Sweeping Spires • Trench • Spire Lookout • Western Ramp • Wisp Vile Ridge | | | Caves & Dungeons |
| Höhlen |
Crater Forest • UnderForest | | | Dungeons |
Desert Cave • Forest Cave • Ice Cave |
| | | Arenen |
| Mini-Bosses |
Desert Titan Arena • Forest Titan Arena • Ice Titan Arena | | | Bosses |
King Titan Arena |
|
|
| v · d · eGameplay Mechaniken |
|---|
| | Spiele/Franchises | | | | Bauen & Entwicklung | | | | Gegenstände | | | | Umgebung |
Spielmodi • Einzelspieler • Survival of the Fittest • Spielpersistenz • Umwelt • Schwierigkeitsgrad | | | Erforschen |
| | | Charakter |
| Charakter |
Level • Engramme (Mobile, P+) • Überlebender-Profil • Emotes • Pfeifen • Frisuren • HUD | | | Attribute | | | | Zustand | |
| | | Kreaturen |
| Domestizierung |
Zähmen • Domestizierung • Aggressionslevel • Züchten • Mutationen • Brüten • Prägung • Partnerbonus • Gewichtsreduzierung | | | Statuswerte | | | | Attribute |
Energie • Maximale Ladung • Ladungsregeneration • Leuchtradius | | | Datenlisten | | | | Anderes |
Temperament |
| | | Verschiedenes |
Erfolge • Chat • DLC • Waffenmechaniken • Stasis • Raptor Claus |
|

 Angler
 Arthropluera
 Dilophosaur
 Direwolf
 Dung Beetle
 Kairuku
 Megalania
 Megalosaurus
 Meganeura
 Onyc
Onyc Phiomia
 Piranha
 Sarco
Sarco Scorpion
 Spider
 Titanoboa
 Trilobite
 Yeti
Yeti Achatina
 Cnidaria
 Coelacanth
 Dunkleosteus
 Eurypterid
 Ichthy
 Manta
Manta Megalodon
 Mosasaurus
 Sabertooth Salmon
 Tusoteuthis


