Eeyore's Guides
| Prodigy Gaming | ||
|---|---|---|
| ARK | Evolved Cluster | Coin Shop • Guides |
- Apologies for dyslexia. Every time I re-read this I fix more mistakes.
Animals of Atlas
- Future releases
- Abominable
- Anglerfish
- Cobra
- Crocodile
- Livyatan (will be an underwater Titanosaur/raiding dino)
- Olfend
- Rabbit
- Rattlesnake
- Roc
- Seagull
- Stegadon (Shieldhorn)
- Tortugar
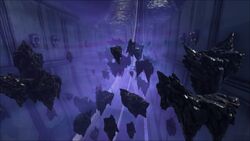
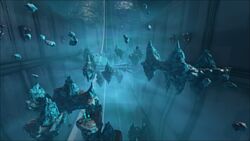
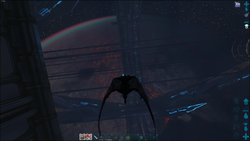
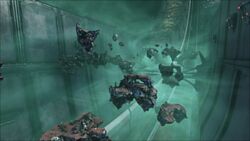
Asteroids (Genesis 2)
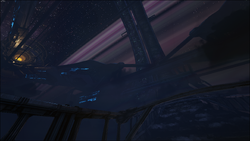
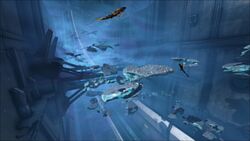
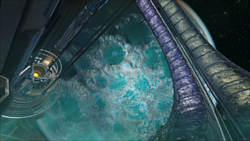
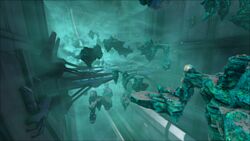
At midnight at the start of each in-game day, the Genesis Ship will enter warp and arrive at a new location at 1:30am. Each location affects the available asteroids that survivors can harvest within space, which can be determined remotely using the skybox or supply crates.
| Supply Crate color | Skybox and Asteroids | Available resources |
|---|---|---|
| Yellow | ||
| Purple |
| |
| Red | ||
| White | ||
| Cyan |
| |
| Orange | ||
| Green | ||
| Blue |
Tames that have harvest restrictions still apply. For example, the ![]() Doedicurus and
Doedicurus and ![]() Gacha will get
Gacha will get ![]() Stone and
Stone and ![]() Flint respectively, instead of the usual primary resource.
Flint respectively, instead of the usual primary resource.
Base Loading Jitter / Spawning Under Your Base
Alas, this is caused by Wild Card attempt at optimization.
- Possible Solutions
- Just wait an extra 30 seconds before you try to do anything. The moment your character snaps to where you should be - you're ready.
- Limit your Client Network Bandwidth in your Advance Settings (I have mine set to 40 KB/s - by default it's on maximum). This may also help if you get lag while flying around the map. It limits how much of your bandwidth is used to download structures - so it'll download less at once, but it means you're less likely to disconnect or crash due to the server thinking you've timed out.
- Place a bed outside, on the ground and away from your main base (e.g. at the edge of your claim). The game seems to load better if your loading structures from the outside-in (as oppose to the middle-out). The base may still load slowly, but it should load it as you approach it and be in a useable-state more quickly.
Blueprint Caps
| Item | Max. Armor | Max. Durability | Max. Cold Resist | Max. Heat Resist |
|---|---|---|---|---|
| Cloth Armor | 141.1 | 434 | 112.9 | 211.6 |
| Hide Armor | 282.1 | 782 | 282.1 | NEG |
| Chitin Armor | 705.3 | 869 | 141.1 | NEG |
| Ghillie Armor | 451.4 | 782 | 112.9 | 423.2 |
| Desert Cloth Armor | 564.3 | 782 | 112.9 | 352.7 |
| Fur Armor | 564.3 | 2086 | 916.9 | NEG |
| Hazard Suit | 916.9 | 1486 | 141.1 | 846.4 |
| Flak Armor | 1410.7 | 2086 | 211.6 | NEG |
| Riot Armor | 1622.3 | 2086 | 211.6 | NEG |
| Tek Armor | 1949.4 | 1500 | 211.6 | NEG |
| Gasmask | 0 | 869 | 141.1 | NEG |
| Heavy Miner's | 1692.8 | 2086 | 141.1 | NEG |
| SCUBA Flippers | 0 | 782 | 211.6 | NEG |
| SCUBA Legs | 70.5 | 869 | 2821.4 | 0 |
| SCUBA Mask | 0 | 782 | 211.6 | NEG |
| SCUBA Tank | 0 | 782 | 564.3 | NEG |
| Wooden Shield | 0 | 6084 | ||
| Metal Shield | 0 | 21729 | ||
| Riot Shield | 0 | 39982 | ||
| Tek Shield | 14.1 | 39982 | ||
| Saddles | 352.7 | N/A | ||
| Tek Saddles | 634.8 | N/A | ||
| Ape Armor | 211.6 | N/A | ||
| Enforcer Shield | 352.7 | N/A | ||
| Valyrian Reins | 141.1 | 10 |
Breeding for Mutations
- Glossary
- Clean - 0 mutations
- Cut / Spayed / Neutered - Unable to breed or be cloned
- Quick Guide
- 1 Clean Male + 7-14 Clean Females + 2 S+ Mutator Pulses (or 4 on Scorched Earth and The Center)
- Breed your creatures - incubating or gestating as required.
- Raise your babies and check for mutations with the spyglass to see who will be the next male, in whatever order you want (some people like to raise all and pretend they'll use/sell the rejects later even though they never do).
- Use the Soul Terminal's baby-catcher to pick-up the new-borns and then you can check for mutations in the Soul Pods and only grow the one you need.
- Put the eggs in an Incubator and destroy any eggs you don't want.
- Swap to male (if necessary)
- 1 Mutated Male + 7-14 Clean Females + 2 Mutator Pulses
- Cycle steps from step 2.
Once you exceed 20 mutations on the male, you might wanna increase the number of females (e.g. 14-21). Why? I'll explain below.
It is generally recommended to focus on one stat at a time and then combine their stats at the end.
- Quick Guide with S+ Propagator
- 8-14 clean creatures in the S+ Propagator plus Element (variable cost)
- Click "Set all to female" and type the number of mutator pulses you want. Enable breeding if necessary.
- Check the S+ eggs for the mutation you're looking for - incubate, hatch and raise it.
- You can Right-Click and Transfer to Nearby Incubator. Then Right-click and Destroy All.
- You can enable Auto-Dropping on the Propagator and then check the eggs when they're in the Incubator.
- You can enable Auto-Dropping and Auto-Hatching on the Incubator and then check the babies.
- 1 mutated creature + 7-13 clean creatures in the S+ Propagator and cycle steps from step 2.
If you get lucky, there's a maybe-bug-maybe-feature where your creatures won't go on cooldown in their soul pod. Take any one thing out and put it back in, and you can breed the same females again - because the propagator's internal cooldowns are cleared when the contents is changed.
How does the mutation counter work?
Examples:
- Male (0/20) + Female (0/20) = Baby (Paternal 0/20; Maternal 0/20 with a chance for a mutation, e.g. 1/20)
- Male (1/20) + Female (2/20) = Baby (Paternal 1/20; Maternal 2/20; chance for a new mutation)
The mutations (in ancestry/soul pod UI) is just a counter. Paternal and Maternal just mean THE TOTAL NUMBER of mutations the father had and the mother had, respectively - i.e. Paternal is the sum if its grandparents. Paternal doesn't mean "patrilineal". Just because the baby has a total of 3 mutations doesn't mean it actually has any of the mutated stats - but it will still pass 3/20 to its children. The counter increases additively - every time you breed mutated creatures together, their baby will have the sum of their mutations. You've probably seen printscreens of people with 123565125/20 mutations. It doesn't mean they have good stats - it could be level 1!
Once the mutation counter exceeds 20: that creature is very unlikely to provide any new mutations to its offspring. It's not impossible - the wiki has the odds for official. However, it's not entirely known how the S+ Mutator's "guaranteed" mutations interacts with those odds (so it's easier to just *act* as if they cannot provide new mutations going forward so has not to be confusing).
Quick facts:
- Babies have a higher chance of getting the "better" wild stat from its parents (domesticated experience/levels are completely irrelevant).
- Either parent can provide a mutation (i.e. a maternal or paternal mutation) - so if you breed a Male (32/20) with a Female (0/20), you can still get offspring with a new mutation.
- 1 Mutation is worth +2-8 wild levels depending on the number of mutators. The number of mutators does not increase how quickly the counter goes up.
It is possible for a baby to inherit the weaker stat between its parents and then gets a mutation on that stat - i.e. you may get babies with stats in the middle of its parents. It's also worth stressing that "maternal mutation" doesn't mean that it was the mother's stat that mutated - you can get a +4 Melee "maternal mutation" on the paternal melee stat. It might be easier to imagine this as D&D character creation:
- Toss a coin for each stat to see whether you get the mother's or father's.
- Toss a coin to see if you get a mutation: heads is maternal and tails is paternal. (This analogy only works with S+'s guaranteed mutations.)
- Once a parent exceeds 20 mutations - their side of the coin becomes blank and you will fail to get a mutation if the coin lands on that side (yes, even when "guaranteed" it will fail).
- Assuming your creature has the standard number of stats, roll a D7 to see which stat gets the mutation. (Some creatures may have more or less stats - e.g. for a Tek Stryder you'd roll a D5 and for a Gacha you'd roll a D8). This is why you I recommend using between 7-14 females.
- Rolling Movement Speed will increase the creature's total level and torpor but will not affect its base movement speed. Wild Speed cannot be increased except by Imprinting Bonus.
- Mutations almost always come with a colour mutation. This colour mutation might be to an unused region and be invisible.
This is why you only replace the male each time and it's good to keep them named to keep track (e.g. Melee Mute 32). By keeping the females clean - you always have at least one chance of getting a mutation. Remember you can gender swap the baby - so it doesn't need it to be born male. By only updating the breeding-male: only the paternal counter increases. (To reiterate: once you reach 20/20 on the male - the progress will become slower because you lose the paternal dice roll for a mutation.)
Creature Variants
- Aberrant
- 4% less health
- 6% more damage
- Unique texture and colours
- Glow in the dark
- Max level: 150 (wild) + 50% wild (74 at 99% taming efficiency) + 73 (from domesticated levels)
- Corrupted (KBD Costume)
- Grants 40% resistance versus hostile corrupted creatures
- Reduces aggression-radius of hostile corrupt creatures to ~3 foundations
- Costume degrades if not powered by Nodules or Polymer
- Corrupted (Structures Plus; discontinued)
- Resets experience to 0.
- Gains the stats and buffs of wild Corrupt creature. The exact information on this is scarce, but generally:
- Modifies aggression tables (i.e. what aggros onto you)
- Ignores damage resistance (definitely natural armour; unclear if saddle armour)
- Take increased damage from certain creatures
- Unable to damage certain enemies (e.g. King Titan and Giga Experiment).
- Radical
- 3% less health
- 5% more damage
- Unique texture and colours
- Max level: 150 (wild) + 50% wild (74 at 99% taming efficiency) + 73 (from domesticated levels)
- Tek (KBD)
- 2% resistance
- 2% more damage
- Unique model and colours
- Max level: 180 (wild) + 50% wild (89 at 99% taming efficiency) + 73 (from domesticated levels)
- Corpses give scrap, oil, electronics and dust
- Defecate Bio Oil
- Xtreme
- 3% less health
- 5% more damage
- Biome-specific textures and colours.
- Max level: 150 (wild) + 50% wild (74 at 99% taming efficient) + 88 (from domesticated levels)
- Earn 2.5x experience.
- Wild X-Creatures also get an obscene buff to damage and resistance.
Hauling Cargo
Have you ever:
- Wanted to move your base location and don't know how to transfer huge amounts of resources?
- Wanting to transfer large amounts of items to another map and think "there must be an easier way to do this - ARK Data is so slow!"?
- Gotten yourself over-encumbered just out of range of your mount?
You should really check out the Info on the S+ Omni Tool! However...
- The S+ Omni Tool's Basic Transfer allows you to move items from one container to another.
- The S+ Omni Tool's Advanced Transfer allows you to pick which resources to move where.
You may have noticed you can't Transfer more than 2x your carry weight (this is called being "over-encumbered"). Many players quickly realize that their ankylo can keep farming metal even after its over-encumbered - and use a high-weight argentavis to carry it around. The same is true for survivors too. The only limit to the amount a survivor or creature can carry is the slot cap - which is 300! You'll see a black anvil on your screen when slot-capped.
- Generating new items (picking up, crafting, harvesting) will delete items in excess of the limit.
- S+ Transferring won't let you perform transfers to slotcapped targets - it won't delete anything.
- WARNING: S+ Transfers won't check carry restrictions when transferring, so NEVER Advance Transfer more than 1 artefact to personal or a creature's inventory and NEVER S+ Transfer Element or Element Shards into a Hover Skiff.
Item caches have a slot cap of 600. If something is destroyed with more than 600 slots: the excess is deleted.
- You can use the Omni Tool's Basic Transfer or Advanced Transfer to reduce the slot count below 600 stacks before moving the structure.
- This is with the exception of vanilla Dedicated Storage, which will instead drop multiple caches nearby.
- WARNING: S+ Dedicated Storage are not exempt. Picking up an S+ Dedicated Storage will delete any stacks in excess of 600.
- Speaking of - the vanilla Dedicated Storage is a completely different structure and you should definitely check it out. It can hold anything that doesn't spoil or degrade - artefacts, tribute, cosmetics, dyes, etc. It doesn't have a consolidate option, though.
Here's some tips for hauling cargo in ARK:
- You can
Press E to Pickup / F all nearbyitems on the ground in excess of your carry weight. Throw items into a pile on the ground and then pick them all up. - You can also use a whip to do this with more range, but it's not very good at picking up things that are half-in-foundations.
- Speaking of whips, did you know that you can use a whip to move creatures that are over-encumbered?
- Did you know that you can the power-walking ability of Tek Legs can be used while over-encumbered to move at walking speed?
- You can actually use all Tek abilities while over-encumbered - but you still cannot jump so you cannot engage the jetpack by jumping. But you can also engage flighting by falling off of something or using the powerfist upwards.
- Did you know that the toggle-run key will toggle-jetpack? Give your finger a break!
- You can actually use all Tek abilities while over-encumbered - but you still cannot jump so you cannot engage the jetpack by jumping. But you can also engage flighting by falling off of something or using the powerfist upwards.
Got access to tek?
- Teleporting a Platform Saddle will also teleport all of the containers on its back. You can get yourself a mammoth, pile loads of boxes on its back and then teleport to your new base location. Remember, there is no weight limit - only the slot limit! The mammoth can carry as many slot-capped boxes as you can fit onto the platform (up to the platform structure limit, obviously).
- If available to you (always worth checking if someone has their S+ Network public), did you know that by pressing G while using the Omni Tool's Teleport you will create a small bubble that teleports all nearby allied survivors and creatures!
- S+ Tek Storage and Dedicated Storage apply an over 90% weight reduction to items in their inventory. This allows your platform saddles to support A LOT more weight - if you don't have access to the teleporter, or want a mobile farming platform.
- The Omni Tool's Basic Transfer only checks the weight of items in the source when determining the maximum amount to transfer to a survivor (usually limited at 2x carry weight). If you Basic Transfer *from* one of those Storage Boxes - the target will receive many more stacks than you would normally be able to transfer.
- Did you know that the Grab (default 'G') hotkey will transfer FROM your target TO YOU? For most resources, you can quickly grab your slot-cap of resources and then teleport - it will stop transferring when you reach the cap.
Items in your inventory will be transferred when you hop map (with some exceptions). Rather than wait to upload 50 things to ARK Data - just slot-cap yourself and transfer!
- WARNING: Always put a few ~20 stacks back. The slot limit in-game does not include your equipped items and the items on your hotbar - but ARK Data does! This usually results in your equipped items or hotbar being deleted until you're below the limit.
- WARNING: You may get disconnected and a message saying "Overflow error". This is fine. Your character transferred successfully. Just log back in on the DESTINATION server and select to download your character.
Kraken's New Dinos
Below are the creatures that Kraken's Better Dinos makes tameable - as a cheatsheet for players coming from a server that's never had modded dinos. The full list of rebalances would be too long to included here, so please check out the mod documentation!
| Creature | Class | Description |
|---|---|---|
| Cnidaria (Jellyfish) | Production |
|
| Eurypterid (Sea scorpion) | Production |
|
| Lamprey | Utility |
|
| Leech | Production |
|
| Liopleurodon | Support |
|
| Meganeura | Utility |
|
| Reindeer | Mobility |
|
| Stygimoloch | Torpor |
|
| Styracosaurus | Bossing |
|
| Trilobite | Production |
|
Loot Tables
- Recent tweaks
- Resources preset now includes Aberration Gems, Achatina Paste, Gunpowder, Sparkpowder, Element and Black Pearls.
- Reagents preset now has less Black Pearls (previously had too many for an otherwise 'lightweight' preset).
- NEW: Consumables loot table.
| Container | Loot Presets |
|---|---|
| |
|
|
| |
| |
| |
| |
|
|
| |
|
|
|
|
|
|
|
|
|
|
|
|
|
|
|
|
|
|
|
|
| |
| |
| |
| |
|
|
|
|
|
|
| |
| |
| |
| |
| |
| |
| |
|
Mod Mismatch
Steam is really bad for checking if there's an update available - but that button very reliably forces a check. It's even more reliable than unsubbing and resubbing to individual mods.
It doesn't matter if you've pressed it before - press it again!
No really.
Seriously, press the button - it'll fetch any updates you're missing.
Passive Generation
It is possible to produce all the following resources passively:
The KBD ![]() Coelacanth passively produces random items from the following resources: Sap, Cementing Paste, Silica Pearls, Polymer, Electronics, Gunpowder, Rhino Horn, Charcoal, Metal, Stone Arrows, Tranq Arrows, Metal Arrows, Tranq Darts, all types of berry, Biotoxin, Leech Blood, Ammonite Bile, Squid Oil, Angler Gel, Sulfur, Sand, Crystal, Obsidian, Clay, Cactus Sap and Absorbent Substrate.
Coelacanth passively produces random items from the following resources: Sap, Cementing Paste, Silica Pearls, Polymer, Electronics, Gunpowder, Rhino Horn, Charcoal, Metal, Stone Arrows, Tranq Arrows, Metal Arrows, Tranq Darts, all types of berry, Biotoxin, Leech Blood, Ammonite Bile, Squid Oil, Angler Gel, Sulfur, Sand, Crystal, Obsidian, Clay, Cactus Sap and Absorbent Substrate.
Shoulder Pet Safety 101
Shoulder Pets are considered to be in-stasis while they are on your shoulder. They cannot drown.
Shoulder Pets will be protected by Death Inventory Keeper.
Don't be afraid to take your companions with you, unless they're of particularly sentimentality.
Tekgrams
Valyrian Reins
- Overview
- Valyrian Reins are crafted in the KBD Workbench.
- The rare material used the recipe is Toughened Hide.
- Note that Toughened Hide is a substitute for Hide, and will be used first if available.
- The Valyrian Reins can be applied to a saddle as a skin or equipped as a costume, unless otherwise stated.
- The "Armor" value only affects those creatures specified below - it is otherwise treated as 0 bonus armor when equipped.
- The "Durability" value affect some of the bonus effects - with 10 being the maximum.
| Creature | Reins Effect |
|---|---|
| Argentavis |
|
| Gasbags |
|
| Griffin |
|
| Ludodactylus |
|
| Lymantria |
|
| Managarmr |
|
| Pelagornis |
|
| Ptera |
|
| Quetz |
|
| Rock Drake |
|
| Snow Owl |
|
| Tapejara |
|
| Tropeognathus |
|
| Wyverns |
|

