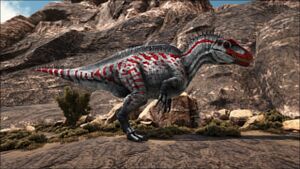
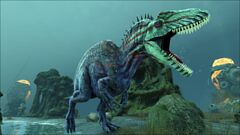
Acrocanthosaurus
admincheat SpawnDino "Blueprint'/Game/Mods/Additions_Pack/Acrocanthosaurus/Dinos/Acrocanthosaurus_Character_BP.Acrocanthosaurus_Character_BP'" 500 0 0 35
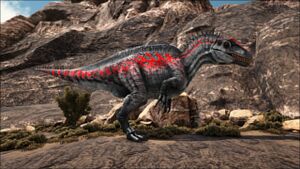
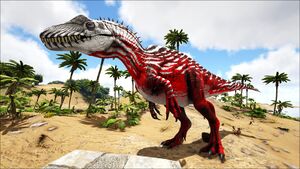
Scorched Acrocanthosaurus
admincheat SpawnDino "Blueprint'/Game/Mods/Additions_Pack/Acrocanthosaurus/Dinos/Scorched_Acrocanthosaurus_Character_BP.Scorched_Acrocanthosaurus_Character_BP'" 500 0 0 35
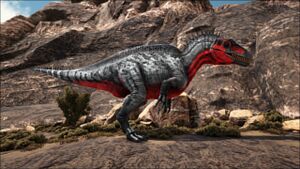
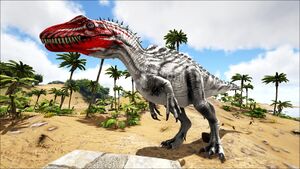
X-Acrocanthosaurus
admincheat SpawnDino "Blueprint'/Game/Mods/Additions_Pack/Acrocanthosaurus/Dinos/Bog_Acrocanthosaurus_Character_BP.Bog_Acrocanthosaurus_Character_BP'" 500 0 0 35
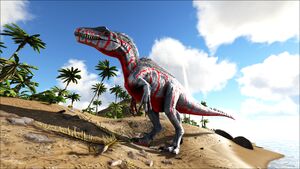
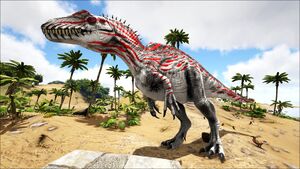
R-Acrocanthosaurus
admincheat SpawnDino "Blueprint'/Game/Mods/Additions_Pack/Acrocanthosaurus/Dinos/Acrocanthosaurus_Character_BP_Eden.Acrocanthosaurus_Character_BP_Eden'" 500 0 0 35
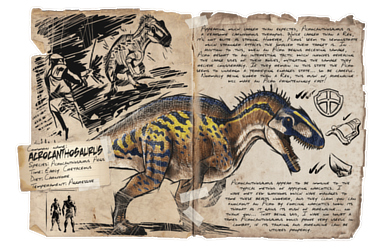
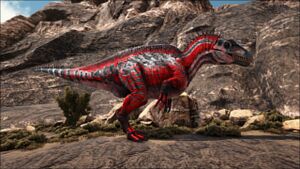
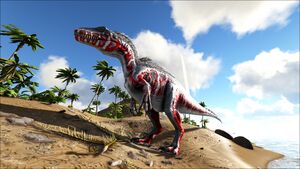
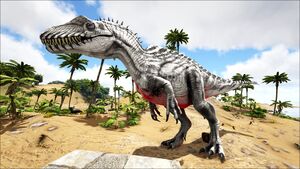
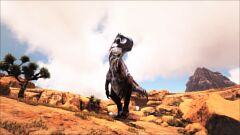
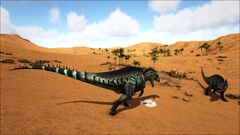
The Acrocanthosaurus or simply Acro is a dinosaur in ARK Additions.
Overview
Dossier
Acrocanthosaurus aegis
TimeEarly Cretaceous
DietCarnivore
TemperamentAggressive
- Wild
Appearing much larger than expected, Acrocanthosaurus is a fearsome carnivorous theropod. While larger than a Rex, it's not quite as strong. However, Acros' seem to demonstrate much stronger attacks the smaller their target is. In addition to this, when an Acro begins receiving damage, Acro resort to an interesting tactic which involves revealing the larger sides of their bodies, mitigating the damage they receive considerably. If they remain in this state the Acro seems to undergo a terrifying enraged state... so be careful. Normally being slower than a Rex, this rush of adrenaline will make an Acro frighteningly fast!
- Domesticated
Acrocanthosaurus appear to be immune to the typical method of applying narcotics. I have met few survivors which have managed to tame these beasts however, and they claim that you can knockout an Acro by forcing narcotics down its throat as it gains its rush of adrenaline... no thank you... That being said, I have no doubt a tamed Acrocanthosaurus would prove very useful in combat, if its tanking and adrenaline can be utilized properly.
Behavior
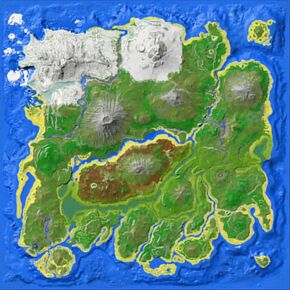
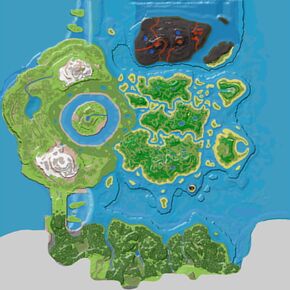
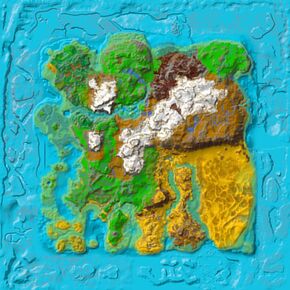
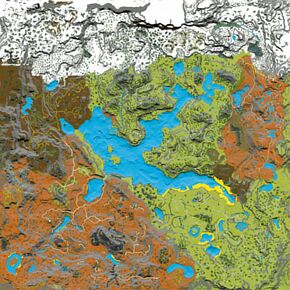
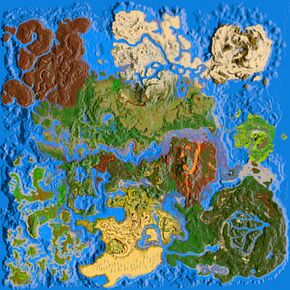
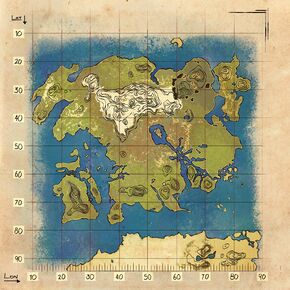
The Acrocanthosaurus can be found on The Island, The Center, Scorched Earth, Ragnarok, Extinction, Valguero, Genesis: Part 1, Crystal Isles, Genesis: Part 2, Lost Island, and Fjordur attacking anything in sight. When attacked, the Acrocanthosaurus may position itself into a shield stance, where it will then tank damage. If it takes enough damage (35% of its ![]() Health, which is calculated before the tanking modifier), the Acrocanthosaurus will roar in frustration, granting it the Adrenaline! buff, which will allow it to attack faster and do more damage.
Health, which is calculated before the tanking modifier), the Acrocanthosaurus will roar in frustration, granting it the Adrenaline! buff, which will allow it to attack faster and do more damage.
Appearance
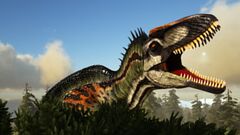
The Acrocanthosaurus is a large theropod that possesses a vibrant color pattern and faintly resembles a ![]() Giganotosaurus or an
Giganotosaurus or an ![]() Allosaurus. It lumbers over the
Allosaurus. It lumbers over the ![]() Rex and the
Rex and the ![]() Spino and has a high spine which it uses for defense.
Spino and has a high spine which it uses for defense.
Color Scheme and Regions
This information can be used to alter the Acrocanthosaurus's regions by entering cheat SetTargetDinoColor <ColorRegion> <ColorID> in the cheat console. For instance, cheat SetTargetDinoColor 0 6 would color the Acrocanthosaurus's "main body" magenta.

Region 2 is not used
for this Creature.

Region 3 is not used
for this Creature.
This information can be used to alter the Scorched Acrocanthosaurus's regions by entering cheat SetTargetDinoColor <ColorRegion> <ColorID> in the cheat console. For instance, cheat SetTargetDinoColor 0 6 would color the Scorched Acrocanthosaurus's "main body" magenta.

Pattern

Region 2 is not used
for this Creature.

Region 3 is not used
for this Creature.
This information can be used to alter the X-Acrocanthosaurus's regions by entering cheat SetTargetDinoColor <ColorRegion> <ColorID> in the cheat console. For instance, cheat SetTargetDinoColor 0 6 would color the X-Acrocanthosaurus's "main body" magenta.

Region 2 is not used
for this Creature.

Region 3 is not used
for this Creature.
This information can be used to alter the R-Acrocanthosaurus's regions by entering cheat SetTargetDinoColor <ColorRegion> <ColorID> in the cheat console. For instance, cheat SetTargetDinoColor 0 6 would color the R-Acrocanthosaurus's "main body" magenta.

Main Body

Pattern

Region 2 is not used
for this Creature.

Region 3 is not used
for this Creature.

Stripe

Underbelly and Face Highlights
Drops
Guaranteed Special Loot
Base Stats and Growth
| Attribute | Base Value | Level Increase | Taming Bonus | ||
|---|---|---|---|---|---|
| Wild | Tamed | Additive | Multiplicative | ||
| 1350 | +270 | +5.4% | 0.07 | ||
| 500 | +50 | +10% | |||
| 150 | +15 | +10% | |||
| 3000 | +300 | +10% | 15% | ||
| 700 | +14 | +4% | |||
| 50 / 95 | +2.5 / +4.75 | +1.7% | 7% | 17.6% | |
| 100% | N/A | +1% | |||
| 1000 | +60 | N/A | 0.5 | ||
Combat
This section describes how to fight against the Acrocanthosaurus.
General
The Acrocanthosaurus can be a formidable opponent in battle, as it possesses a shield stance as well as the Adrenaline! buff and can easily kill survivors that aren't prepared to fight one. It is advised to fight one mounted, rather than on foot.
Strategy
Fighting an Acrocanthosaurus with a creature that is of similar or larger drag weight than it will ensure that the creature takes minimal damage. It is also important to note that an Acrocanthosaurus can outrun a survivor while out of shield stance. If necessary, the survivor can inflict enough damage (10% of its ![]() Health) in order to enable its shield stance, at which point they can escape.
Health) in order to enable its shield stance, at which point they can escape.
Weaponry
The Acrocanthosaurus should be fought with a creature, as this reduces the likelihood of a wild Acrocanthosaurus taking enough damage to activate its adrenaline and deal significantly more damage to the survivor and creatures.
Dangers
If an Acrocanthosaurus successfully activates its adrenaline without being killed, it becomes a force to be reckoned with, doing almost double its original ![]() Melee Damage. The survivor should take caution when on foot or on a creature with a lower drag weight, as an Acrocanthosaurus can outrun a survivor while out of shield stance. It also does more damage to targets smaller than it with its stomp. Tamed Acrocanthosaurus pose a greater threat, as it becomes difficult to kill the rider when the Acrocanthosaurus enters shield stance. The shield bash attack of an Acrocanthosaurus in shield stance can also knock back a large amount of creatures, so survivors should be wary of environmental hazards such as cliffs.
Melee Damage. The survivor should take caution when on foot or on a creature with a lower drag weight, as an Acrocanthosaurus can outrun a survivor while out of shield stance. It also does more damage to targets smaller than it with its stomp. Tamed Acrocanthosaurus pose a greater threat, as it becomes difficult to kill the rider when the Acrocanthosaurus enters shield stance. The shield bash attack of an Acrocanthosaurus in shield stance can also knock back a large amount of creatures, so survivors should be wary of environmental hazards such as cliffs.
Wild Acrocanthosaurus tend to spawn in groups of 2-3. These groups often consist of opposing genders, enabling the Acrocanthosaurus's mate boost.
Weakness
Fighting the Acrocanthosaurus with a strong creature that has higher drag weight will make the process of killing one much easier. When a wild or riderless Acrocanthosaurus enters shield stance, the survivor can stop attacking in order to get it to exit the stance and prevent it from being able to activating its adrenaline.
Taming
Preferred Food
 Exceptional Kibble
 Raw Mutton
 Cooked Lamb Chop
 Raw Prime Meat
 Cooked Prime Meat
 Raw Prime Fish Meat
 Cooked Prime Fish Meat
 Raw Meat
 Cooked Meat
 Raw Fish Meat
 Cooked Fish Meat
Taming Method
Since the Acrocanthosaurus is immune to ranged tranquilizers, the only way to render one unconscious is by feeding it ![]() Narcoberries,
Narcoberries, ![]() Narcotic, or
Narcotic, or ![]() Bio Toxin whenever it roars in frustration. Place the
Bio Toxin whenever it roars in frustration. Place the ![]() Narcotic in the last slot of the hotbar, run up inside the mouth of the Acrocanthosaurus, and, aiming for the top jaw, use E to feed them to the Acrocanthosaurus. It is recommended to use a
Narcotic in the last slot of the hotbar, run up inside the mouth of the Acrocanthosaurus, and, aiming for the top jaw, use E to feed them to the Acrocanthosaurus. It is recommended to use a ![]() Fabricated Sniper Rifle, as this allows the survivor to count the shots needed to put the Acrocanthosaurus into its shield stance and the shots needed for it to activate its adrenaline.
Fabricated Sniper Rifle, as this allows the survivor to count the shots needed to put the Acrocanthosaurus into its shield stance and the shots needed for it to activate its adrenaline.
If the player prefers, a ![]() Pump-Action Shotgun, can be used instead, since excess damage is ignored and will not ruin the taming effectiveness until the unconscious animation is played. This tends to be more viable for higher-level Acros.
Pump-Action Shotgun, can be used instead, since excess damage is ignored and will not ruin the taming effectiveness until the unconscious animation is played. This tends to be more viable for higher-level Acros.
If the player is for whatever reason disinclined to use firearms, trapping the Acro and using a ![]() Wyvern leveled in melee damage could work too (Ice Wyvern recommended. Fire and Crystal Wyverns not recommended because lasting DoT effects may ruin the taming effectiveness. Poison Wyverns not recommended because gas cloud poses the same problem. Lightning Wyverns not recommended, because the player may find themselves choosing between the risk of dying to their own wyvern's breath, or missing the window to feed the Acro). Keep in mind a weapon might still be required to initialize the taming process, and that the Acro may remain agro'd on the Wyvern, causing the head to be too high for the player to reach without jumping, so it's highly risky.
Wyvern leveled in melee damage could work too (Ice Wyvern recommended. Fire and Crystal Wyverns not recommended because lasting DoT effects may ruin the taming effectiveness. Poison Wyverns not recommended because gas cloud poses the same problem. Lightning Wyverns not recommended, because the player may find themselves choosing between the risk of dying to their own wyvern's breath, or missing the window to feed the Acro). Keep in mind a weapon might still be required to initialize the taming process, and that the Acro may remain agro'd on the Wyvern, causing the head to be too high for the player to reach without jumping, so it's highly risky.
Utility
Controls
 - This key triggers a simple bite. When the adrenaline is active, the speed of this attack is increased.
 - This key activates its shield stance. When enough damage is taken in this stance (10% of its
  Health), the Acrocanthosaurus will roar, activating its adrenaline. Using the
  in this stance will trigger a shield bash, which can damage
  Metal-tier structures.
- C - This key triggers a side stomp. The damage of this attack is multiplied by a target's drag weight relative to the Acrocanthosaurus's drag weight. When the adrenaline is active, the Acrocanthosaurus will perform 3 stomps instead of 1.
- Ctrl - This key triggers a roar.
Roles
Tank - While in its shield stance, Acrocanthosaurus will be able to tank damage. While it is taking damage in this state, it will build up its adrenaline. Once this is full, it receives a 35 second buff which regenerates 0.2% ![]() Health per second, and a boost to
Health per second, and a boost to ![]() Melee Damage, resistance, and
Melee Damage, resistance, and ![]() Movement Speed.
Movement Speed.
Alpha Hunter - Acrocanthosaurus can take the hits of ![]() Alpha creatures when utilizing its shield stance and can easily kill lower level ones. However, Acrocanthosaurus are at risk when facing higher level
Alpha creatures when utilizing its shield stance and can easily kill lower level ones. However, Acrocanthosaurus are at risk when facing higher level ![]() Alpha Rexes and should be leveled in
Alpha Rexes and should be leveled in ![]() Health and
Health and ![]() Melee Damage to ensure victory.
Melee Damage to ensure victory.
Bullet Sponge - The shield stance is an efficient way to soak ![]() Auto Turrets and other ranged attacks, as it transforms the Acrocanthosaurus a living shield for survivors and creatures, including the rider. The Acrocanthosaurus may also activate its adrenaline if it takes enough, which allows some time to back off and regain
Auto Turrets and other ranged attacks, as it transforms the Acrocanthosaurus a living shield for survivors and creatures, including the rider. The Acrocanthosaurus may also activate its adrenaline if it takes enough, which allows some time to back off and regain ![]() Health or bring in other creatures. While in its shield stance, the Acrocanthosaurus is also able to damage
Health or bring in other creatures. While in its shield stance, the Acrocanthosaurus is also able to damage ![]() Metal-tier structures, which makes it incredibly useful in raids when leveled in
Metal-tier structures, which makes it incredibly useful in raids when leveled in ![]() Health and
Health and ![]() Melee Damage.
Melee Damage.
Boss Army - If used properly, an Acrocanthosaurus can be used to take on the bosses of The Island and Scorched Earth. When an Acrocanthosaurus activates its adrenaline, they gain an increase in ![]() Health regeneration, attack speed, and
Health regeneration, attack speed, and ![]() Melee Damage. This ability can prove to be critical in a boss battle, though the survivor should always have backup creatures. Acrocanthosaurus are incredibly effective against the
Melee Damage. This ability can prove to be critical in a boss battle, though the survivor should always have backup creatures. Acrocanthosaurus are incredibly effective against the![]() Broodmother in particular, as their immunity to
Broodmother in particular, as their immunity to ![]() Torpidity means they aren't knocked unconscious during the fight, and the broodmother's attacks have the potential to quickly put it into adrenaline to allow you to deal increased damage. If attempting this strategy, well bred, mate boosted Acrocanthosaurus with good saddles should be used, along with Daedon to help heal the damage taken in order to enter adrenaline. The shield stance may mitigate some damage, but it isn't nearly as much of a reduction as a Megatherium's insect killer buff.
Torpidity means they aren't knocked unconscious during the fight, and the broodmother's attacks have the potential to quickly put it into adrenaline to allow you to deal increased damage. If attempting this strategy, well bred, mate boosted Acrocanthosaurus with good saddles should be used, along with Daedon to help heal the damage taken in order to enter adrenaline. The shield stance may mitigate some damage, but it isn't nearly as much of a reduction as a Megatherium's insect killer buff.
Golem Fighter - Since the shield bash of the Acrocanthosaurus can damage ![]() Stone-tier structures, this particular attack faces no damage reduction when used against
Stone-tier structures, this particular attack faces no damage reduction when used against ![]() Rock Elementals. This can prove particularly useful on Scorched Earth.
Rock Elementals. This can prove particularly useful on Scorched Earth.
Spotlight
Notes/Trivia
For information pertaining specifically to the real-world Acrocanthosaurus, see the relevant Wikipedia article.
- Acrocanthosaurus aegis roughly translates to "high-spined lizard shield."
- Imprinting increases the Acrocanthosaurus's normal
 Movement Speed by 20%, but this has no effect on the
  Movement Speed while its adrenaline is active.
 - The mechanics and abilities of the Acrocanthosaurus are a reference to and inspired by the Deviljho, a monster from the popular game Monster Hunter, which is known for its brute strength and rage triggered by excessive amounts of damage.
- Prior to January 11, 2020, Acrocanthosaurus could not enter the Tek Cave after the prohibition of Cryopods. This has been fixed.

