|
บทความ/เนื้อหานี้อยู่ระหว่างการดำเนินการ
เนื้อหาดังกล่าวอาจมีการเปลี่ยนแปลงบางอย่าง จะถูกอัปเดตข้อมูลในอีกไม่กี่ชั่วโมงหรือไม่กี่วันข้างหน้า
|

|
หน้านี้ไม่ได้รับการอัปเดตข้อมูลเป็นเวลานาน, เนื้อหาอาจมีความล้าหลัง สามารถช่วยอัปเดตข้อมูลใหม่โดยการอัปเดตข้อมูล
หากข้อเสนอแนะหรือสงสัยในการแก้ไขโปรดไปที่: หน้าพูดคุย
|
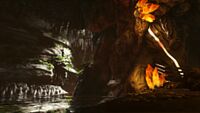
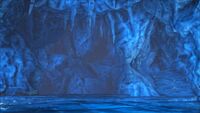
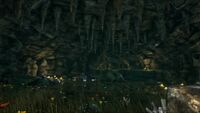
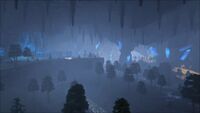
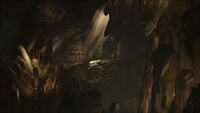
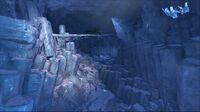
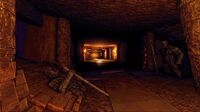
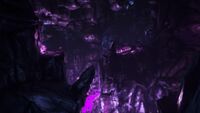
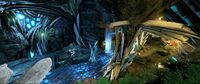
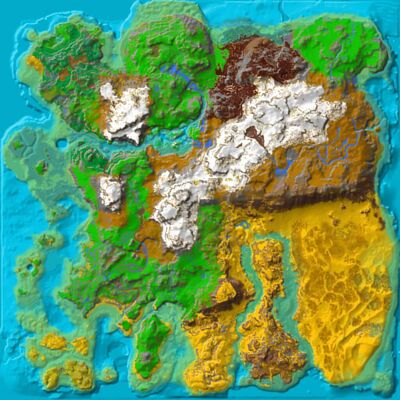
There are two types of caves that can be found in ARK: Progression Caves and Resources Caves, the latter caves being found underwater on The Island and most regions of Ragnarok. Some are easy to explore, others extremely difficult. If you survive the dangers of the caves, however, they each contain a variety of resources to obtain.
Progression Caves
-

Central Cave
-

North West Cave
-

Lower South Cave
-

North East Cave
-

Upper South Cave
-

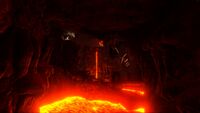
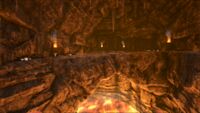
Lava Cave
-

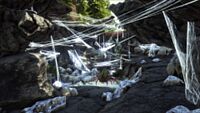
Swamp Cave
-

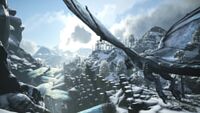
Snow Cave
-

The Caverns of Lost Hope
-

The Caverns of Lost Faith
-

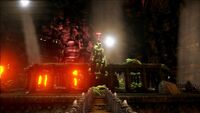
Tek Cave
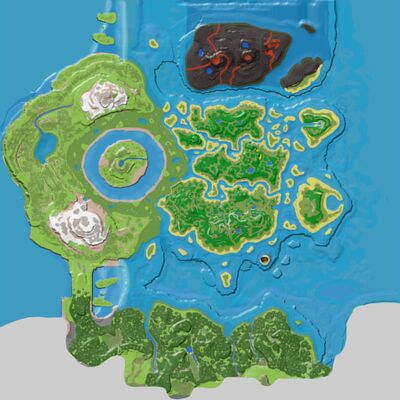
Locations
|
|
Difficulty: Green = Standard; Red = Hard
Cyan = Standard Underwater; Blue = Hard Underwater.
|
Coordinates
Creatures
Note that the Hard Caves spawn creatures at extremely high levels (often exceeding 250), and that these creatures are untameable. Creatures within The Caverns of Lost Faith are also untameable, but spawn at standard levels.
- Terrestrial Entrances
 Angler
 Arthropluera
 Dilophosaur
 Direwolf
 Dung Beetle
 Kairuku
 Megalania
 Megalosaurus
 Meganeura
 Onyc
Onyc Phiomia
 Piranha
 Sarco
Sarco Scorpion
 Spider
 Titanoboa
 Trilobite
 Yeti
Yeti
- Underwater Entrances
 Achatina
- Angler
- Araneo
 Cnidaria
 Coelacanth
- Dung Beetle
 Dunkleosteus
 Eurypterid
 Ichthyosaurus
 Manta
Manta Megalodon
 Mosasaurus
- Onyc
- Piranha
- Pulmonoscorpius
 Sabertooth Salmon
- Trilobite
 Tusoteuthis
-
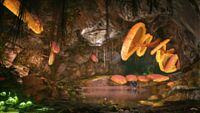
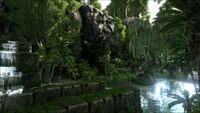
Jungle Cave
-
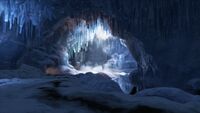
North Ice Cave
-
South Ice Cave
-
Lava Oasis Cave
-
LavaCave
-
Southeastern Trench
-

The Center Cave
-
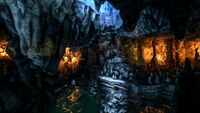
Cliffside Cavern
-
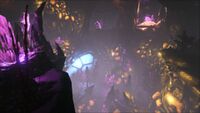
Underground World
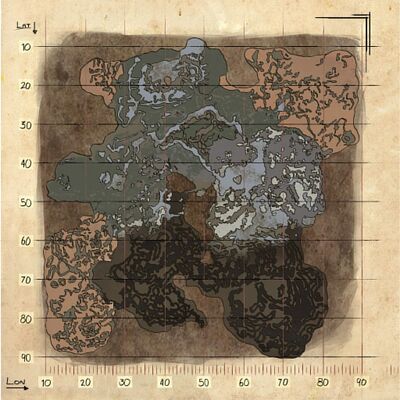
Locations
Difficulty: Green = Standard; Red = Hard; Gray = unknown difficulty; Cyan = Standard Underwater
Coordinates
Jungle Cave
Coordinates
The Center Cave
Coordinates
Cliffside Cavern
Coordinates
Underground World
Coordinates
Creatures
- Missing.
Small Caves
Coordinates
-

Grave of the Tyrants
-

Old Tunnels
-

Ruins of Nosti
Locations
Green = Standard Difficulty
Coordinates
Creatures
- Achatina
- Araneo
- Arthropluera
- Direwolf
 Mantis
- Megalosaurus
- Onyc
- Pulmonoscorpius
 Raptor
 Rubble Golem
 Sabertooth
- Titanoboa
Note that Achatina spawn as high-levelled varients, similar to the creatures found within The Island's Swamp and Snow caves. Unlike The Island however, these Achatina are tameable.
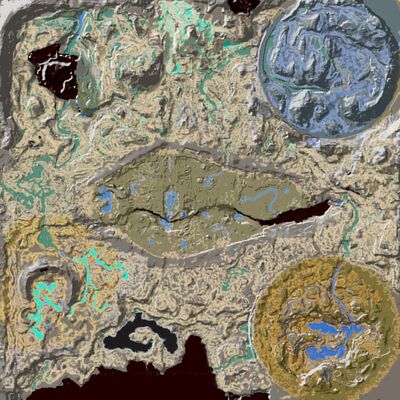
This page only lists the Dungeons and important Caves of Ragnarok. For a list of all caves in Ragnarok please visit this page: Caves (Ragnarok)
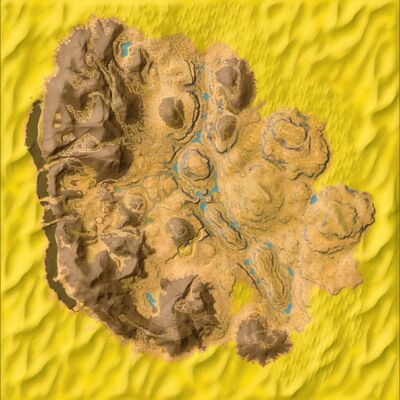
Locations
Green = Standard; Red = Hard; Gray = unknown difficulty
Coordinates
Creatures
- Achatina
- Araneo
- Arthropluera
 Dire Bear
 Iceworm
- Kairuku
 Lava Elemental
- Onyc
- Pulmonoscorpius
- Titanoboa
Note that all creatures inside these caves are high-leveled, untameable variants, similar to the creatures found within The Island's Swamp and Snow caves.
-

Old Railway Cave
-

Hidden Grotto
-

Elemental Vault
Locations
Green = Standard; Red = Hard; gray = unknown difficulty
Coordinates
Creatures
 Aberrant Achatina
 Aberrant Anglerfish
 Aberrant Arthropluera
 Aberrant Baryonyx
 Aberrant Beelzebufo
 Aberrant Carnotaurus
 Aberrant Cnidaria
 Aberrant Dimetrodon
 Aberrant Diplocaulus
 Aberrant Dung Beetle
 Aberrant Electrophorus
 Aberrant Megalosaurus
 Aberrant Pulmonoscorpius
 Aberrant Raptor
 Aberrant Salmon
 Aberrant Titanoboa
 Alpha Karkinos
 Featherlight
 Glowbug
 Glowtail
 Karkinos
 Lamprey
 Nameless
 Ravager
 Seeker
Despite having a large cave opening, dinosaurs classified as flying cannot be mounted within the cave. There are exceptions to this limitation however.
Locations
Green = Standard; Red = Hard; gray = unknown difficulty
Coordinates
Creatures
 Allosaurus
- Arthropluera
- Direwolf
 Kaprosuchus
- Megalosaurus
 Microraptor
- Onyc
 Polar Bear
 Polar Purlovia
 Purlovia
 Rex
Rex- Rubble Golem
 Terror Bird
 Therizinosaur
- Titanoboa
- Yeti
 Yutyrannus
-
The Great Trench
-
-
The Lost Temple
-
The Unknown
Locations
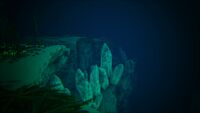
Resource Caves
Cavern: A cave, or a chamber in a cave, typically a large one.
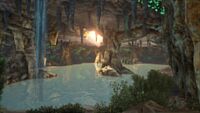
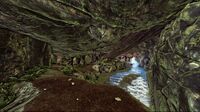
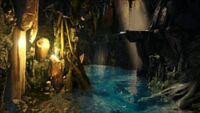
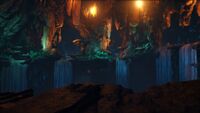
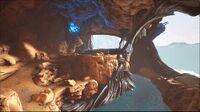
There are currently 12 Resource Caves on The Island, and are all found underwater. These caves can often be difficult to find, but often contain a dense collection of ข้อผิดพลาด Lua ใน package.lua บรรทัดที่ 80: module 'Module:Arguments' not found and ข้อผิดพลาด Lua ใน package.lua บรรทัดที่ 80: module 'Module:Arguments' not found, although the latter of which provide less oil than nodes found elsewhere in the game. The only indication of the position from the surface is a small flow of bubbles, appearing as a thin white line. On lower graphics settings, a grey box can be seen on the ocean floor from the surface around the cave's entrance.
The entrances to the resource caves also appears to be a spawn location for pairs of ข้อผิดพลาด Lua ใน package.lua บรรทัดที่ 80: module 'Module:Arguments' not founds, who tend to linger in the area, as well as a singular ข้อผิดพลาด Lua ใน package.lua บรรทัดที่ 80: module 'Module:Arguments' not found, which in turn tend to linger near to the ข้อผิดพลาด Lua ใน package.lua บรรทัดที่ 80: module 'Module:Arguments' not founds.
Coordinates
Creatures
- Eurypterid
Resources
 Crystal
 Oil
Oil Silica Pearls
-
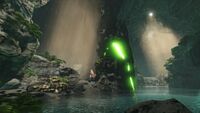
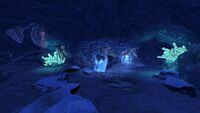
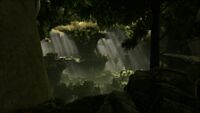
The Abyss
-
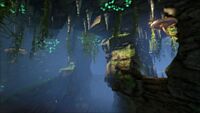
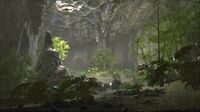
The Emerald Forest
Creatures
Resources
Tips
|
|
หน้านี้ไม่ได้รับการอัปเดตข้อมูลเป็นเวลานาน, เนื้อหาอาจมีความล้าหลัง สามารถช่วยอัปเดตข้อมูลใหม่โดยการอัปเดตข้อมูล
หากข้อเสนอแนะหรือสงสัยในการแก้ไขโปรดไปที่: หน้าพูดคุย
|
Surface Caves
These are general cave tips. For tips on specific caves, please visit their individual pages.
- Take ข้อผิดพลาด Lua ใน package.lua บรรทัดที่ 80: module 'Module:Arguments' not found or better yet ข้อผิดพลาด Lua ใน package.lua บรรทัดที่ 80: module 'Module:Arguments' not founds and ข้อผิดพลาด Lua ใน package.lua บรรทัดที่ 80: module 'Module:Arguments' not founds or if you are a high enough level ข้อผิดพลาด Lua ใน package.lua บรรทัดที่ 80: module 'Module:Arguments' not found. Some progression caves require multiple ข้อผิดพลาด Lua ใน package.lua บรรทัดที่ 80: module 'Module:Arguments' not founds.
- Hide or Fur armor is helpful for many, but not all caves. Chitin or Metal (Flak) is great if you have an available Smithy.
- Set up a small base at the beginning of a cave with a ข้อผิดพลาด Lua ใน package.lua บรรทัดที่ 80: module 'Module:Arguments' not found and a chest with tools, weapons, armor, a ข้อผิดพลาด Lua ใน package.lua บรรทัดที่ 80: module 'Module:Arguments' not found and a ข้อผิดพลาด Lua ใน package.lua บรรทัดที่ 80: module 'Module:Arguments' not found. If possible, in single player you can use a ข้อผิดพลาด Lua ใน package.lua บรรทัดที่ 80: module 'Module:Arguments' not found as a smithy IN the cave. Or on multiplayer you can use a ข้อผิดพลาด Lua ใน package.lua บรรทัดที่ 80: module 'Module:Arguments' not found
- Most of the creatures found in caves are non-tamable (mostly ข้อผิดพลาด Lua ใน package.lua บรรทัดที่ 80: module 'Module:Arguments' not found), except for a few cases or caves such as ข้อผิดพลาด Lua ใน package.lua บรรทัดที่ 80: module 'Module:Arguments' not found, ข้อผิดพลาด Lua ใน package.lua บรรทัดที่ 80: module 'Module:Arguments' not found or ข้อผิดพลาด Lua ใน package.lua บรรทัดที่ 80: module 'Module:Arguments' not found.
- Because there are no ข้อผิดพลาด Lua ใน package.lua บรรทัดที่ 80: module 'Module:Arguments' not found spawns outside of caves in Scorched Earth , caves are the only place you can tame them in. They do however provide higher max tame levels, meaning you won't have to feed them as much as when they were tamed on other maps.
- ข้อผิดพลาด Lua ใน package.lua บรรทัดที่ 80: module 'Module:Arguments' not founds are useful for avoiding creatures, getting a good vantage point, and to not have to bring foundations and ceilings to bridge gaps. However, not all caves will permit its uses.
- In some caves that are very tough, one may use a ข้อผิดพลาด Lua ใน package.lua บรรทัดที่ 80: module 'Module:Arguments' not found on wild creatures to clear the cave to make it easier. However, be mindful as some respawn area will immediately respawn creatures the instant the area is brought to stasis.
- Flyers brought into the cave under any method will not be mountable, even with saddle. Oddly, Climbers can still climb upwards.
- Aberration ข้อผิดพลาด Lua ใน package.lua บรรทัดที่ 80: module 'Module:Arguments' not founds and ข้อผิดพลาด Lua ใน package.lua บรรทัดที่ 80: module 'Module:Arguments' not found are also a big help even though all caves can be traversed without these.
- ข้อผิดพลาด Lua ใน package.lua บรรทัดที่ 80: module 'Module:Arguments' not found allows bringing of creatures into previously inaccessible area due to the opening of the caves. However, some creatures that are too big to fit inside will not be released out of the cryopod. This includes areas whereby the size are strictly fittable only for survivors and smaller.
- Bringing a Parasaur and using its turret mode can be very helpful in identifying enemies and potential tames. For example, Megalania can be hard to spot without turret mode, and Dung Beetles may accidentally be killed if not identified first through turret mode.
- Bring a friend if trying this so you can identify enemies on the move. A Parasaur is also very weak, so an escort is needed.
- Since a Parasaur is a pack animal, it can also help bring out the valuable Crystal and Obsidian.
Underwater Caves
- ข้อผิดพลาด Lua ใน package.lua บรรทัดที่ 80: module 'Module:Arguments' not found will supply you Oxygen while underwater for a certain amount of seconds, to allow you to dive for longer times, making it easier to find the entrance. A ข้อผิดพลาด Lua ใน package.lua บรรทัดที่ 80: module 'Module:Arguments' not found or a powered ข้อผิดพลาด Lua ใน package.lua บรรทัดที่ 80: module 'Module:Arguments' not found could also help with this, then no oxygen is ever needed! Though, the ข้อผิดพลาด Lua ใน package.lua บรรทัดที่ 80: module 'Module:Arguments' not found will slowly lose durabillity as it's in use, and element, for the ข้อผิดพลาด Lua ใน package.lua บรรทัดที่ 80: module 'Module:Arguments' not found.
- Riding a ข้อผิดพลาด Lua ใน package.lua บรรทัดที่ 80: module 'Module:Arguments' not found can help against other Sharks and allows you very quick movement in the water. They are also a good way to spot the bubbles from the surface. It is advised to bring it with a pack, as wild Megalodon are never seen alone in underwater caves and with a pack boost, will easily shred even the most resilient of Megalodon.
- Alternatively using a ข้อผิดพลาด Lua ใน package.lua บรรทัดที่ 80: module 'Module:Arguments' not found or ข้อผิดพลาด Lua ใน package.lua บรรทัดที่ 80: module 'Module:Arguments' not found will allow you to travel much faster than a Megalodon. A tamed Plesiosaur can fairly easily take on a wild Megalodon and an Ichthyosaurus can easily outrun any wild animals. Be wary of any ข้อผิดพลาด Lua ใน package.lua บรรทัดที่ 80: module 'Module:Arguments' not found nearby if you are bringing Icthyosaurus.
- If you have a Tribemate with a ข้อผิดพลาด Lua ใน package.lua บรรทัดที่ 80: module 'Module:Arguments' not found, ข้อผิดพลาด Lua ใน package.lua บรรทัดที่ 80: module 'Module:Arguments' not found or ข้อผิดพลาด Lua ใน package.lua บรรทัดที่ 80: module 'Module:Arguments' not found, they can transport you directly to the location of the cave and drop you down, avoiding most of the swim, and with that, most of the Megalodons on the way to the cave. Once finished the Pteranodon, Argentavis or Tropeognathus can pick you up again from the water surface. This is also a very resource friendly method, as it allows you to go down with minimum armor and weapons, as fighting can be reduced to a minimum. That way, the loss of dying is less of a setback. This method does, however, require you to have found the entrance beforehand.
- Riding a Sarco allows you to use a single mount as they can move quick both in water and on the ground. Moreover, it's faster than a Megalodon, has near instant stamina regeneration under water and can fit in most underwater caves, making it safer while gathering resources. Be wary of any Tusoteuthis that spawns within the cave, as their range can grab onto the Sarco.
- Eurypterids can spawn in groups (3-5 at once) in even small underwater caves as of patch 246. Be prepared to deal with their stings!
- ข้อผิดพลาด Lua ใน package.lua บรรทัดที่ 80: module 'Module:Arguments' not found allows bringing of creatures into previously inaccessible area due to the opening of the caves. However, some creatures that are too big to fit inside will not be released out of the cryopod. Care for the Cryo Cooldown though (due to possible constant uses), as wild dinos inside the caves that are aggressive will still attack dino under Cryo Sickness, which will result in a swift death due to damage multiplier towards dino under that state.
- ข้อผิดพลาด Lua ใน package.lua บรรทัดที่ 80: module 'Module:Arguments' not found can give constant oxygen to land creatures that excels under water and requires to be constantly underwater, but does not have infinite oxygen (Good example is ข้อผิดพลาด Lua ใน package.lua บรรทัดที่ 80: module 'Module:Arguments' not found. However, due to their sheer size, are only limited at certain areas underwater within the underwater cave, even with Cryopods.
- ข้อผิดพลาด Lua ใน package.lua บรรทัดที่ 80: module 'Module:Arguments' not found swims fast for a land creature while submerged, but is incredibly frail (cannot attack underwater) and has lower oxygen that most other creature.
Notes
- There is a large flat faced rock that looks like it could be a cave entrance on the South haven island cliff face. Could be another cave in the future.
- Building a base in an underwater cave will stop resource spawning in that cave.
- In the North Ice Cave on The Center, one of the two parts (the part with the Artifact of the Devourer) of the cave's crystal nodes are invisible (can still be farmed normally with a pick).
- This is especially detrimental when trying to get to one of the places that spawns a loot crate, which is along a long, thin corridor that is littered with spiders, wolves, sabertooths, and Yetis (possibly one of the most concentrated areas of aggressive creatures in the game).
- These nodes can block movement, bullets, arrows, etc. but can be helpful as it blocks some creatures against walls, while other nodes can act as walls, allowing you to be unseen as long as it is between you and a creature.
- When holding H,
 , or
, or  , you can see that each cave has its own location. The Tek Cave is “The Belly of the Beast.” The South East cave is “Lava Cave.”
- In Aberration, there was supposedly a fourth cave planned, but was eventually scrapped after the DLC is released. The names still exist in the database, however. This makes it the first and only official cave to not be implemented into the official DLC map.
- The Artifact that was supposed to be added into the cave was re-purposed for Crystal Isles DLC as an Alpha Crystal Wyvern Queen requirement.
- All of the caves do not permit flying creatures inside, with the sole exception of ข้อผิดพลาด Lua ใน package.lua บรรทัดที่ 80: module 'Module:Arguments' not found.
- A Managarmr can pounce into the pearl cave and easily wipe your base so build smart and survive.
v · d · eสถานที่  |
|---|
| แสดงสถานที่ของ The Island. สำหรับสถานที่บนส่วนขยายหรือแผนที่อื่นๆ
ดูได้ที่ The Center, Scorched Earth, Ragnarok, Aberration, Extinction, Valguero, Genesis: Part 1, Crystal Isles หรือ Genesis: Part 2. | | | แผนที่ | | | | ที่ราบ |
The Eastern Plains • The Frigid Plains • The Western Plains | | | หมู่เกาะ |
Cragg's Island • Southern Islets • South Haven • The Dead Island • The Footpaw | | | ภูเขา |
Far's Peak • The Frozen Tooth • The Grand Hills • The Red Peak • Volcano • Weathertop • Whitesky Peak • Winter's Mouth | | | ชายหาด |
Northeast Shores • Northern Shores • Northwest Shores • Southeastern Shores • The Southeast Shores • The Western Approach • The Western Coast | | | ป่าไม้ |
Southern Jungle • The Eastern Forest • The Redwood Forests | | | ถ้ำ |
Central Cave • Lava Cave • Lower South Cave • North East Cave • North West Cave • Snow Cave • Swamp Cave • Tek Cave • The Caverns of Lost Faith • The Caverns of Lost Hope • Upper South Cave | | | อารีนา |
Broodmother Arena • Dragon Arena • Megapithecus Arena • Overseer Arena | | | อื่นๆ |
Deep Ocean • Drayo's Cove • Ice Wyrm's Belly • The Belly of the Beast • The Deep Island • The Descent • The Frigid Deep • The Frozen Fang • The Frozen Maw • The Frozen Sea • The Gulch of Lamentation • The Hidden Lake • The Maw • The Shadow Road • The Throat of Borea • The Throat of Flame • The Writhing Swamps • Smuggler's Pass • Volcanic Maw |
|
แม่แบบ:Nav Locations The Center
แม่แบบ:Nav Locations Scorched Earth
แม่แบบ:Nav Locations Ragnarok
แม่แบบ:Nav Locations Aberration
แม่แบบ:Nav Locations Extinction
แม่แบบ:Nav Locations Valguero
| v · d · eแมคคานิคของเกม |
|---|
| | เกม/แฟรนไชส์ | | | | การสร้าง & Development |
Building • Building Guides • Farming • Cooking • Electricity • Item Quality • Spoilage • Blueprints • Inventory • Tribes • Spawn Locations • Leveling • Creative Mode | | | Items |
Armor • Consumables • Resources • Structures • Weapons | | | ภาวะแวดล้อม | | | | Exploring |
| Maps | | | | Features |
Coordinates • Flying • Swimming • Obelisks • Supply Crate • Loot Crate (Deep Sea) • Biomes • Explorer Notes • Runes • Dossiers • Caves • Artifacts • Boss Arenas • Ascension • ARKs • CrossARK Transfers • Missions (Genesis: Part 1, Genesis: Part 2) |
| | | ตัวละคร |
| ตัวละคร |
Levels • Engrams (Mobile, P+) • Survivor Profile • Emotes • Whistling • Hairstyles • HUD | | | แอตทริบิวต์ |
Health • Stamina • Oxygen • Food • Water • Weight • Melee Damage • Movement Speed • Fortitude • Crafting Skill • Torpidity | | | Condition |
Status Effects • Diseases |
| | | สิ่งมีชีวิต |
| สิ่งมีชีวิต |
Taming • Domestication • Aggression Level • Breeding • Mutations • Incubation • Imprinting • Mate Boost • Weight Reduction | | | สถิติ |
Base Creature Statistics • Base Creature Speeds • Base Damage • Creature stats calculation • Level weighing | | | แอตทริบิวต์ |
Energy • Charge Capacity • Charge Regeneration • Charge Emission Range | | | รายการข้อมูล |
Carryable by • Immobilized by • Can damage | | | อื่นๆ |
Temperament |
| | | อื่นๆ |
Achievements • Chat • DLCs • Weapon Mechanics • Stasis • Raptor Claus • HLN-A • Chibi-Pets |
|