

cheat summon Bee_Character_BP_Ccheat SpawnDino "Blueprint'/Game/PrimalEarth/Dinos/Bee/Bee_Character_BP.Bee_Character_BP'" 500 0 0 35cheat summon Bee_Queen_Character_BP_Ccheat SpawnDino "Blueprint'/Game/PrimalEarth/Dinos/Bee/Bee_Queen_Character_BP.Bee_Queen_Character_BP'" 500 0 0 35cheat summon Bee_Queen_Character_BP_Gauntlet_Ccheat SpawnDino "Blueprint'/Game/Genesis/Dinos/MissionVariants/Gauntlet/Bog/Bee_Queen_Character_BP_Gauntlet.Bee_Queen_Character_BP_Gauntlet'" 500 0 0 35cheat summon HoneyBee_Character_BP_Ccheat SpawnDino "Blueprint'/Game/Mods/CrystalIsles/Assets/Dinos/HoneyBee/HoneyBee_Character_BP.HoneyBee_Character_BP'" 500 0 0 35cheat summon Bee_Character_BP_STA_Ccheat SpawnDino "Blueprint'/Game/Genesis2/Missions/ModularMission/Gauntlet2/STA/Dinos/Bee_Character_BP_STA.Bee_Character_BP_STA'" 500 0 0 35cheat summon Bee_Queen_Character_BP_STA_Ccheat SpawnDino "Blueprint'/Game/Genesis2/Missions/ModularMission/Gauntlet2/STA/Dinos/Bee_Queen_Character_BP_STA.Bee_Queen_Character_BP_STA'" 500 0 0 35cheat summon Bee_Queen_Character_BP_STA_C
巨大ハチ(jai-aunt-bee)は、ARK: Survival Evolvedの生物の一種です。
このセクションは、サバイバーであるヘレナ・ウォーカーが書いた調査書を、正確にコピーすることを目的としています。この文章とゲーム内の生物との間には若干の食い違いがあるかもしれません。

Apis lithohermaea
生息年代中世期中期
食性植物食
気性縄張り意識が強い
野生のジャイアントビーは、レッドウッドの木々や岩壁の上部に巣を作ると最後、決してそこから離れようとしません。多くの場合は、巣の近くで集団で飛んでいます。そして女王を見るには、その巣を割らなければなりません。しかしこれまでの経験から言って、彼らの強い縄張り意識のおかげで、それが楽しい作業になることはないでしょう。 彼らの針には注意してください。針には獲物を弱らせる力がある上、棘が付いていないため、彼らは針を失うことなく何度も対象に突き刺すことができるのです。
テイム済みの女王は新たに卵を産み、巣を形成します。ギリースーツを着ることを忘れなければ、サバイバーはそこからハチミツを採取することができます。このハチミツは甘くて美味しいだけでなく、島の哺乳類を魅了する強い香りも持っており、罠としてよく利用されます。ジャイアントビーは女王と共に戦闘に参加するので、危険な状況では防衛手段として活用できます。
General: The entity that is the Giant Bee consists of the Queen Bee and the drone (called Giant Bee in game). Queen Bees and Drones appear when a wild beehive is damaged or destroyed.
Queen: The Queen Bee is the center of the Giant Bee entity. She is the larger of the two that players will encounter. When she spawns into the world, she automatically becomes a hive. Note that the Queen may despawn shortly after spawning in and turning into a hive, even when she is spawned in by a player. Wild Queens will spawn drones to protect her while she flees from the recently destroyed hive, and will keep spawning them after tamed. Once tamed, she can be interacted with like other pets but she does not gain XP and cannot level up past the post tame additional levels. (+2 max on a private game) She tends to spawn at level 5. She has an inventory that can have items placed in it, and a food bar but it does not drain very fast. From tests, she can eat both raw meat and Rare Flowers, but seems to require hand feeding. The Queen will continuously spawn drones that seemingly do not count towards the player's tame count, as they do not show up as red in the kill feed if killed by the owning player or fellow tribe members.
Drones: Drones are smaller of the two Giant Bees. They will spawn from inside a wild hive and will swarm any attackers. Once the Queen is tamed, they can be interacted with the exception of having an inventory or a progression system. They can and will protect the player if their aggression is not set to Passive. They can also follow the player, but only a certain distance before returning to the Queen. Giant Bee drones can be uploaded to a Beacon or Obelisks, and can be redownloaded. If they are downloaded, they will be severed from the Queen and can be used as guard dogs. However, like Forcetamed ![]() Titanoboa, they cannot be fed or leveled up, and will despawn when the player reloads the same world. Drones cannot be acquired from a tamed hive, and are only produced by a tamed Queen. She will only produce a certain amount, and the Drones seem to have lifespans. Sometimes they will live for 30 minutes or so and sometimes they will die en masse within a few seconds of spawning.
Titanoboa, they cannot be fed or leveled up, and will despawn when the player reloads the same world. Drones cannot be acquired from a tamed hive, and are only produced by a tamed Queen. She will only produce a certain amount, and the Drones seem to have lifespans. Sometimes they will live for 30 minutes or so and sometimes they will die en masse within a few seconds of spawning.
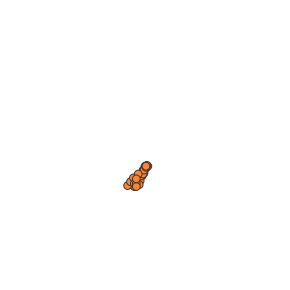
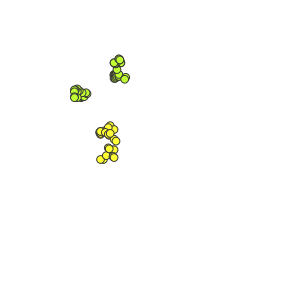
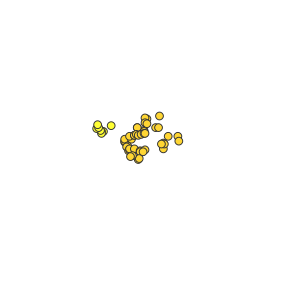
Displayed are the Queen Bee's natural colors. The drone bees it spawns have different colorization.
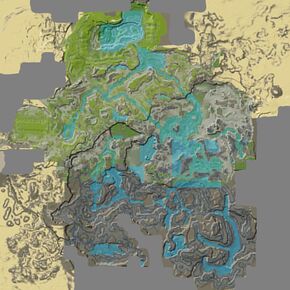
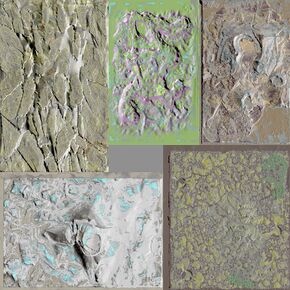
このセクションでは、巨大ハチの自然な色と領域が表示されます。デモンストレーションのために、以下の領域はアルビノの巨大ハチの上に赤色で着色されています。各領域の説明の下に表示される色付きの四角形は、自然な配色の全体的な範囲を提供するために巨大ハチがランダムにスポーンする色です。色の上にカーソルを置くと、その色の名前とIDが表示されます。
この情報を使用して、チートコンソールにcheat SetTargetDinoColor <ColorRegion> <ColorID>と入力することにより、巨大ハチの領域を変更できます。たとえば、cheat SetTargetDinoColor 0 6は巨大ハチの"body highlights"がmagenta色になります。


Region 1 is not used
for this Creature.

Region 3 is not used
for this Creature.
Region 4 is not used
for this Creature.

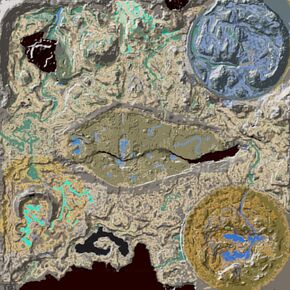
このセクションでは、巨大ハチの自然な色と領域が表示されます。デモンストレーションのために、以下の領域はアルビノの巨大ハチの上に赤色で着色されています。各領域の説明の下に表示される色付きの四角形は、自然な配色の全体的な範囲を提供するために巨大ハチがランダムにスポーンする色です。色の上にカーソルを置くと、その色の名前とIDが表示されます。
この情報を使用して、チートコンソールにcheat SetTargetDinoColor <ColorRegion> <ColorID>と入力することにより、巨大ハチの領域を変更できます。たとえば、cheat SetTargetDinoColor 0 6は巨大ハチの"dark all"がmagenta色になります。

Region 1 is not used
for this Creature.
Region 3 is not used
for this Creature.
| 能力値 | 基準値 | レベルアップ | テイムボーナス | ||
|---|---|---|---|---|---|
| 野性生物 | テイム生物 | 追加 | 増加 | ||
| 80 | +16 | +5.4% | 0.07 | ||
| 200 | +20 | +10% | |||
| 150 | +15 | +10% | |||
| 450 | +45 | +10% | |||
| 150 | +3 | +4% | |||
| 8 | +0.4 | +1.7% | 7% | 17.6% | |
| 100% | N/A | +1% | |||
| 400 | +24 | N/A | 0.5 | ||
| 能力値 | 基準値 | レベルアップ |
|---|---|---|
| 野性生物 | ||
| 200 | +40 | |
| 200 | +20 | |
| 150 | +15 | |
| 450 | +45 | |
| 150 | +3 | |
| 12 | +0.6 | |
| 100% | N/A | |
| 400 | +24 |
野生生物の値を入力すると、どのステータスが目立っているかがわかります。高レベルの生物の値が緑色であれば、繁殖には非常に適しています。すでに生物をテイムしている場合は、外部ツールを使って繁殖用のステータスを取り戻すことができます。[1]
stat-calculatorはモバイルビューでは機能しません。代替方法についてはこちらをご覧ください: Apps
生物がテイムされた後は、テイム効果に応じていくつかのステータスにボーナスを得ることに注意してください。このため、テイムされた生物のレベルを取得することは困難です。したがって、このツールは野生生物のみを対象としていますが、ステータスがどのように配分されているかという第一印象を与えることができます。
This section describes how to fight against the Giant Bee.
These things are pure annoyances. You choose when to engage (by destroying a wild beehive), so you can prepare with ample time to do so. Just don't be stupid, and don't walk into other creatures and you're fine.
Performing a barrel roll with a ![]() Pteranodon is a relatively safe way to destroy the hive without wasting too many resources such as bullets. If the barrel roll is aimed correctly, the Pteranodon can damage the hive with more damage than its regular attack, and the barrel roll also allows the rider to move past the hive fast enough in order to not get stung by the Drones. Just repeat a “hit and run” strategy with you Pteranodons’s roll. Rocket Launchers are also great against wild hives. Another great way to destroy a hive is by using a
Pteranodon is a relatively safe way to destroy the hive without wasting too many resources such as bullets. If the barrel roll is aimed correctly, the Pteranodon can damage the hive with more damage than its regular attack, and the barrel roll also allows the rider to move past the hive fast enough in order to not get stung by the Drones. Just repeat a “hit and run” strategy with you Pteranodons’s roll. Rocket Launchers are also great against wild hives. Another great way to destroy a hive is by using a ![]() Dire Bear as Dire Bears have a passive buff that makes you and the Dire Bear immune to bees.
Dire Bear as Dire Bears have a passive buff that makes you and the Dire Bear immune to bees.
Ranged weapons and pikes or spears are effective against the drones.
Stings will dismount riders and slow players, making them easy targets for the swarm. Their small size makes them difficult to hit at times, and they move at a fair pace, allowing them to chase any assailant attempting to raid the hive.
The drones are fairly slow and have low health, making them easy targets for ranged weapons.
| 給餌間隔 | 時間 | ||
|---|---|---|---|
| 1 | 00:00 | 0:00:28 | |
| 2 | 05:09 | 0:05:09 | |
| 4 | 03:25 | 0:10:17 | |
| 3 | 03:51 | 0:07:43 | |
| 3 | 05:47 | 0:11:35 | |
| 5 | 03:12 | 0:12:51 | |
| 6 | 01:32 | 0:07:43 | |
| 7 | 03:00 | 0:18:01 | |
| 11 | 01:27 | 0:14:32 | |
| 13 | 01:23 | 0:16:43 | |
| 16 | 01:22 | 0:20:35 | |
| 32 | 00:39 | 0:20:35 | |
| 給餌間隔 | 時間 | ||
|---|---|---|---|
| 2 | 00:55 | 0:00:55 | |
| 3 | 03:51 | 0:07:43 | |
| 5 | 03:12 | 0:12:51 | |
| 3 | 03:51 | 0:07:43 | |
| 3 | 05:47 | 0:11:35 | |
| 6 | 03:05 | 0:15:25 | |
| 7 | 01:30 | 0:09:01 | |
| 9 | 02:53 | 0:23:09 | |
| 14 | 01:25 | 0:18:30 | |
| 17 | 01:22 | 0:21:52 | |
| 21 | 01:21 | 0:27:01 | |
| 42 | 00:39 | 0:27:01 | |
| 給餌間隔 | 時間 | ||
|---|---|---|---|
| 2 | 00:55 | 0:00:55 | |
| 3 | 03:51 | 0:07:43 | |
| 6 | 03:05 | 0:15:25 | |
| 4 | 03:26 | 0:10:18 | |
| 4 | 05:08 | 0:15:26 | |
| 7 | 02:59 | 0:17:59 | |
| 9 | 01:26 | 0:11:35 | |
| 11 | 02:49 | 0:28:18 | |
| 18 | 01:23 | 0:23:47 | |
| 21 | 01:21 | 0:27:01 | |
| 27 | 01:20 | 0:34:43 | |
| 53 | 00:39 | 0:34:05 | |
| 給餌間隔 | 時間 | ||
|---|---|---|---|
| 2 | 00:55 | 0:00:55 | |
| 4 | 03:26 | 0:10:18 | |
| 7 | 02:59 | 0:17:59 | |
| 5 | 03:13 | 0:12:52 | |
| 5 | 04:49 | 0:19:18 | |
| 9 | 02:53 | 0:23:08 | |
| 11 | 01:24 | 0:14:09 | |
| 13 | 02:47 | 0:33:26 | |
| 21 | 01:23 | 0:27:45 | |
| 26 | 01:20 | 0:33:26 | |
| 32 | 01:19 | 0:41:09 | |
| 63 | 00:39 | 0:40:31 | |
| 給餌間隔 | 時間 | ||
|---|---|---|---|
| 2 | 00:55 | 0:00:55 | |
| 4 | 03:26 | 0:10:18 | |
| 8 | 02:56 | 0:20:33 | |
| 5 | 03:13 | 0:12:52 | |
| 5 | 04:49 | 0:19:18 | |
| 10 | 02:51 | 0:25:42 | |
| 13 | 01:23 | 0:16:43 | |
| 15 | 02:45 | 0:38:35 | |
| 25 | 01:22 | 0:33:02 | |
| 30 | 01:19 | 0:38:35 | |
| 37 | 01:19 | 0:47:35 | |
| 74 | 00:39 | 0:47:35 | |
| 給餌間隔 | 時間 | ||
|---|---|---|---|
| 3 | 00:41 | 0:01:23 | |
| 5 | 03:13 | 0:12:52 | |
| 9 | 02:53 | 0:23:08 | |
| 6 | 03:05 | 0:15:26 | |
| 6 | 04:37 | 0:23:09 | |
| 12 | 02:48 | 0:30:50 | |
| 14 | 01:23 | 0:18:01 | |
| 17 | 02:43 | 0:43:43 | |
| 28 | 01:22 | 0:37:00 | |
| 34 | 01:19 | 0:43:43 | |
| 42 | 01:19 | 0:54:01 | |
| 84 | 00:39 | 0:54:01 | |
数値は最適な場合のものであり、常に予備を用意してください。
レベルに応じて必要な資源を計算するには、外部のTaming calculatorをご利用ください。
![]() キブル(簡易)の材料:
1 ×
キブル(簡易)の材料:
1 × ![]() こんがり魚、1 ×
こんがり魚、1 × ![]() 小型の卵、5 ×
小型の卵、5 × ![]() 繊維、5 ×
繊維、5 × ![]() メジョベリー、2 ×
メジョベリー、2 × ![]() ニンジン、1 ×
ニンジン、1 × ![]() 水
水
Taming an Apis Queen is perhaps one of the most difficult and annoying tasks any survivor can experience, but with the proper knowledge, equipment, and animals to aid you in the endeavor; the difficulty and annoyance make way for what can be a relatively simple and easy effort.
The general taming process happens like this; first, make the Queen appear by destroying wild beehives. The Queen is passively tamed by getting near to her and feeding her a selection of her favored foods (a list of which is provided above, place the food item in your last slot on your action bar, and press E, ![]() ,
, ![]() when the option is available), and this can only be done when the Drones surrounding her are calm and unaggressive towards you and any of your current tames nearby, but this is easier said than done. To get close enough without provoking the Drones, more often than not you require the aid of a
when the option is available), and this can only be done when the Drones surrounding her are calm and unaggressive towards you and any of your current tames nearby, but this is easier said than done. To get close enough without provoking the Drones, more often than not you require the aid of a ![]() Ghillie Suit and
Ghillie Suit and ![]() Bug Repellant, although it is not necessary if one decides to be swift about it. Once you have those, equip the Ghillie armor and spray on your repellent, then hold the crouch button to go prone. From there, you can crawl right up to her without angering the Drones, and proceed to feed her (Or just run up and Click E with kibble in your last slot, this will not require ghillie nor bug repellent.) However, these are not the only hurdles you have to jump before you can tame her, as things get much more complicated than that. In order to reach the Queen in the first place: the hive in which she lives must first be broken open. As a side note, some wild hives do not contain Queens, which can be identified with the complete absence of Drones defending them if you attack the hive. Secondly, you will occasionally encounter a hive that contains two to three Queens, or find multiple hives with their own separate Queen clipped into each other, but this is a rare occurrence.
Bug Repellant, although it is not necessary if one decides to be swift about it. Once you have those, equip the Ghillie armor and spray on your repellent, then hold the crouch button to go prone. From there, you can crawl right up to her without angering the Drones, and proceed to feed her (Or just run up and Click E with kibble in your last slot, this will not require ghillie nor bug repellent.) However, these are not the only hurdles you have to jump before you can tame her, as things get much more complicated than that. In order to reach the Queen in the first place: the hive in which she lives must first be broken open. As a side note, some wild hives do not contain Queens, which can be identified with the complete absence of Drones defending them if you attack the hive. Secondly, you will occasionally encounter a hive that contains two to three Queens, or find multiple hives with their own separate Queen clipped into each other, but this is a rare occurrence.
Breaking open the hive can be done in any number of ways, from your own weaponry such as melee or firearms, or explosives, but by far the most effective strategy is to make use of tames to assist you. The tame required for this process varies per map and where the hive is located, but generally the best options are ![]() Tapejara and Dimorphodon for hives located up on high cliffs or redwood trees (Tapejara: due to their flight and maneuverability, aids in spotting hives, positioning yourself properly to damage the hive, and killing the drones before they sting you. Dimorphodon, if they are available on the map, can be used to take the Tapejara's place for damaging the hive so that you don't have to risk getting stung and knocked off your flying mount, and because they are flyers; they can reach a hive no matter where it's at), and a Dire Bear for hives that are on the ground or near enough to it that ramps can be built to access the hive (because Dire Bears themselves are entirely immune to the dismounting and snaring status effect caused by the drone's stings, while their presence also largely prevents you yourself from getting stung). When the hive is attacked, one of two things will happen, depending on your tame's melee damage effectiveness: the hive will immediately break open and release the Queen who will start spawning drones to protect herself, or Drones will emerge from the damaged hive to sting and chase you off. If the hive was not broken open on the first hit and you aren't riding a Dire Bear or using Dimorphodon; retreat and put enough distance between you and the hive until the Drones despawn, then return and repeat this process until the hive is broken.
Tapejara and Dimorphodon for hives located up on high cliffs or redwood trees (Tapejara: due to their flight and maneuverability, aids in spotting hives, positioning yourself properly to damage the hive, and killing the drones before they sting you. Dimorphodon, if they are available on the map, can be used to take the Tapejara's place for damaging the hive so that you don't have to risk getting stung and knocked off your flying mount, and because they are flyers; they can reach a hive no matter where it's at), and a Dire Bear for hives that are on the ground or near enough to it that ramps can be built to access the hive (because Dire Bears themselves are entirely immune to the dismounting and snaring status effect caused by the drone's stings, while their presence also largely prevents you yourself from getting stung). When the hive is attacked, one of two things will happen, depending on your tame's melee damage effectiveness: the hive will immediately break open and release the Queen who will start spawning drones to protect herself, or Drones will emerge from the damaged hive to sting and chase you off. If the hive was not broken open on the first hit and you aren't riding a Dire Bear or using Dimorphodon; retreat and put enough distance between you and the hive until the Drones despawn, then return and repeat this process until the hive is broken.
Once the hive has been busted and the Queen is released, then begins the true challenge, and the primary reason why taming her is so difficult; she permanently flies, and wanders around aimlessly flying downwards: allowing her to reach locations and heights where she is virtually impossible to be fed and tamed from, or be attacked by dangerous predators that can kill her. This challenge, however, can be entirely negated, and where the equipment you bring comes into play. To force her to stay still, you require a trap that can be opened for her to fly into, then closed to box her in. The trap you will build Depends on whether the hive is located high up on a tree or cliff, or on or near to the ground. For tree or cliff-based hives; build a 2x2 of wood/adobe or better trap consisting of 4 foundations, 8 door frames, 8 doors, and 1 giant hatchframe and giant trap door sitting at the top to act as a lid. For ground-based or near-ground hives; the same design can be repeated, only with taller walls and a dinosaur gateway and gate facing towards the hive. Alternatively, multiple Wooden Cages can be placed on the ground in various places, partially distanced from and surrounding the hive, to act as traps (though the Queen can be trapped in Wooden Cages, the Wooden Cage often makes it difficult to get your crosshair on her to feed her the taming food). Once your trap is built, however, she's not simply going to fly into it. The trap needs to be baited, and ironically, the best and only bait that will grab her attention and force her to move into your trap is the very thing you are taming her for: ![]() Giant Bee Honey. (Needs confirmation, sources claim bee queens will not be tamed when considering themselves trapped, regardless this is quite a bit too much effort for a tame that's as simple as grabbing the kibble, running up, and clicking e.)
Giant Bee Honey. (Needs confirmation, sources claim bee queens will not be tamed when considering themselves trapped, regardless this is quite a bit too much effort for a tame that's as simple as grabbing the kibble, running up, and clicking e.)
Before you begin the process of breaking open her hive; you should first collect some honey from it (if the hive is out of your reach a Grappling Hook will be required), which will yield you up to 5 free jars. Once you have the honey, place all five jars into slots on your action bar so that you can use them as bait, and position yourself within your trap (if it is a Wooden Cage instead of a box trap built out of structures, stand just outside it). Proceed to break the hive open, whistling to your tames to attack it (on Scorched Earth, there are no Dire Bears or Dimorphodon unless you transfer them, without transfers, you will be forced to use your Tapejara to reach the hive and break it open yourself), and once the Queen is exposed; immediately whistle for your tames to back off by either whistling them to passive, or directing them to flee to another spot, then drop a ![]() Giant Bee Honey in the trap by using the slot on the action bar the honey is placed in (if the honey is dropped into the trap before her hive is broken open, she will ignore it). She will begin to fly towards the honey, but more often than not, her Drones tend to beat her to it. Following this, she will either pause for a few seconds, or continue flying towards the spot the honey was at before her Drones snatched it. If she pauses before entering the trap, drop another jar into the trap and repeat this until she either enters the trap, or you run out of honey. Once she enters the trap, she will pause for a few seconds after she reaches the honey; this is the moment where you need to close the dinosaur gate or giant trapdoor to shut her in. While you close the trap, if you still have some honey left over, drop another jar inside the trap to keep her in while door is still closing, for good measure. For the most effective results, make sure you have cleared the area surrounding the hive of other wild animals that can interfere and steal the bait before the Queen has a chance to get to it. Once she's shut in, the process of feeding her can begin; in the relative peace, ease, and safety of the trap.
Giant Bee Honey in the trap by using the slot on the action bar the honey is placed in (if the honey is dropped into the trap before her hive is broken open, she will ignore it). She will begin to fly towards the honey, but more often than not, her Drones tend to beat her to it. Following this, she will either pause for a few seconds, or continue flying towards the spot the honey was at before her Drones snatched it. If she pauses before entering the trap, drop another jar into the trap and repeat this until she either enters the trap, or you run out of honey. Once she enters the trap, she will pause for a few seconds after she reaches the honey; this is the moment where you need to close the dinosaur gate or giant trapdoor to shut her in. While you close the trap, if you still have some honey left over, drop another jar inside the trap to keep her in while door is still closing, for good measure. For the most effective results, make sure you have cleared the area surrounding the hive of other wild animals that can interfere and steal the bait before the Queen has a chance to get to it. Once she's shut in, the process of feeding her can begin; in the relative peace, ease, and safety of the trap.

Having a tamed Apis Queen in your menagerie of tames is without a doubt one of the best advantages you can have as, much like Farming, your newly acquired ![]() Bee Hive provides you with extremely beneficial, long-term results; a replenishing and easily accessed supply of
Bee Hive provides you with extremely beneficial, long-term results; a replenishing and easily accessed supply of ![]() Giant Bee Honey, which can be used in a wide variety of purposes. Unlike a wild hive, which will always be aggressive to you, and will only yield up to 5 jars of honey per harvest that only starts to replenish every 15 minutes; your tamed hive can hold up to 45 jars of honey, producing about two jars roughly every hour. However, there is a catch; your tamed hive requires a supply of
Giant Bee Honey, which can be used in a wide variety of purposes. Unlike a wild hive, which will always be aggressive to you, and will only yield up to 5 jars of honey per harvest that only starts to replenish every 15 minutes; your tamed hive can hold up to 45 jars of honey, producing about two jars roughly every hour. However, there is a catch; your tamed hive requires a supply of ![]() Rare Flower to produce honey, and will slowly begin to degrade in structure health and break without flowers in its inventory. Thankfully, the production cost is very low, as the flowers are consumed at an extremely slow rate, about one per hour, and if the hive does break, your Queen will emerge from it; healthy and unharmed, able to be grabbed again to make a new hive that can be placed again when you are ready.
Rare Flower to produce honey, and will slowly begin to degrade in structure health and break without flowers in its inventory. Thankfully, the production cost is very low, as the flowers are consumed at an extremely slow rate, about one per hour, and if the hive does break, your Queen will emerge from it; healthy and unharmed, able to be grabbed again to make a new hive that can be placed again when you are ready.
When tamed, there is a prompt displayed over the Queen Bee: "press E, ![]() ,
, ![]() to obtain hive". When doing so, a
to obtain hive". When doing so, a ![]() Bee Hive is placed in your inventory and the Queen disappears. The hive can then be placed like on the ground like a structure, but requires
Bee Hive is placed in your inventory and the Queen disappears. The hive can then be placed like on the ground like a structure, but requires ![]() Rare Flower to 'stay healthy', or it will break. When destroyed, the Queen that was used to build the
Rare Flower to 'stay healthy', or it will break. When destroyed, the Queen that was used to build the ![]() Bee Hive will respawn, and can then be used to create a new hive, which can be placed again when you have the flowers to fuel it. Once placed and loaded up with flowers, your hive will provide a consistent source of
Bee Hive will respawn, and can then be used to create a new hive, which can be placed again when you have the flowers to fuel it. Once placed and loaded up with flowers, your hive will provide a consistent source of ![]() Giant Bee Honey, at a rate of roughly two jars an hour. Withdrawing honey from your hive, however, can be a bit tricky, but nowhere near the effort that was required in order to tame your Queen in the first place. If you don't use the proper equipment when you access your hive's inventory, you will lose a small chunk of your health immediately, and receive the BEES! status effect, which slows your movement speed by 1/3rd and drains 10% of your total health over a few seconds. To avoid these hazards, you have a few options. A
Giant Bee Honey, at a rate of roughly two jars an hour. Withdrawing honey from your hive, however, can be a bit tricky, but nowhere near the effort that was required in order to tame your Queen in the first place. If you don't use the proper equipment when you access your hive's inventory, you will lose a small chunk of your health immediately, and receive the BEES! status effect, which slows your movement speed by 1/3rd and drains 10% of your total health over a few seconds. To avoid these hazards, you have a few options. A ![]() Ghillie Suit will allow you to access the hive without getting the BEES! status effect, but you will still lose a chunk of your health from accessing the hive's inventory. To avoid both the immediate health penalty and the status effect, you can equip either
Ghillie Suit will allow you to access the hive without getting the BEES! status effect, but you will still lose a chunk of your health from accessing the hive's inventory. To avoid both the immediate health penalty and the status effect, you can equip either ![]() Bug Repellant or a full suit of Hazard Gear.
Bug Repellant or a full suit of Hazard Gear.
A quick tutorial on how to make a bee trap to get honey easier in the Redwoods.
| Patch | 変更点 |
|---|---|
| 257.0 | |
| 257.4 | |
| 257.42 |
|
| 259.0 | Fixed issue where bee hives were stacking on top of each other. |
| 261.0 | Drone bees no longer give XP. |
| 262.0 | Acsessing a Bee Hive no logner provides the player with |
| 278.0 | |
| 305.12 | Fixed a bug in which the |
| 310.67 |
|
| 311.74 Crystal Isles Expansion Release | Added |
| 312.65 | Having |
| 324.16 | Fixed invisible bees. |
| 326.3 | Fixed a bug where wild bees would not spawn. |
| 329.27 | Added bees to Genesis: Part 2. |


Beehives obtained by taming Giant Bees