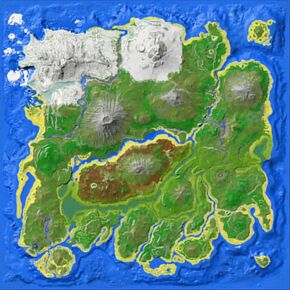
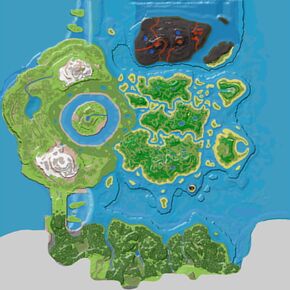
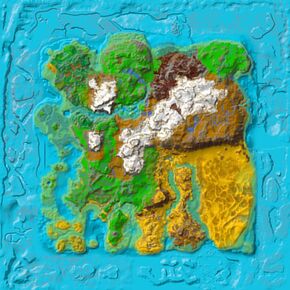
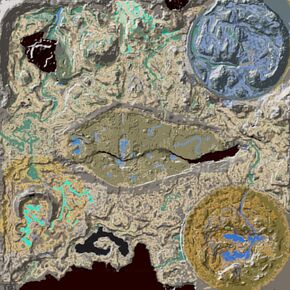
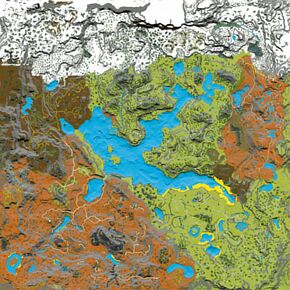
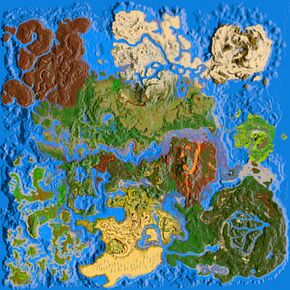
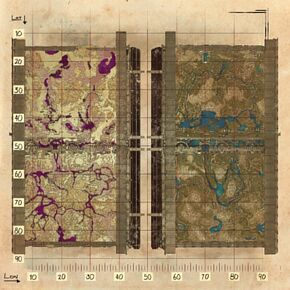
cheat summon Dimorph_Character_BP_Ccheat SpawnDino "Blueprint'/Game/PrimalEarth/Dinos/Dimorphodon/Dimorph_Character_BP.Dimorph_Character_BP'" 500 0 0 35cheat summon Dimorph_Character_BP_Aberrant_Ccheat SpawnDino "Blueprint'/Game/PrimalEarth/Dinos/Dimorphodon/Dimorph_Character_BP_Aberrant.Dimorph_Character_BP_Aberrant'" 500 0 0 35cheat summon Dimorph_Character_BP_Corrupt_Ccheat SpawnDino "Blueprint'/Game/Extinction/Dinos/Corrupt/Dimorphodon/Dimorph_Character_BP_Corrupt.Dimorph_Character_BP_Corrupt'" 500 0 0 35cheat summon Dimorph_Character_BP_Aggressive_Retrieve_Ccheat SpawnDino "Blueprint'/Game/Genesis/Dinos/MissionVariants/Retrieve/Volcanic/Dimorph_Character_BP_Aggressive_Retrieve.Dimorph_Character_BP_Aggressive_Retrieve'" 500 0 0 35cheat summon Dimorph_Character_BP_STA_Ccheat SpawnDino "Blueprint'/Game/Genesis2/Missions/ModularMission/Gauntlet2/STA/Dinos/Dimorph_Character_BP_STA.Dimorph_Character_BP_STA'" 500 0 0 35cheat summon Dimorph_Character_BP_TameSTA_Ccheat SpawnDino "Blueprint'/Game/Genesis2/Missions/ModularMission/Gauntlet2/STA/Endless/Tames/Dimorph_Character_BP_TameSTA.Dimorph_Character_BP_TameSTA'" 500 0 0 35



















ディモルフォドン(die-More-pho-don)は、Dimorphとも呼ばれ、2015年7月18日にゲームに追加されたARK: Survival Evolvedの生物の一種です。
このセクションは、サバイバーであるヘレナ・ウォーカーが書いた調査書を、正確にコピーすることを目的としています。この文章とゲーム内の生物との間には若干の食い違いがあるかもしれません。
Dimorphodon equesica
生息年代Early Jurassic
食性Carnivore
気性Reactive
ディモルフォドンはジキルとハイドのような島の翼竜です。普段はおとなしく、時には友好的ですらありますが、ひとたび怒らせれば極端に攻撃的になります。たとえ相手がより大きな動物だったとしても、それで怯えるようなこともありません。ディモルフォドンはその大きい(しかし軽量の)頭蓋骨と歯によって、自分より小さい動物を一瞬で仕留めることが可能です。かろうじて1mを超える程度のディモルフォドンは、食物連鎖の中では下位に位置します。しかしその信じられないほどの素早さと驚くほど強力な噛みつきは驚異的で、特に集団で襲ってきた時はかなり危険です。怒っている時や空腹時のディモルフォドンの群れは自身の何倍もある獲物をも倒します。サバイバーは彼らの群れが集まっているところで狩りをしないよう、気を付ける必要があります。
ディモルフォドンは比較的簡単に飼いならせる動物ですが、戦闘ではシンプルかつ強力な用途があります。恐竜などに騎乗している人間を直接攻撃できるのです。多数のディモルフォドンの集団が一気に襲ってくれば、敵は対処に困るでしょう。
Dimorphodons tend to stay close in groups of 2-5, however they can rarely be seen alone. They do not attack the player unless they are attacked or an egg is stolen.
They fight using the Raptor tactic (hit and run) and tend to dart towards their target, deliver a strike, then dart away. A small but dangerous flyer, the Dimorphodons are small, fast, and very hard to hit. They are great pets and hunters once tamed, but in the wild, they will attack if provoked and are very hard to hit for players without ranged melee weapons (pikes and spears) and mounts that do not have vertical attacking capabilities.
Tamed Dimorphodons will attack players if directed to attack an animal with a rider, making them excellent human hunters during raids. Watch out for these when walking along rivers and swamps, and some shorelines. In large groups they can become quite a menace, trying to tame one when a large pack is present is very hard so you may want to knock or kill the others so you can tame the one you want. Once in a group they take a swarm mentality, and due to the hit and run attack style, you'll have one hitting you as soon as the other leaves your vision. Shotguns and large mounts should end your troubles quickly.
The Dimorphodon appears as a small flying reptile with a notably round head. They look similar to bats, and because of this can often be confused with the cave-dwelling Onyc. However there are a few notable differences in appearance, the main one being Dimorphodon's wide color scheme. Whereas similar species tend to have only brown, tan and black colors, Dimorphodon boast striking and bright colors such as reds and greens in addition to more mundane blacks and browns. They can even come in dazzling shades of white, which may seem appropriate given this creature can often be found in the tundras.
このセクションでは、ディモルフォドンの自然な色と領域が表示されます。デモンストレーションのために、以下の領域はアルビノのディモルフォドンの上に赤色で着色されています。各領域の説明の下に表示される色付きの四角形は、自然な配色の全体的な範囲を提供するためにディモルフォドンがランダムにスポーンする色です。色の上にカーソルを置くと、その色の名前とIDが表示されます。
この情報を使用して、チートコンソールにcheat SetTargetDinoColor <ColorRegion> <ColorID>と入力することにより、ディモルフォドンの領域を変更できます。たとえば、cheat SetTargetDinoColor 0 6はディモルフォドンの"body"がmagenta色になります。
この情報を使用して、チートコンソールにcheat SetTargetDinoColor <ColorRegion> <ColorID>と入力することにより、ディモルフォドンの領域を変更できます。たとえば、cheat SetTargetDinoColor 0 6はディモルフォドンの"all muted -g"がmagenta色になります。
すべての異種のディモルフォドンがドロップします:
| 能力値 | 基準値 | レベルアップ | テイムボーナス | ||
|---|---|---|---|---|---|
| 野性生物 | テイム生物 | 追加 | 増加 | ||
| 125 | +25 | +5.4% | 0.07 | ||
| 150 | +15 | +10% | |||
| 150 | +15 | +10% | |||
| 900 | +90 | +10% | |||
| 50 | +1 | +4% | |||
| 23 | +1.15 | +1.7% | 7% | 17.6% | |
| 100% | N/A | +1% | |||
| 100 | +6 | N/A | 0.5 | ||
野生生物の値を入力すると、どのステータスが目立っているかがわかります。高レベルの生物の値が緑色であれば、繁殖には非常に適しています。すでに生物をテイムしている場合は、外部ツールを使って繁殖用のステータスを取り戻すことができます。[1]
stat-calculatorはモバイルビューでは機能しません。代替方法についてはこちらをご覧ください: Apps
生物がテイムされた後は、テイム効果に応じていくつかのステータスにボーナスを得ることに注意してください。このため、テイムされた生物のレベルを取得することは困難です。したがって、このツールは野生生物のみを対象としていますが、ステータスがどのように配分されているかという第一印象を与えることができます。
野生生物の飼い方に関する一般的な情報はテイムを参照してください。
Since the introduction of the bola in May 2016, this weapon is probably the easiest way to KO a Dimorphodon. Once entangled in the bola, walk up to your immobilized prey and shoot it in the head with a tranq dart or tranq arrow. An Electric Prod with 100% melee damage (engram-grade) will instantly knock-out a Level 22 or below Dimorphodon if hit directly in the head. This is another easy method to take one out, especially when you only want to knock out a single Dimorphodon when there are several others nearby.
Hitting a Dimorphodon that is not attacking you poses quite a challenge to any survivor. Trying to shoot the Dimorphodon from the side made many a survivor scratch their heads due to arrows sticking out of the Dino but no apparent result in behavior. In this case, server lag, client lag and an incredibly small hit-box will make the client calculate the shot as a hit and thus rendering the arrow, whereas the server calculates the same shot as miss due to lag/delay. Playing on a server with ~30 Ping @ 30fps its necessary to "lead" the target by about one inch of the screen when using a tranq rifle even on short distance while the Dimorphodon is flying at 90° to your line of sight.
Therefore, clever survivors will make sure the Dimorphodon is angry at the survivor, thus flying straight towards him, which makes landing hits very easy.
Another method is to mount a flyer like a Pteranodon or an Argentavis(preferably low level, low dmg) and fly to the target. Attack it, so it aggroes the Argentavis/Pteranodon. Fly away a few meters, land, unmount and shoot a tranq dart/arrow into its head (since the Dimorphodon is heading for your mount, your position will be slightly off his flight-path. For a head shot, you will have to lead the target again. Just take good measure of the dinos level as one tranq arrow to the head of a flyer deals about 150-250 dmg, add the damage you did with your bird attack and you are likely to kill a low level Dimorphodon.
This method works very well for high level dinos (100+), for lower levels a slingshot might work as well.
After enough torpor is applied, the Dimorphodon will begin to flee. Now is the time to position oneself directly in the wake of his flightpath (behind him) and shoot him from there to bring it finally down.
Sidenote: Having an Argent or Pteranodon at hand also makes for easy prime meat gathering. Survivors with enough foresight will scout for a valuable Dimorphodon, note the position and color, then gather some prime meat and quickly down the Dimorphodon.
When trying to tame low level Dimorphodons, the Beelzebufo and Scorpion tactics will work better as all projectiles deal increased damage to flyers, often killing the low hp Dimorphodons.
If hunting alone, many choose to bring a Beelzebufo as a mount, rather than using a weapon. Using a frog with high melee damage will frequently produce greater success as a leveled frog is able to apply more torpor per hit, reducing odds of the target escaping.
Hunting with a frog has three primary benefits:
The primary drawback to hunting with a frog is that you have one more positional variable to control. Trying to hit a small moving target while jumping can be challenging, and the frog turns much less quickly than the Dimorphodon, allowing them to easily evade by changing direction. A secondary drawback is that a frog with exceedingly high melee damage, while able to take down higher level targets in one or two hits, will frequently kill targets with lower health.
Have patience.
Dimorphodons have a wide-ranging but consistent flight pattern, and will always return to locations they have previously visited. Do not chase while observing; if you wait, it will return. Dimorphodons come to rest on the ground infrequently, and you want to mentally note these locations before alerting the target.
After your target is selected, follow from ~3-5 tiles behind. If Dimorphodons feel pursued, they will stoop to land but immediately take off again; however, if they fully land, they remain on the ground for about 5 seconds regardless of pursuit. Follow from the maximum distance you can close in about 2–3 seconds of sprinting.
When the Dimorphodon has actually landed, close the distance with a sprint. You will have a few heartbeats' time–before it alights again–to line up a solid head-shot from point blank range. If you lose this opportunity, wait for the next one–unless you are exceptionally skilled at hitting small, moving targets, this is likely your only opportunity for a guaranteed head-shot.
After the first shot, it will take off again before most crossbows or rifles have reloaded; a bow or compound bow may score 1-2 additional hits during this time. However, it will fly directly in the direction it was facing, at eye level for a few seconds more. If you approach from behind for the head shot, you can easily score another 2-3 hits with a crossbow or rifle during this flight.
If you wait for the Dimorphodon to land again, all torpor from these initial shots will be long gone and you will, essentially, be starting over with a greater risk of killing your target. Therefore, you must take the remainder of your shots while it is attempting active evasion.
After several more hits, the Dimorphodon will turn to fight.
It will stoop to fly in rapid circles around you, aiming attacks for your head–these attacks happen so rapidly that a novice hunter may want to wear flak or chitin armor.
Stand still and count the number of seconds it takes the Dimorphodon to make one full circle and reappear directly in front of you, and take note of the height of the previous circle. Dimorphodons will vary height during attacks, but will typically make several attacks at the same level before changing height again. Noting height and timing when the Dimorphodon will reappear in front of you should give you enough information to anticipate when they'll next appear in front of your weapon, and land enough shots to KO the target.
You will waste ammo–LOTS of ammo. Bring 2-3x as much as you think you need, at a minimum, so that you do not need to abandon the hunt halfway through to retrieve ammo. Expect to take shots that are not perfect; if you wait for perfect shots, you will never KO this particular dinosaur.
.... Or just wait for it to land and bola so you can always land perfect shots.
Bring a scorpion with high-leveled melee attack. Mount up and wait - at a distance - for the Dimorphodon to land. When it does, race up and position your scorpion's main body over the Dimorphodon, forming a cage with its legs. The dimorph should be directly under the scorpion's head, almost cupped in the pincers, where it has the most collision. When you are in position, strike! Wait 9-10sec between strikes, but the Dimorphodon should be trapped underneath you and unmoving if you positioned right. The downside is that the dimorph can still hit you, so bring flak armor and health brews if your scorpion has low damage or the dimorph is high level.
In some cases the dimorph is able to escape anyway; in this case you should jump off of your scorpion, making the dimorph aggro onto it instead of you. Let the scorpion attack at will - it will land at least a few hits, raising torpor - and meanwhile you watch its tight circles and hit it with tranqs. With this method even the highest-level dimorphs can be downed in only a couple minutes.
A group of Dimorphodons, even two lower-level ones, will attack so quickly that you may need to kill all of them (including your target) to avoid player death. You may need to watch your target for several minutes, without moving, to ensure its flight does not come into contact with any other Dimorphodon's flight. If it contacts any others, kill the Dimorphodons that are not your target while their flight patterns are divergent.
Dimorphodons have very little torpor (100 + 6 * level) and lose it very quickly. They do not lose torpor as quickly as a Compy, but very nearly. Make sure you have a stack of narcotic on your person before you begin the hunt, and do not anticipate being away from the animal at all during the tame. If you need raw prime meat, recruit a friend to deliver it.
The Electric Prod(100% damage) can instantly knock out a Dimorphodon below level 27(included) and inflict almost no damage. A prod with 376% or higher damage can knock out any wild Dimorphodon.
| 時間 | |||||
|---|---|---|---|---|---|
| 2 | 0 | 0 | 0 | 0:01:07 | |
| 3 | 0 | 0 | 0 | 0:01:40 | |
| 2 | 0 | 0 | 0 | 0:01:07 | |
| 4 | 2 | 1 | 1 | 0:02:14 | |
| 4 | 0 | 0 | 0 | 0:01:07 | |
| 5 | 5 | 1 | 1 | 0:02:47 | |
| 8 | 2 | 1 | 1 | 0:02:17 | |
| 10 | 5 | 1 | 1 | 0:02:47 | |
| 12 | 7 | 2 | 1 | 0:03:21 | |
| 24 | 7 | 2 | 1 | 0:03:21 | |
| 気絶するまで: | |||||
| 気絶値の減少値: 0.84 / 秒, 気絶状態から回復する時間: 00:02:00 | |||||
| 時間 | |||||
|---|---|---|---|---|---|
| 3 | 0 | 0 | 0 | 0:01:41 | |
| 6 | 1 | 1 | 1 | 0:03:20 | |
| 4 | 0 | 0 | 0 | 0:02:14 | |
| 8 | 9 | 2 | 1 | 0:04:27 | |
| 10 | 0 | 0 | 0 | 0:02:47 | |
| 12 | 25 | 6 | 3 | 0:06:41 | |
| 19 | 16 | 4 | 2 | 0:05:26 | |
| 23 | 23 | 6 | 3 | 0:06:24 | |
| 29 | 34 | 8 | 4 | 0:08:04 | |
| 57 | 34 | 8 | 4 | 0:07:56 | |
| 気絶するまで: | |||||
| 気絶値の減少値: 1.39 / 秒, 気絶状態から回復する時間: 00:03:17 | |||||
| 時間 | |||||
|---|---|---|---|---|---|
| 5 | 0 | 0 | 0 | 0:02:47 | |
| 9 | 7 | 2 | 1 | 0:05:00 | |
| 6 | 0 | 0 | 0 | 0:03:21 | |
| 12 | 21 | 5 | 3 | 0:06:40 | |
| 15 | -0 | -0 | -0 | 0:04:11 | |
| 18 | 49 | 12 | 6 | 0:10:01 | |
| 30 | 37 | 9 | 5 | 0:08:34 | |
| 36 | 49 | 12 | 6 | 0:10:01 | |
| 45 | 70 | 17 | 9 | 0:12:31 | |
| 90 | 70 | 17 | 9 | 0:12:31 | |
| 気絶するまで: | |||||
| 気絶値の減少値: 1.81 / 秒, 気絶状態から回復する時間: 00:04:11 | |||||
| 時間 | |||||
|---|---|---|---|---|---|
| 7 | 0 | 0 | 0 | 0:03:54 | |
| 13 | 23 | 6 | 3 | 0:07:13 | |
| 9 | 2 | 1 | 1 | 0:05:01 | |
| 17 | 44 | 11 | 6 | 0:09:27 | |
| 21 | 10 | 3 | 2 | 0:05:51 | |
| 25 | 85 | 21 | 11 | 0:13:54 | |
| 42 | 67 | 17 | 9 | 0:12:00 | |
| 50 | 85 | 21 | 11 | 0:13:54 | |
| 62 | 116 | 29 | 15 | 0:17:14 | |
| 124 | 116 | 29 | 15 | 0:17:14 | |
| 気絶するまで: | |||||
| 気絶値の減少値: 2.19 / 秒, 気絶状態から回復する時間: 00:04:50 | |||||
| 時間 | |||||
|---|---|---|---|---|---|
| 9 | 0 | 0 | 0 | 0:05:01 | |
| 16 | 36 | 9 | 5 | 0:08:53 | |
| 11 | 8 | 2 | 1 | 0:06:07 | |
| 21 | 64 | 16 | 8 | 0:11:40 | |
| 27 | 22 | 6 | 3 | 0:07:31 | |
| 32 | 126 | 32 | 16 | 0:17:47 | |
| 53 | 99 | 25 | 13 | 0:15:08 | |
| 63 | 123 | 31 | 16 | 0:17:31 | |
| 79 | 168 | 42 | 21 | 0:21:57 | |
| 158 | 168 | 42 | 21 | 0:21:57 | |
| 気絶するまで: | |||||
| 気絶値の減少値: 2.54 / 秒, 気絶状態から回復する時間: 00:05:20 | |||||
| 時間 | |||||
|---|---|---|---|---|---|
| 11 | 4 | 1 | 1 | 0:06:07 | |
| 19 | 52 | 14 | 7 | 0:10:33 | |
| 13 | 16 | 5 | 3 | 0:07:14 | |
| 26 | 93 | 24 | 12 | 0:14:26 | |
| 32 | 34 | 9 | 5 | 0:08:54 | |
| 39 | 171 | 44 | 22 | 0:21:41 | |
| 64 | 134 | 35 | 18 | 0:18:16 | |
| 77 | 168 | 43 | 22 | 0:21:24 | |
| 96 | 224 | 58 | 29 | 0:26:41 | |
| 192 | 224 | 58 | 29 | 0:26:41 | |
| 気絶するまで: | |||||
| 気絶値の減少値: 2.88 / 秒, 気絶状態から回復する時間: 00:05:45 | |||||
| Time | ||||||
|---|---|---|---|---|---|---|
| 2 | 0 | 0 | 0 | 0:01:07 | ||
| 4 | 2 | 1 | 1 | 0:02:14 | ||
| 5 | 0 | 0 | 0 | 0:01:24 | ||
| 6 | 7 | 2 | 1 | 0:03:21 | ||
| 9 | 4 | 1 | 1 | 0:02:35 | ||
| 11 | 6 | 2 | 1 | 0:03:04 | ||
| 14 | 10 | 3 | 2 | 0:03:54 | ||
| 27 | 9 | 2 | 1 | 0:03:46 | ||
| 1 | 0 | 0 | 0 | 0:00:34 | ||
| 2 | 0 | 0 | 0 | 0:01:07 | ||
| 2 | 0 | 0 | 0 | 0:00:34 | ||
| 2 | 0 | 0 | 0 | 0:01:07 | ||
| 3 | 0 | 0 | 0 | 0:00:52 | ||
| 4 | 0 | 0 | 0 | 0:01:07 | ||
| 5 | 0 | 0 | 0 | 0:01:24 | ||
| 9 | 0 | 0 | 0 | 0:01:16 | ||
| 1 | 0 | 0 | 0 | 0:00:34 | ||
| 1 | 0 | 0 | 0 | 0:00:34 | ||
| 1 | 0 | 0 | 0 | 0:00:17 | ||
| 1 | 0 | 0 | 0 | 0:00:34 | ||
| 1 | 0 | 0 | 0 | 0:00:18 | ||
| 1 | 0 | 0 | 0 | 0:00:17 | ||
| 1 | 0 | 0 | 0 | 0:00:17 | ||
| 1 | 0 | 0 | 0 | 0:00:09 | ||
| 1 | 0 | 0 | 0 | 0:00:34 | ||
| 1 | 0 | 0 | 0 | 0:00:34 | ||
| 1 | 0 | 0 | 0 | 0:00:17 | ||
| 1 | 0 | 0 | 0 | 0:00:34 | ||
| 1 | 0 | 0 | 0 | 0:00:18 | ||
| 1 | 0 | 0 | 0 | 0:00:17 | ||
| 1 | 0 | 0 | 0 | 0:00:17 | ||
| 1 | 0 | 0 | 0 | 0:00:09 | ||
| KO: | ||||||
| Torpidity-depletion: 0.84 / s, Time until all torpidity is depleted: 00:02:00 | ||||||
| Time | ||||||
|---|---|---|---|---|---|---|
| 5 | 0 | 0 | 0 | 0:02:47 | ||
| 9 | 13 | 3 | 2 | 0:05:00 | ||
| 11 | 0 | 0 | 0 | 0:03:04 | ||
| 13 | 29 | 7 | 4 | 0:07:14 | ||
| 22 | 22 | 5 | 3 | 0:06:17 | ||
| 26 | 29 | 7 | 4 | 0:07:14 | ||
| 33 | 42 | 10 | 5 | 0:09:11 | ||
| 65 | 41 | 10 | 5 | 0:09:02 | ||
| 2 | 0 | 0 | 0 | 0:01:07 | ||
| 3 | 0 | 0 | 0 | 0:01:40 | ||
| 4 | 0 | 0 | 0 | 0:01:07 | ||
| 5 | 0 | 0 | 0 | 0:02:47 | ||
| 8 | 0 | 0 | 0 | 0:02:17 | ||
| 9 | 0 | 0 | 0 | 0:02:31 | ||
| 11 | 0 | 0 | 0 | 0:03:04 | ||
| 22 | 0 | 0 | 0 | 0:03:04 | ||
| 1 | 0 | 0 | 0 | 0:00:34 | ||
| 1 | 0 | 0 | 0 | 0:00:34 | ||
| 1 | 0 | 0 | 0 | 0:00:17 | ||
| 1 | 0 | 0 | 0 | 0:00:34 | ||
| 1 | 0 | 0 | 0 | 0:00:18 | ||
| 1 | 0 | 0 | 0 | 0:00:17 | ||
| 2 | 0 | 0 | 0 | 0:00:34 | ||
| 3 | 0 | 0 | 0 | 0:00:26 | ||
| 1 | 0 | 0 | 0 | 0:00:34 | ||
| 1 | 0 | 0 | 0 | 0:00:34 | ||
| 1 | 0 | 0 | 0 | 0:00:17 | ||
| 1 | 0 | 0 | 0 | 0:00:34 | ||
| 1 | 0 | 0 | 0 | 0:00:18 | ||
| 1 | 0 | 0 | 0 | 0:00:17 | ||
| 1 | 0 | 0 | 0 | 0:00:17 | ||
| 1 | 0 | 0 | 0 | 0:00:09 | ||
| KO: | ||||||
| Torpidity-depletion: 1.39 / s, Time until all torpidity is depleted: 00:03:17 | ||||||
| Time | ||||||
|---|---|---|---|---|---|---|
| 9 | 5 | 2 | 1 | 0:05:01 | ||
| 17 | 44 | 11 | 6 | 0:09:27 | ||
| 21 | 12 | 3 | 2 | 0:05:51 | ||
| 25 | 84 | 21 | 11 | 0:13:54 | ||
| 41 | 64 | 16 | 8 | 0:11:43 | ||
| 49 | 81 | 20 | 10 | 0:13:37 | ||
| 62 | 113 | 28 | 14 | 0:17:14 | ||
| 123 | 112 | 27 | 14 | 0:17:06 | ||
| 3 | 0 | 0 | 0 | 0:01:41 | ||
| 6 | 0 | 0 | 0 | 0:03:20 | ||
| 7 | 0 | 0 | 0 | 0:01:57 | ||
| 9 | 5 | 2 | 1 | 0:05:01 | ||
| 14 | 0 | 0 | 0 | 0:04:00 | ||
| 17 | 2 | 1 | 1 | 0:04:44 | ||
| 21 | 12 | 3 | 2 | 0:05:51 | ||
| 41 | 11 | 3 | 2 | 0:05:42 | ||
| 1 | 0 | 0 | 0 | 0:00:34 | ||
| 1 | 0 | 0 | 0 | 0:00:34 | ||
| 1 | 0 | 0 | 0 | 0:00:17 | ||
| 1 | 0 | 0 | 0 | 0:00:34 | ||
| 2 | 0 | 0 | 0 | 0:00:35 | ||
| 2 | 0 | 0 | 0 | 0:00:34 | ||
| 3 | 0 | 0 | 0 | 0:00:51 | ||
| 5 | 0 | 0 | 0 | 0:00:42 | ||
| 1 | 0 | 0 | 0 | 0:00:34 | ||
| 1 | 0 | 0 | 0 | 0:00:34 | ||
| 1 | 0 | 0 | 0 | 0:00:17 | ||
| 1 | 0 | 0 | 0 | 0:00:34 | ||
| 1 | 0 | 0 | 0 | 0:00:18 | ||
| 1 | 0 | 0 | 0 | 0:00:17 | ||
| 1 | 0 | 0 | 0 | 0:00:17 | ||
| 1 | 0 | 0 | 0 | 0:00:09 | ||
| KO: | ||||||
| Torpidity-depletion: 2 / s, Time until all torpidity is depleted: 00:04:32 | ||||||
| Time | ||||||
|---|---|---|---|---|---|---|
| 15 | 28 | 8 | 4 | 0:08:21 | ||
| 30 | 117 | 30 | 15 | 0:16:39 | ||
| 37 | 49 | 13 | 7 | 0:10:17 | ||
| 44 | 200 | 52 | 26 | 0:24:27 | ||
| 73 | 162 | 42 | 21 | 0:20:51 | ||
| 88 | 200 | 52 | 26 | 0:24:27 | ||
| 110 | 266 | 68 | 34 | 0:30:34 | ||
| 219 | 264 | 68 | 34 | 0:30:26 | ||
| 5 | 0 | 0 | 0 | 0:02:47 | ||
| 10 | 0 | 0 | 0 | 0:05:33 | ||
| 13 | 0 | 0 | 0 | 0:03:37 | ||
| 15 | 28 | 8 | 4 | 0:08:21 | ||
| 25 | 15 | 4 | 2 | 0:07:09 | ||
| 30 | 28 | 8 | 4 | 0:08:21 | ||
| 37 | 49 | 13 | 7 | 0:10:17 | ||
| 73 | 48 | 13 | 7 | 0:10:09 | ||
| 1 | 0 | 0 | 0 | 0:00:34 | ||
| 1 | 0 | 0 | 0 | 0:00:34 | ||
| 2 | 0 | 0 | 0 | 0:00:34 | ||
| 2 | 0 | 0 | 0 | 0:01:07 | ||
| 3 | 0 | 0 | 0 | 0:00:52 | ||
| 3 | 0 | 0 | 0 | 0:00:51 | ||
| 4 | 0 | 0 | 0 | 0:01:07 | ||
| 8 | 0 | 0 | 0 | 0:01:07 | ||
| 1 | 0 | 0 | 0 | 0:00:34 | ||
| 1 | 0 | 0 | 0 | 0:00:34 | ||
| 1 | 0 | 0 | 0 | 0:00:17 | ||
| 1 | 0 | 0 | 0 | 0:00:34 | ||
| 1 | 0 | 0 | 0 | 0:00:18 | ||
| 1 | 0 | 0 | 0 | 0:00:17 | ||
| 1 | 0 | 0 | 0 | 0:00:17 | ||
| 1 | 0 | 0 | 0 | 0:00:09 | ||
| KO: | ||||||
| Torpidity-depletion: 2.88 / s, Time until all torpidity is depleted: 00:05:45 | ||||||
| Time | ||||||
|---|---|---|---|---|---|---|
| 28 | 108 | 30 | 15 | 0:15:34 | ||
| 55 | 298 | 83 | 42 | 0:30:32 | ||
| 69 | 154 | 43 | 22 | 0:19:11 | ||
| 83 | 497 | 137 | 69 | 0:46:07 | ||
| 138 | 411 | 114 | 57 | 0:39:24 | ||
| 165 | 494 | 136 | 68 | 0:45:51 | ||
| 206 | 639 | 176 | 88 | 0:57:14 | ||
| 412 | 639 | 176 | 88 | 0:57:14 | ||
| 10 | 0 | 0 | 0 | 0:05:34 | ||
| 19 | 44 | 12 | 6 | 0:10:33 | ||
| 23 | 0 | 0 | 0 | 0:06:24 | ||
| 28 | 108 | 30 | 15 | 0:15:34 | ||
| 46 | 77 | 21 | 11 | 0:13:08 | ||
| 55 | 104 | 29 | 15 | 0:15:17 | ||
| 69 | 154 | 43 | 22 | 0:19:11 | ||
| 138 | 154 | 43 | 22 | 0:19:11 | ||
| 1 | 0 | 0 | 0 | 0:00:34 | ||
| 2 | 0 | 0 | 0 | 0:01:07 | ||
| 3 | 0 | 0 | 0 | 0:00:51 | ||
| 3 | 0 | 0 | 0 | 0:01:41 | ||
| 5 | 0 | 0 | 0 | 0:01:26 | ||
| 6 | 0 | 0 | 0 | 0:01:41 | ||
| 7 | 0 | 0 | 0 | 0:01:57 | ||
| 14 | 0 | 0 | 0 | 0:01:57 | ||
| 1 | 0 | 0 | 0 | 0:00:34 | ||
| 1 | 0 | 0 | 0 | 0:00:34 | ||
| 1 | 0 | 0 | 0 | 0:00:17 | ||
| 1 | 0 | 0 | 0 | 0:00:34 | ||
| 1 | 0 | 0 | 0 | 0:00:18 | ||
| 1 | 0 | 0 | 0 | 0:00:17 | ||
| 1 | 0 | 0 | 0 | 0:00:17 | ||
| 1 | 0 | 0 | 0 | 0:00:09 | ||
| KO: | ||||||
| Torpidity-depletion: 4.4 / s, Time until all torpidity is depleted: 00:07:10 | ||||||
| Time | ||||||
|---|---|---|---|---|---|---|
| 41 | 206 | 60 | 30 | 0:22:47 | ||
| 81 | 515 | 149 | 75 | 0:44:58 | ||
| 101 | 280 | 81 | 41 | 0:28:04 | ||
| 121 | 826 | 238 | 119 | 1:07:14 | ||
| 202 | 693 | 200 | 100 | 0:57:40 | ||
| 242 | 826 | 238 | 119 | 1:07:14 | ||
| 303 | 1063 | 306 | 153 | 1:24:11 | ||
| 605 | 1061 | 306 | 153 | 1:24:02 | ||
| 14 | 0 | 0 | 0 | 0:07:47 | ||
| 27 | 97 | 28 | 14 | 0:15:00 | ||
| 34 | 20 | 6 | 3 | 0:09:27 | ||
| 41 | 206 | 60 | 30 | 0:22:47 | ||
| 68 | 159 | 46 | 23 | 0:19:25 | ||
| 81 | 202 | 59 | 30 | 0:22:31 | ||
| 101 | 280 | 81 | 41 | 0:28:04 | ||
| 202 | 280 | 81 | 41 | 0:28:04 | ||
| 2 | 0 | 0 | 0 | 0:01:07 | ||
| 3 | 0 | 0 | 0 | 0:01:40 | ||
| 4 | 0 | 0 | 0 | 0:01:07 | ||
| 5 | 0 | 0 | 0 | 0:02:47 | ||
| 7 | 0 | 0 | 0 | 0:02:00 | ||
| 9 | 0 | 0 | 0 | 0:02:31 | ||
| 11 | 0 | 0 | 0 | 0:03:04 | ||
| 21 | 0 | 0 | 0 | 0:02:56 | ||
| 1 | 0 | 0 | 0 | 0:00:34 | ||
| 1 | 0 | 0 | 0 | 0:00:34 | ||
| 1 | 0 | 0 | 0 | 0:00:17 | ||
| 1 | 0 | 0 | 0 | 0:00:34 | ||
| 1 | 0 | 0 | 0 | 0:00:18 | ||
| 1 | 0 | 0 | 0 | 0:00:17 | ||
| 1 | 0 | 0 | 0 | 0:00:17 | ||
| 2 | 0 | 0 | 0 | 0:00:17 | ||
| KO: | ||||||
| Torpidity-depletion: 5.78 / s, Time until all torpidity is depleted: 00:08:04 | ||||||
数値は最適な場合のものであり、常に予備を用意してください。
レベルに応じて必要な資源を計算するには、外部のTaming calculatorをご利用ください。
This section describes how to fight against the Dimorphodon.
Dimorphodons land for very short amount of time so, using ranged weapons other than a Fabricated Sniper for when they land is not a great idea. Fabricated Snipers will take a lot of skill to get at most a single headshot. The best method for taking out Dimorphodons is a sword or pike mixed with flak armor. Dimorphodons can attack in packs in which can be difficult to take a single one at a time unless you and your tribe arm up with Assault Rifles you can spray and pray the skies with a rain of bullets. Dimorphodons have quickly dropping topority so KOing a single one without any armor may prove to be a bad idea since it will get up very quickly. Using a group of their own kind against them with high damage will prove to be an efficient method even when against a large group.
Due to their relatively slow flight speed and large turning arc you can wait for them to fly towards you for an attack, fire a shot into their head, and then quickly strafe left or right to avoid most/all of their attacks. This can be used for knocking the Dimorphodon unconscious or killing them.
The Dimorphodon is relatively weak in terms of health, so any weapon will do as long as you can score hits. Ranged melee weapons (pikes and spears) are quite effective when the Dimorphodon swoops in for an attack, and if you are accurate enough, a regular bow or crossbow can kill a low level Dimorphodon in a relatively small number of hits.
The Dimorphodon does not damage a mounted pet when attacking but instead attacks the rider. Many times survivors who are unaware of this can think that their mount is taking negligible damage and then find themselves dead or very near death.
They deal large amounts of "damage" to the durability of armor being used.
They are dangerous in hordes, but you can easily out run them due to their speed and turning radius.
Dimorphodons are used for fighting or as pack animals. Although they are too small to ride, they make for good swarming creatures; a group of six can often kill stronger creatures without suffering any casualties. Due to its size, the Dimorphodon is extremely hard to hit, not just for players, but for wild dinos too. By leveling up health and damage on a tamed dimo, you can turn the small flying critter into a battle bat that has your back while mining, gathering, and farming for food. However, you should be careful around creatures with a large area of effect in their attacks, like the Stegosaurus or Brontosaurus, as they can easily hit flocks of Dimorphodons. In a worst-case scenario, you could lose your entire flock against such a creature.
Tamed Dimorphodons can be carried on your shoulder, and can be thrown to attack the target you are looking at by double-tapping F, but if you're mounted you won't be able to pick it back up without dismounting. When sitting on your shoulder, Dimorphodon is very useful while gathering supplies as they attack Titanomyrma and Compies if put on neutral.
Along with being excellent pack/swarm creatures when used offensively, Dimorphodons also have the ability to shield whoever they are following, be it another dino or a human player. Setting Dimorphodons to follow you at the lowest distance will make them circle around you constantly, because of this, the Dimorphodons will shield you from attacks as they will get hit instead. This is quite useful when fighting creatures such as the microraptor, troodon, beelzebuffo, titanomyrma, other dimorphodons, dilophosaurs, and Onycs.
Dimorphodons, aside from these other uses, also enjoy a notable distinction: they are extremely efficient for breaking open Bee Hives and aiding in the taming of Giant Bees, arguably more so than using firearms or explosives. Being flyers, a small swarm of Dimorphodons can easily reach and quickly break open any hive when whistled to attack it, without angering the drones, provided the player keeps a far enough distance away while they do this. Once the hive is broken and the queen is exposed, they can be whistled to passive and brought back, without harming the queen or drawing the attention of drones so long as they are called back quickly enough. Once returned to the player's position, they can be set to neutral to guard any mounts or other tamed dinos while the player is occupied with the long-chase process of taming the queen bee.
Perhaps one of the best uses Dimorphodon-loving survivors have had this creature for is cave exploration. Due to their great maneuverability and ability to ride one's shoulder, they can easily navigate and fight in the most crowded of cave networks. When needed, you can simply toss it off your shoulder and whistle attack on any desired target. Another perk of this is the fact that it can help carry loot and resources found and harvested in the cave without getting stuck like other pack animals.
現実世界のディモルフォドンに関する情報については、関連するウィキペディアの記事を参照してください。
| Patch | 変更点 |
|---|---|
| 187.0 | |
| 189.0 | No longer lays |
| 213.0 | Improved Dimorphodon collision box |
| 215.0 | Can now be picked up and carried on the shoulder |
| 216.0 | Dimorphodons now lay eggs again |
| 216.1 | Fixed |
| 220.4 | Can no longer mate when shoulder mounted |
| 242.5 | Improved Dimorphodon eating animations |
| 275.0 Aberration Expansion Release | Added |
| 285.104 Extinction Expansion Release | Added |